Wix Harmony Editor: Working With Vector Art, Shapes, and Icons
5 min
In this article
- Adding vector art, shapes, and icons
- Designing vector art, shapes, and icons
- Adjusting the settings of basic shapes and vector art
Add beautiful vector art, shapes, and icons to express your style. These graphics are digital illustrations (SVGs) that stay sharp at any size, so your design always looks stunning. Choose from the hundreds of free options available at Wix, or upload your own.
Note:
In the Graphics section of the Add panel, you can find vector art, shapes, icons, and stickers. Stickers are image files you can add to your site, while the rest are SVGs, so you can edit them differently.
Adding vector art, shapes, and icons
You can use vector art, shapes, and icons to decorate your site, or as an appealing call-to-action. You can either choose from the hundreds of free options available from Wix, or you can upload your own.
To add vector art, shapes, and icons:
- Go to your editor.
- Click + Add at the top left of the editor.
- Select Elements.
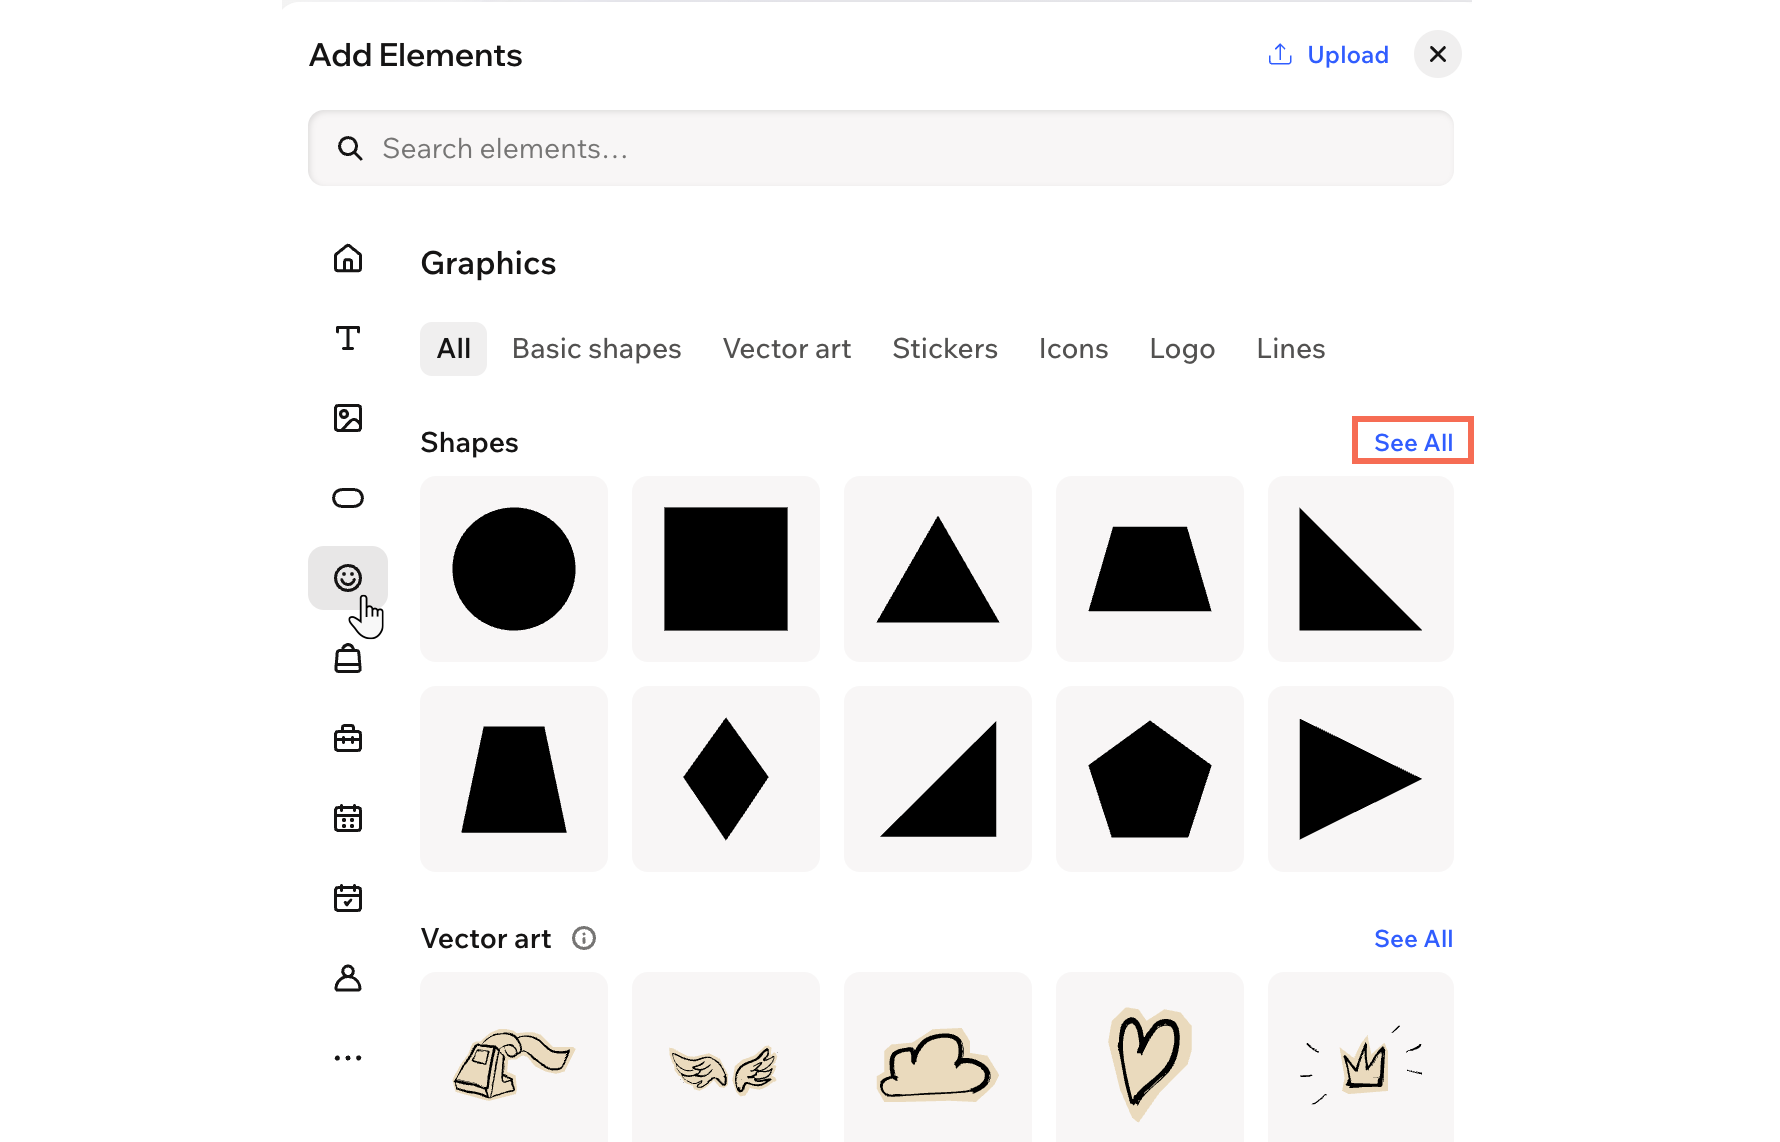
- Click the Graphics icon
 on the left.
 - Click any element under Vector art, Basic shapes, or Icons.
Tip: Access many more free options by clicking See All. - Click or drag your chosen vector art onto the page.
Want to upload your own SVG?
Click Upload at the top of the panel to add your own media to your site.
Designing vector art, shapes, and icons
Customize vector art, shapes, and icons on your site including the colors, opacity, and shadow, so it complements your design.
To customize the design:
- Go to your editor.
- Click the relevant element and choose what you want to customize:
Customize its colors
Adjust its design
 on the action bar.
 : Change the color(s) of your element, choosing one of your brand colors or a custom color. You can also adjust the element's opacity.
  : Define the borders of your element so it stands out, choosing a color, width and style. Click the Edit all borders icon
  to design them all at once.
 : Apply inner and outer shadow to give the element an interesting 3D effect, setting the position, blurriness, color and more.
 : Flip the element horizontally or vertically.
Add an animation
 on the action bar.
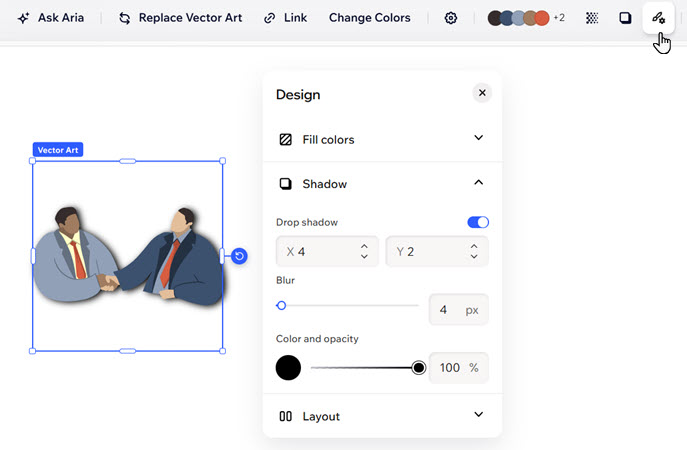
Note:
- The available customization options depend on whether the vector art features a single color, multiple colors, or a grayscale palette.
- When uploading your SVG file, we analyze its colors and classify it either as a shape element or a vector art element. For instance, SVG files that only show a single color will appear as a 'shape' in the editor. If we are not able to identify the colors in your SVG file, you may not be able to customize its colors in the editor.
Adjusting the settings of basic shapes and vector art
Adjust how these elements appear and function on your site. You can update their size and layout, add a link to turn the element into a button or call-to-action, and set accessibility options to make sure everyone can enjoy your site’s content.
To adjust the settings:
- Go to your editor.
- Select the relevant element.
- Click the Settings icon
 on the action bar.
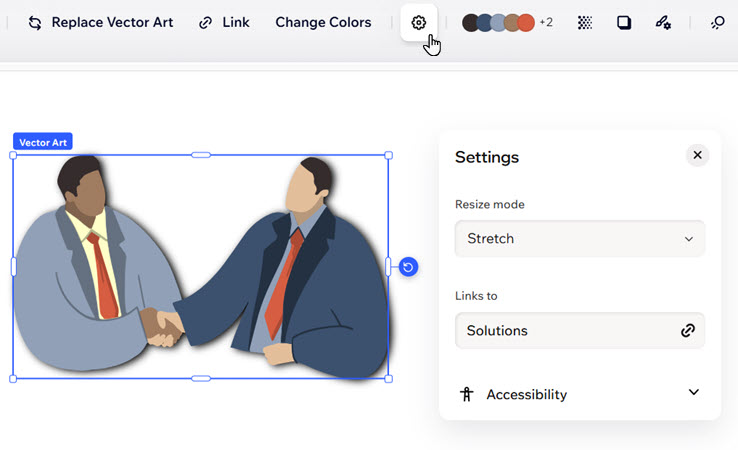
 - Choose what to do next:
- Resize Mode: Choose how the element fits on the page: Fit or Stretch.
- Links to: Add a link to the element.
- Accessibility: Enter a short description of what you can see in this vector art or basic shape, to help search engines and accessibility tools.