Wix Groups: Creating Automations for Your Group
4 min read
In this article
- Step 1 | Add a new automation
- Step 2 | Choose a trigger
- Step 3 | (Optional) Add a delay
- Step 4 | (Optional) Add a condition
- Step 5 | Choose an action
Save time by creating automations for your group. Each automation begins with a trigger which leads to an action. For example, when a member creates a post, you can assign them a unique member badge.
Explore a variety of available triggers when setting up automations to meet each group's needs. Whether it's sending a notification when a group member is added, pays for a group, or leaves a group.
Step 1 | Add a new automation
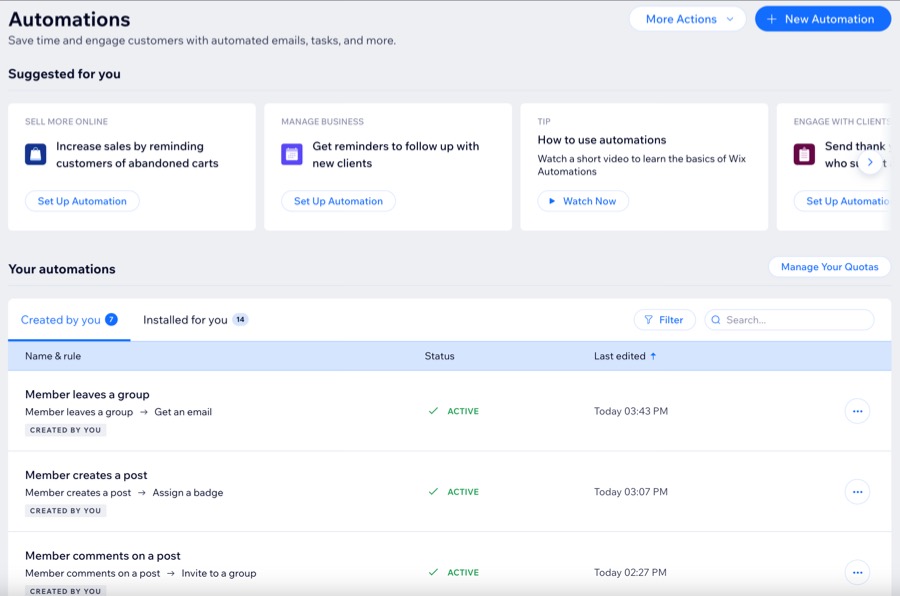
Your site's dashboard displays every automation you create. Make sure to give each item a unique name for easy organization and tracking.
To add a new automation:
- Go to Automations in your site's dashboard.
- Click + New Automation or click an existing automation to edit it.
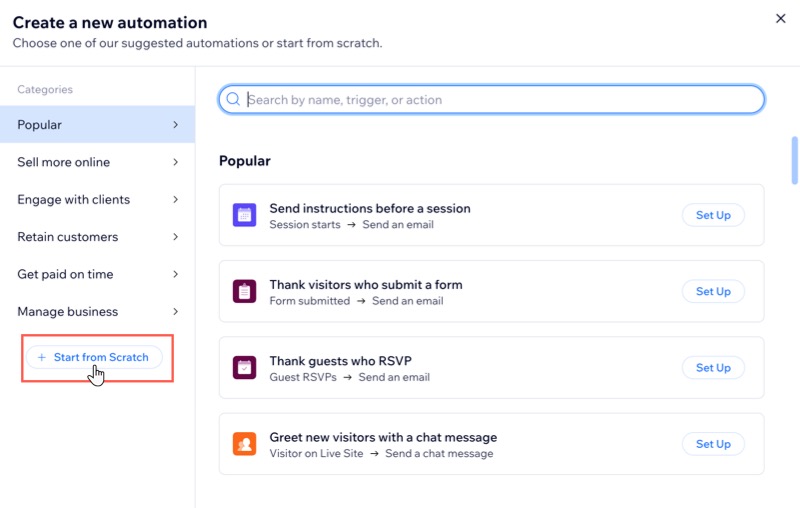
- Click + Start from Scratch.
- Click the title to give your automation a name.
Tip:
Invite people to join a group by creating a new automation. For example, when a visitor is on a specific page on your site, choose an action that invites them to join.
Step 2 | Choose a trigger
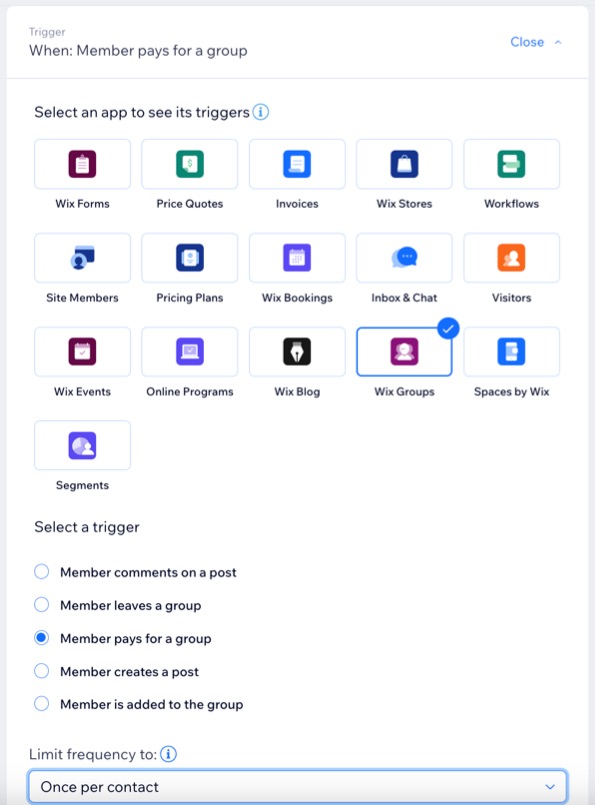
Choose from a list of available triggers related to a group member's activity. This initiates an automatic response and activates the automation.
To choose a trigger:
- Select Wix Groups in the Trigger section.
- Select the relevant checkbox under Select a trigger and choose a trigger for your automation.
- Click the Limit Frequency to: drop-down and select how many times the same contact can trigger this automation:
- Don't limit (trigger every time): Your action will take place every time it is triggered by a visitor.
- Once per contact: Your action will take place only once per contact.
- Oncer per contact every 24 hrs: Your action will take place only once per contact in any 24hr period.
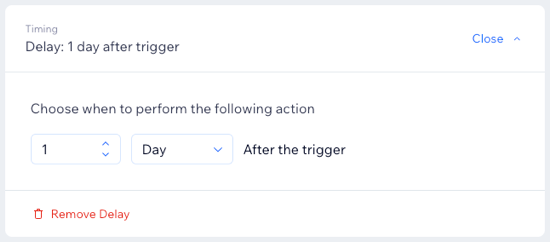
Step 3 | (Optional) Add a delay
Choose when the action should occur. You can perform the action immediately after the trigger, or set a delay to send it.
For example, if your trigger is "Member leaves a group," and your action is "Send an email", you may want this to be sent after a certain amount of time has passed.
To add a delay to your automation:
- Click + Add Delay.
- Click the drop-down and select when to perform the action (e.g. days, hours and minutes).
Note: If you don't add a delay, the action is performed as soon as the trigger occurs.
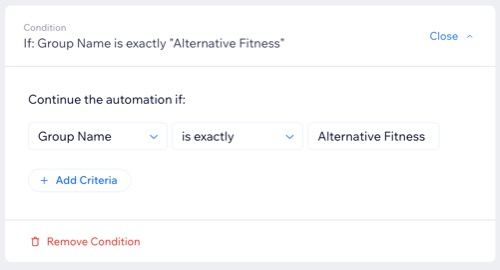
Step 4 | (Optional) Add a condition
After selecting a trigger, you can add a condition to set up complex automation flows.
For example, with multiple groups, send a coupon to members who paid for a specific group. Set your trigger to 'Member pays for a group' and the action to 'Send a coupon.' Then, add the condition with the exact group name to target those members, excluding individuals from other groups.
To add a condition:
- Click + Add Condition.
- Click the Select criteria drop-down and select the criteria you want to use to decide whether this automation continues each time it's triggered.
- Click the drop-down that appears next to your criteria drop-down to select your operator (e.g. "is", "is not").
- Click the drop-down or text box that appears next to your operator drop-down to complete your condition.
Note: The logical statement you've created will determine whether the automation continues. - (Optional) Click + Add Criteria to add more conditions.
Tip:
Learn more about best practices for creating conditions.
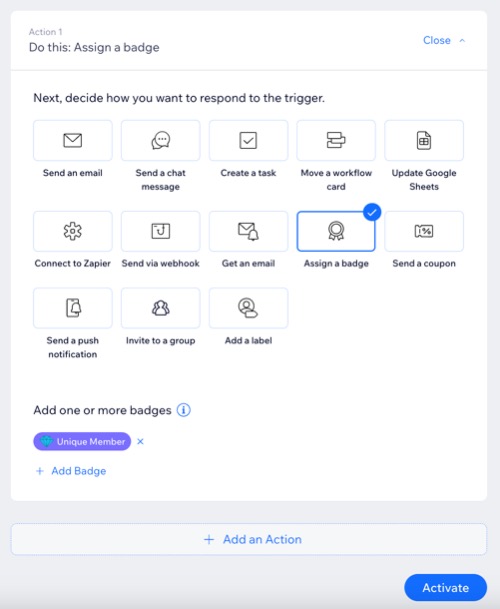
Step 5 | Choose an action
After choosing a trigger, decide how you want to respond to that trigger. For example, if your trigger is 'Member pays for a group', you can send a coupon to encourage them to purchase a membership to another group.
To choose an action:
- Select your desired action in the Action section.
- Choose an action using the available options.
Tip: For example, add a multistep automation that welcomes members who join your group with a chat message or email. - (Optional) Click + Add an Action to set up a multistep automation.
Tip: For example, add a multistep automation that sends a unique member badge when someone posts or comments in the group to motivate interaction. - Click Activate.