


Wix Events: Creating a Wix Live Video Conferencing Event in the Wix App
5 min
In this article
- Step 1 | Add video conferencing to your event
- Step 2 | Add Live Video to your website
- Step 3 | Prepare for the event
- Step 4 | Start your video conferencing event
- FAQs
Important:
As of March 2024, the option to connect to Wix Live is no longer available. If you’ve already created events with Wix Live, you can continue using it in the meantime.
Connect online with your event guests, wherever they are, using Wix Live video conferencing.
Step 1 | Add video conferencing to your event
You can add video conferencing to a new event or to one you already created, whether it's saved as a draft or published.
Tip:
Select Online as your location if your event only takes place virtually, or Physical Location to create a hybrid event (in person and online).
To add video conferencing:
- Go to your site in the Wix app.
- Tap Manage
 at the bottom.
 - Tap Events.
- Select an option:
- Create a new event:
- Edit an existing event:
- Select Published Events or Draft Events and tap the relevant event.
- Tap the Manage tab.
- Select Add-ons.
- Tap Add to Event under Video conferencing.
- Tap Continue.
- Select the type of event you want to set up:
- Webinar: Up to 250 people can watch, comment, and post emoticons.
- Meeting: Up to 25 people can speak, share screens, and more.
- Tap Save.
- Save your event:
- New event: When you've finished creating the event, tap Next and save as a draft or publish.
- Existing event: Tap Save.
Tip:
When guests sign up for your online event, they receive a unique link in their confirmation and a reminder email which allows them to join the event.
Step 2 | Add Live Video to your website
Before you can host a meeting or webinar using the Wix app, you need to add Live Video to your desktop site.
Tip:
You only need to do this once. Next time you host a Wix Live event, you can skip to step 3.
To add Live Video on desktop:
- Access your site's dashboard on your computer.
- Go to the Manage Apps tab.
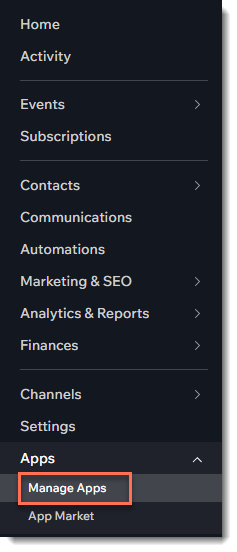
- Click Complete Setup next to Wix Live Video.
Step 3 | Prepare for the event
To make sure everything runs smoothly in the event itself, it's a good idea to hold a test event in advance. Your test can last up to 15 minutes and you can invite up to 3 people to join.
To prepare for the event:
- Go to your site in the Wix app.
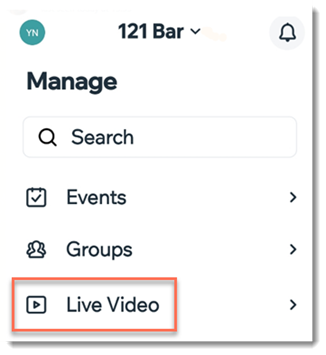
- Tap Manage at the bottom.
- Select Live Video.
- If prompted, give the app permission to access video and audio on your device.
- Tap to select the relevant event.
- Tap Test Video.
- Tap Test Video again.
- Tap the More Actions icon
 .
. - Tap Share.
- Send the link to guests so they can help test the live video.
Note:
Note: The test lasts 15 minutes.
Step 4 | Start your video conferencing event
You can begin your live event 5 minutes before it's set to start.
To start your event:
- Go to your site in the Wix app.
- Tap Manage at the bottom.
- Select Live Video.
- If prompted, give the app permission to access video and audio on your device.
- Tap to select the relevant event.
- Tap Start Live Video.
Note: This button is active starting 5 minutes before the event.
FAQs
Can I create an online event using Zoom or another platform in the Wix app?
Can a Wix Live event have more than one host?
Can I manually send the event URL to guests?

Can guests share their Wix Live link and give others access for free?
Do Wix Live events have a time limit?
Can I record my Wix Live event?
Can I host a hybrid event (in person and online)?
