

Wix Bookings: Scheduling Your Courses
2 min
Schedule your sessions exactly when you want, whether the meetings take place at regular intervals (e.g. 1 hour per week every Monday at 8:00), or a more personalized schedule (e.g. a session of a different length once every three weeks with sessions taught by different instructors).
After creating a course, you can schedule its sessions from your booking calendar. When clients book a course, they sign up for the entire course and all its sessions.
Before you begin:
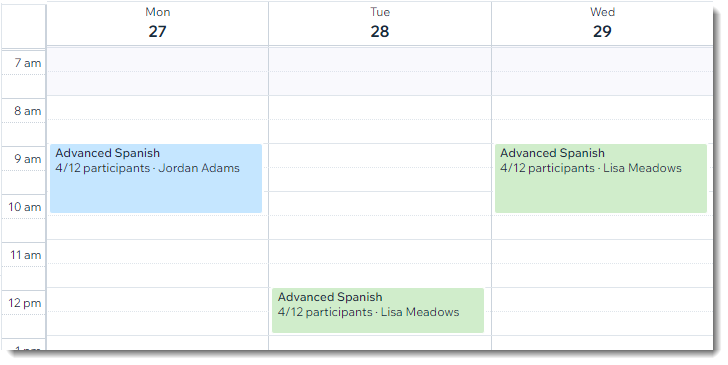
Create the course service that you want to schedule (e.g. Advanced Spanish).
To schedule a course session:
- Go to Booking Calendar in your site's dashboard.
- Click the time slot in which the course takes place for the first time.
- Select Course session.
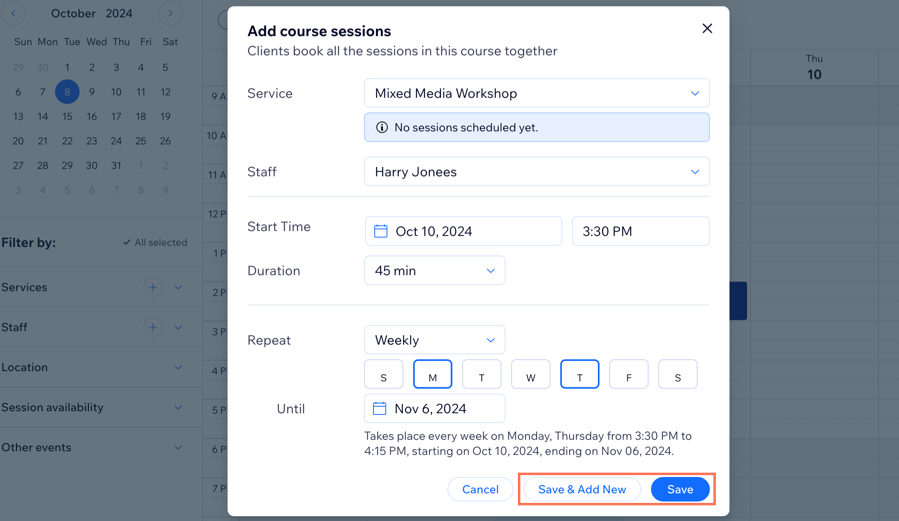
- Add the course session details:
- Course/Service: Select the course you want to schedule.
- Staff: Select the staff member who is leading the course.
- Start Time: Edit the date and start time of the session.
- Duration: Select the duration of the course.
Note: Select Custom to enter a custom duration. - Repeat: Choose how often the course session is offered:
- Select an option from the drop-down.
Note: Select Doesn't Repeat to only offer the course once. - Select the day(s) of the week the course takes places.
- (Optional) Click the field next to Until and choose the date of the last class.
- Select an option from the drop-down.
- Choose a saving option:
- Save & Add New: Save the session and start scheduling another one.
- Save: Save the session and return to your calendar.
Tip:
Go to the Bookings Services tab and click Show Schedule next to the relevant course to view a summary of its schedule.
You can also select the Schedule view in your calendar to check the list of upcoming sessions on the certain date.
