

Wix Blog: Customizing the Email Notification Sent to Your Site Visitors
6 min
In this article
- Choosing which readers notifications are sent to
- Choose how the notifications are sent
- Customize the email notification
Increase engagement by sending custom email notifications whenever you publish a post. You can control who the notifications are sent to, where they are sent, and what they look like from the Outgoing Notifications page in your site's dashboard.
Note:
The Outgoing Notifications page lets you control your notification settings for any Wix apps that you're using.
Choosing which readers notifications are sent to
You can choose who you want to send the notifications to. Think about who's more likely to appreciate these notifications coming into their inbox.
Notes:
- If you're an older Wix Blog user, you may see a different version of the notification page.
- If you have email notifications and push notifications enabled, you need to choose the recipients for each action separately.
To choose who notifications are sent to:
- Go to Blog in your site's dashboard.
- Click the More Actions drop-down and select Blog settings.
- Click Manage next to Manage your notifications & emails.
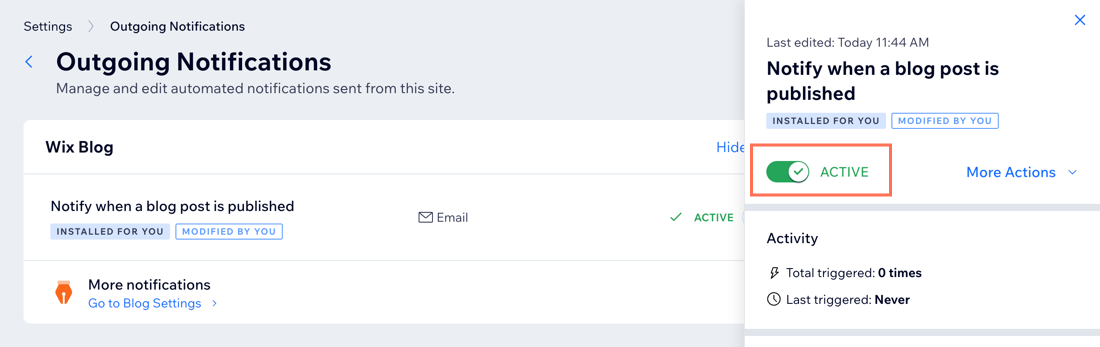
- Click the More Actions icon
 next to Notify when a blog post is published.
 - Click Edit.
- Choose the recipients for each action:
Send an email

Send a push notification (new)

Choose how the notifications are sent
Decide how you want the notifications to be sent out. In addition to email notifications, the App automation gives you the option to send a push notification to Wix mobile apps and site feed.
Note:
If you're an older Wix Blog user, you may see a different version of the notification page.
To choose how notifications are sent:
- Go to Blog in your site's dashboard.
- Click the More Actions drop-down and select Blog settings.
- Click Manage next to Manage your notifications & emails.
- Click the More Actions icon next to Notify when a blog post is published.
- Click Edit.
- Choose which type of notifications you want to send out:
- Just email: Remove the push notification action from the automation.
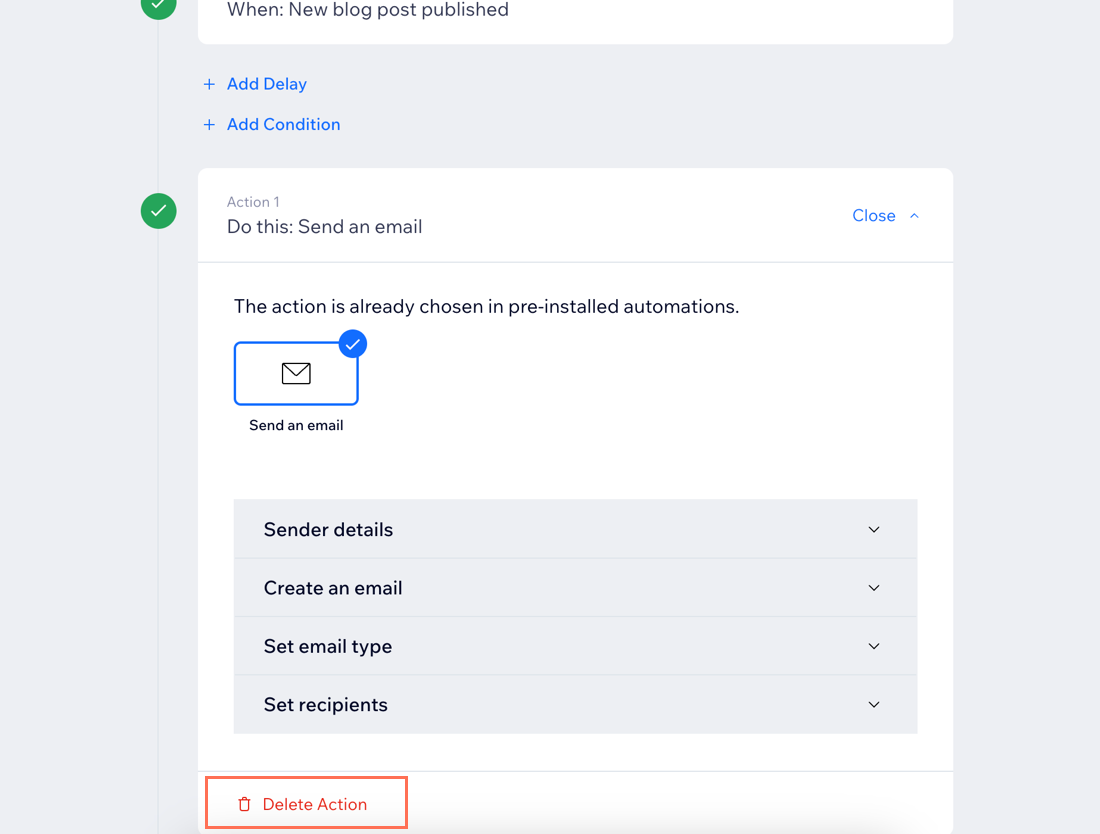
- Scroll down to Action 2 Do this: Send a push notification (new) and click Delete Action.
- Click Delete.
- Just push notification: Remove the email notification action from the automation.
- Scroll down to Action 1 Do this: Send an email and click Delete Action.
- Click Delete.
- Both email and push notifications: Make sure both actions appear in the automation.
- Just email: Remove the push notification action from the automation.
- Click Save at the top.
Tip: If you have previously deleted an action, you can restore it by clicking the More Actions icon next to the notification and selecting Reset to default. This will reset the automation's email template and statistics.
 - (If inactive) Activate the notification to start using it.
- Go back to the Outgoing Notifications page.
- Hover over Notify followers when a blog post is published and click View Summary.
- Enable the toggle next to Inactive.
Customize the email notification
Personalize the email notification so it matches your site and brand. This way, your readers are more likely to appreciate what you send and actively engage with what they see. You can change the sender email address, edit the content of the email and more.
Notes:
- If you're an older Wix Blog user, you may see a different version of the notification page.
- Because this automation is added for you, parts of the automation cannot be customized. For more customization options, duplicate this automation or create a new one.
To customize the email notification:
- Go to Blog in your site's dashboard.
- Click the More Actions drop-down and select Blog settings.
- Click Manage next to Manage your notifications & emails.
- Click the More Actions icon next to Notify when a blog post is published.
- Click Edit.
- Scroll down to Action 1 Do this: Send an email.
- Customize your automated email:
- Edit your sender details: Send the email from your preferred email address so recipients know who to reply to.
- Personalize your email: Write and design your email template, or select an existing email to use as a template.
- Set the email type: Select a type for your email to determine how or when your recipients can mute or unsubscribe from your emails.
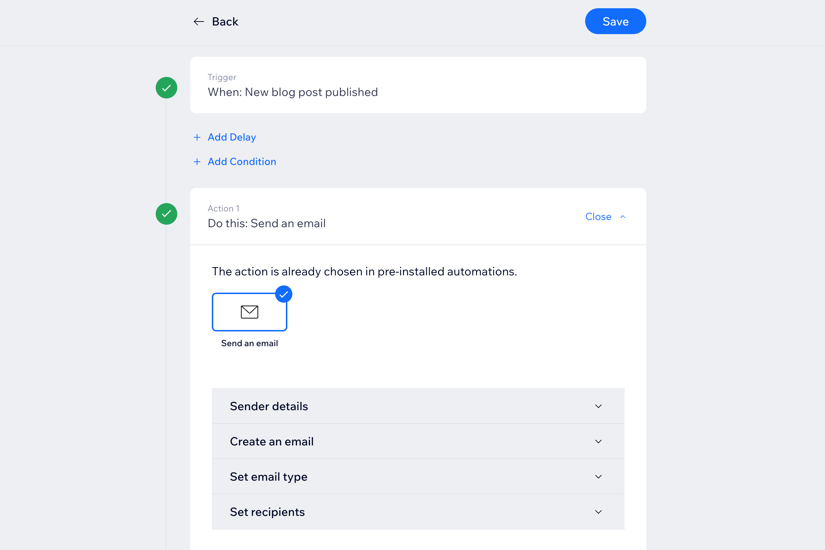
10. (Optional) Set a delay and add a condition to specify the automation:
Add a delay
Add a condition
Want to learn more?
Your email notification is fully customizable. You can also create custom Email Marketing campaigns. Learn more about creating, customizing and sending emails..
