

Wix Blog: Adding Notes to Your Posts
6 min
In this article
- Adding a note to a post
- Using mentions in a note
- Responding to a note
- Resolving a note
- Editing a note
- Deleting a note
You can add notes to your blog posts in the post composer in your site's dashboard. Notes are a great way to leave reminders for yourself or your blog's authors for changes that the post may need.
For example, you can leave a note on a post when multiple authors are working to create a post together.
Adding a note to a post
Any writer or editor with access to your blog can write notes on your posts. You can also add as many notes as you want to a post.
To add a note:
- Go to Blog in your dashboard.
- Select the post that you want to add a note to.
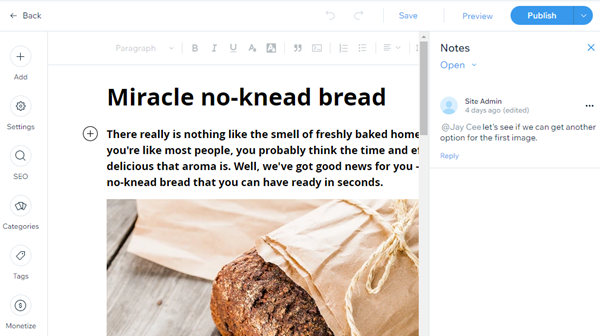
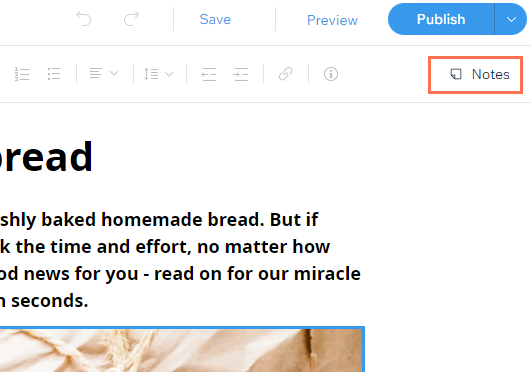
- Click Notes in the top right corner of the post.
- Enter your note in the bottom right of the notes panel.
Tip: Use the "@" symbol with a writer's name to mention them on the post, e.g. "@Jay Cee". Learn more about mentions - Click Add.
Using mentions in a note
You can mention writers or editors in your notes so that they receive a notification about your comment. Anyone who has access to a post can use mentions.
Note:
It's only possible to mention writers with Editor permissions or writers who are the owner of the post.
To use mentions:
- Go to Blog in your dashboard.
- Select the post that you want to add a mention to.
- Click Notes in the top right corner of the post.
- Add a new note or edit an existing note.
- Type the @ symbol followed by the name of the person you want to mention, e.g. "@Jay Cee".
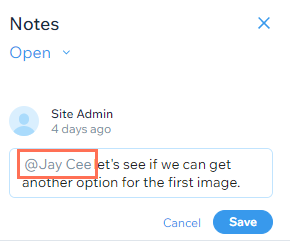
- Click Save.
Responding to a note
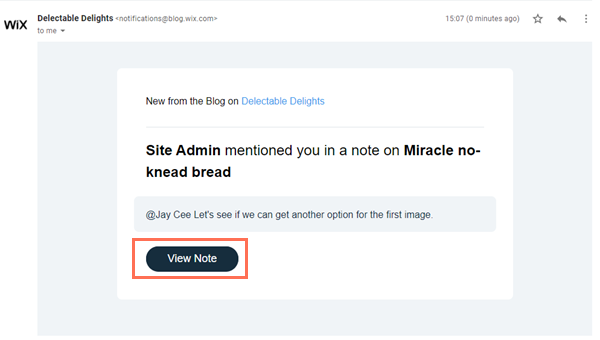
When someone mentions you in a note on a post, you'll receive an email notification. You can go to the post that contains the note by clicking View Note.
To respond to a note:
- Click View Note in the email notification.
- Click Notes in the top right corner of the post.
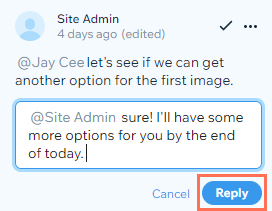
- Click Reply under the note you want to respond to.
- Enter your response.
- Click Reply.
Resolving a note
When you or your collaborators are finished with a note, you can resolve it. For example, if an editor tagged you in note to replace an image in a post, you can resolve the comment after you replace the image.
Resolved notes are moved to the Resolved tab and are no longer visible on the Open tab.
To resolve a note:
- Go to Blog in your dashboard.
- Select the post with the note that you want to resolve.
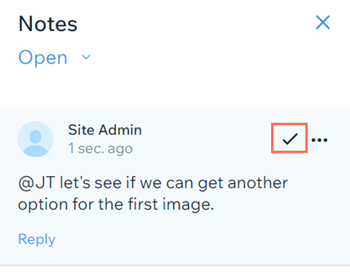
- Click Notes in the top right corner of the post.
- Click the Mark as Resolved icon
 .
.
Tip:
To see notes that were previously resolved, click the drop-down menu under Notes and select Resolved. You can also click the More Actions icon  beside previously resolved notes to re-open or delete them.
beside previously resolved notes to re-open or delete them. Editing a note
You can edit your post's notes if you need to change something. For example, if you realize that you mentioned the wrong person on a note, you can edit the note and mention the right person instead.
To edit a note:
- Go to Blog in your dashboard.
- Select the post with the note that you want to edit.
- Click Notes in the top right corner of the post.
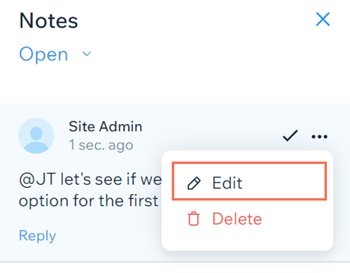
- Click the More actions icon beside the note.
- Select Edit.
- Make your changes to the note.
- Click Save.
Deleting a note
You can delete notes if you no longer need them. For example, if you decide there are too many notes on a post, you can delete some of them to leave only the most important notes.
Important:
It's not possible to recover a note after you delete it.
To delete a note:
- Go to Blog in your dashboard.
- Select the post with the note that you want to delete.
- Click Notes in the top right corner of the post.
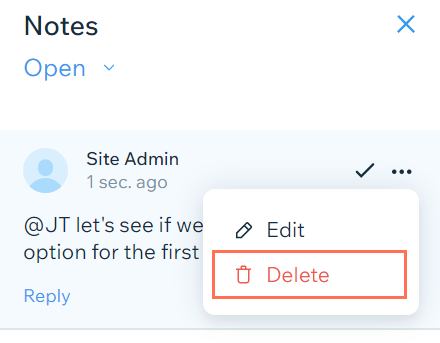
- Click the More actions icon beside the note.
- Select Delete.
Hire a Professional WriterGet the content you need for your website. Hire a writer from the Wix Marketplace to create text that fits your message and brand.
