


Wix Blog: Adding Writers and Editors in Wix Blog
In this article
- Video tutorial
- Blog roles and their associated permissions
- Adding a writer or an editor
- Adding a writer or editor from roles & permissions
- Adding a writer or editor from the writers list
- Changing a writer's role
Assigning blog roles to specific people is a great way to share some of your blog's responsibilities and tasks.
For example, if you have a blog that requires staff writers or editors, you can assign them specific roles and permissions to help manage your blog. You can also
create custom roles for any type of role to match your staffing needs.
Video tutorial
Check out this short video tutorial, or scroll down to read the full article.
Blog roles and their associated permissions
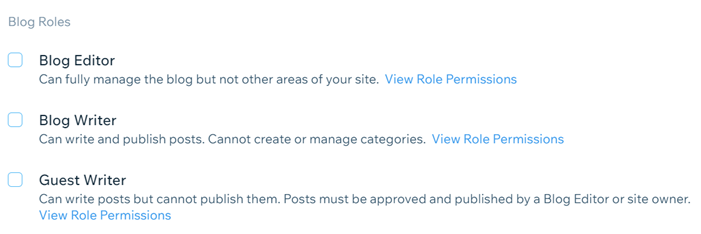
You can choose from three different roles to assign when you invite people to collaborate on your blog: blog editor, blog writer, and guest writer.
Tip:
You can also add managed writers to your blog without giving them any permissions. Adding a writer this way means that you can attribute a specific post to them on a one-time basis.
Each blog role has different permissions associated with it. For example, blog editors can write and manage their own posts and other writers' posts, whereas blog writers can only write and manage their own posts.
Blog editors, blog writers, and guest writers are automatically added to
your site's members area as members. Managed writers are not added as members.
The table below lists the roles and all of their associated permissions:
| Action | Admins/Owner | Blog Editor | Blog Writer | Guest Writer | Managed Writer |
|---|---|---|---|---|---|
Access the Editor
|
Yes
|
No
|
No
|
No
|
No
|
Access the blog manager
|
Yes
|
Yes
|
Yes
|
Yes
|
No
|
Create a post
|
Yes
|
Yes
|
Yes
|
Yes
|
No, but you can assign them to a post
|
Publish a post
|
Yes
|
Yes
|
Only their own
|
No
|
No
|
Write & manage your own posts
|
Yes
|
Yes
|
Yes
|
Write posts only
|
No
|
Manage other writers' posts
|
Yes
|
Yes
|
No
|
No
|
No
|
Publish posts
|
Yes
|
Yes
|
Yes
|
No -
needs approval
|
No
|
Manage posts
|
Yes
|
Yes
|
Only their own
|
Only their own
|
No
|
Pin posts
|
Yes
|
Yes
|
No
|
No
|
No
|
Set cover image on post
|
Yes
|
Yes
|
Yes
|
Yes
|
No
|
Mark a post as "featured"
|
Yes
|
Yes
|
No
|
No
|
No
|
Add a category to a post
|
Yes
|
Yes
|
Yes
|
Yes
|
No
|
Create and manage categories
|
Yes
|
Yes
|
No
|
No
|
No
|
Create tags
|
Yes
|
Yes
|
Yes
|
Yes
|
No
|
Delete comments
|
Yes
|
Yes
|
Only on their own posts
|
Only on their own posts
|
No
|
Duplicate posts
|
Yes
|
Yes
|
Only their own
|
Only their own
|
No
|
Delete or block members
|
Yes
|
No
|
No
|
No
|
No
|
Important:
Admins are site collaborators who have access to your editor and site dashboard, but cannot edit your site's payment info, delete your blog, add new writers, or duplicate your site. Admins have permission to perform all the actions in your blog that you can perform.
Learn how to add admins
Adding a writer or an editor
Add writers and editors from Roles & Permissions in your site's Settings or from your writers list.
People that you add receive an invitation to the email address that you enter when you invite them. However, they can accept with any email address by signing in or creating a new Wix account. The invite is valid for 30 days. If your collaborator doesn't accept in this time, you can
resend it.
Note:
- If you feel that the email address that accepted an invitation is suspicious, you can remove it from your collaborator list.
- New writers appear in the dropdown list of authors only after they access the blog manager.
Important:
By sending an invite to collaborate, you agree to the
Wix Terms of Use.
Adding a writer or editor from roles & permissions
- Go to Roles & Permissions in your site's dashboard.
- Click Invite People.
- Enter the person's email address under Email(s).
Note: You can add multiple email addresses by separating each address with a comma. - Select the required role under Blog Roles.
- Click Send Invite.
Adding a writer or editor from the writers list
- Go to Blog in your site's dashboard.
- Click the Writers tab in the panel on the left.
- Click Add Writer at the top right.
- Select the type of writer that you want to add and click Continue.
- Choose what you want to do:
Invite a new writer
Create a managed writer
Changing a writer's role
After you've added a writer to your blog, you can change their role in the roles & permissions section of your site's dashboard.
To change a writer's role:
- Go to Roles & Permissions in your site's dashboard.
- Click the More Actions icon
 next to the writer that you want to edit.
 - Select Change Role.
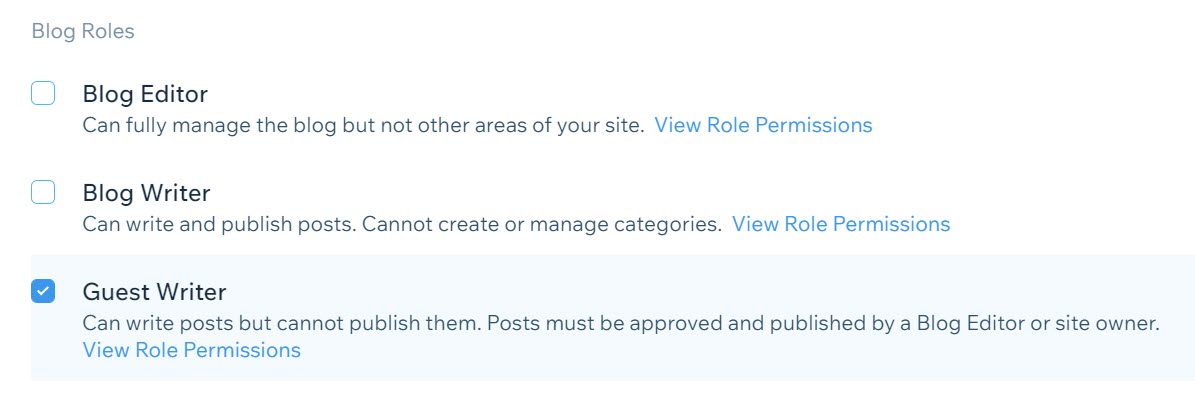
- Scroll down to the Blog Roles section.
- Select the role you want to use.
- Click Save.
Deleting writers:
You can delete a writer anytime. Click the
More Actions icon
 next to the writer's name and click
Delete.
next to the writer's name and click
Delete.
next to the writer's name and click
Delete.