

Studio Editor: Managing Dropdowns in a Menu
6 min
In this article
- Adding menu items to a dropdown
- Adding sub-items to a dropdown item
- Managing dropdown menu items
- Adding elements to a dropdown container
- FAQs
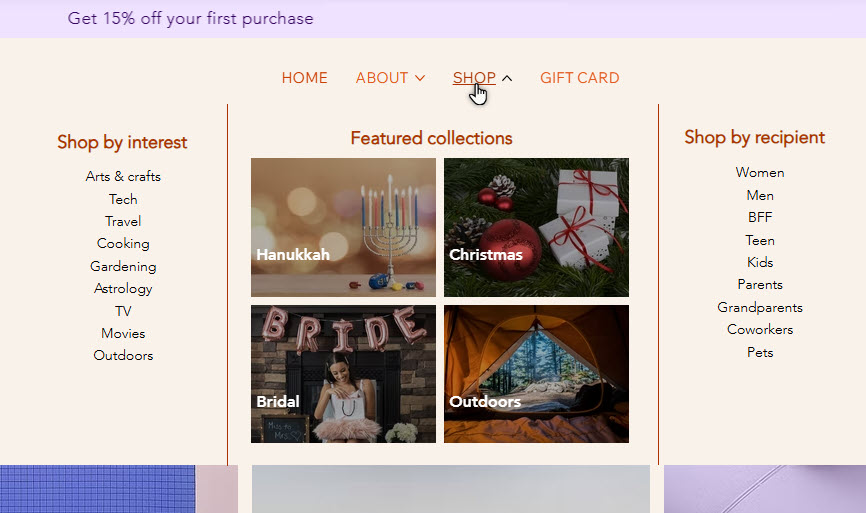
Dropdowns are versatile menu items that function as both submenus and containers, so you can create an experience tailored to your client's business needs.
Use items and sub-items to create nesting menus, and organize them to look how you want. You can also attach elements such as media and buttons to display eye-catching custom content.
Before you begin:
Dropdowns can only be added from new menus in the Studio Editor. If you have the previous menu experience, you can create submenus and add mega menus.
Adding menu items to a dropdown
Choose which menu items you want to show in the dropdown. You can add existing menu items, or create new items as you go.
To add menu items to a dropdown:
- Select the relevant menu in the editor.
- Click Manage Menu.
- (Optional) Add new items to the menu:
- Click + Add Item.
- Select the item type you want to add and set it up.
- Change the item name in the menu.
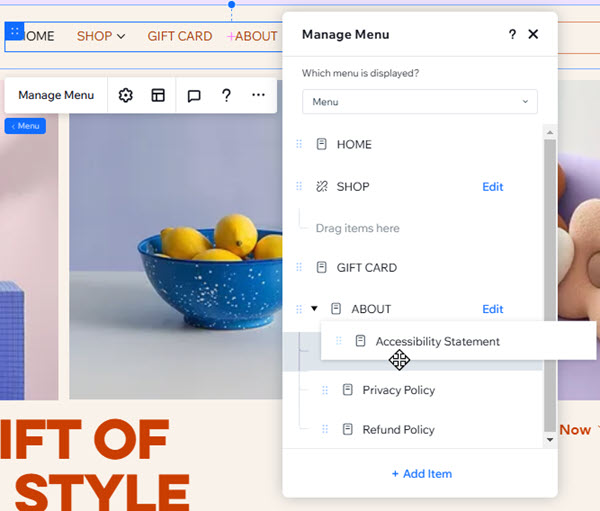
- Click and drag relevant menu items to move them under the dropdown.
Adding sub-items to a dropdown item
Once you've added items to your dropdown, place sub-items under them to create multiple layers of navigation. Sub-items help you organize sequential content, and make it even easier for visitors to find what they need.
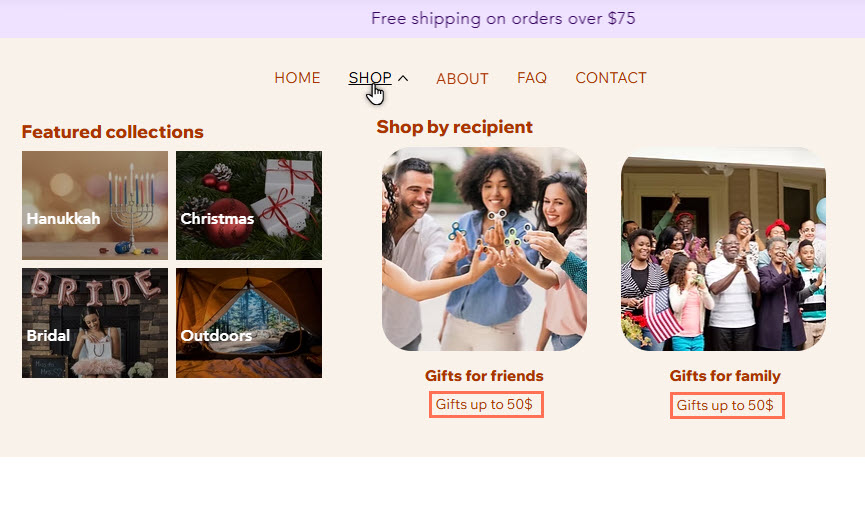
For example, the Shop dropdown in the following image contains items titled 'Gifts for friends' and 'Gifts for family'. Both have sub-items underneath them: 'Gifts up to $50'.
To create sub-menu items in a dropdown:
- Select the relevant menu in the editor.
- Click Manage Menu.
- (Optional) Add new item to the menu:
- Click + Add Item.
- Select the item type you want to add and set it up.
- Change the item name in the menu.
- Move the item into the dropdown.
- Drag the item to move it under the relevant 'parent' item in the dropdown.
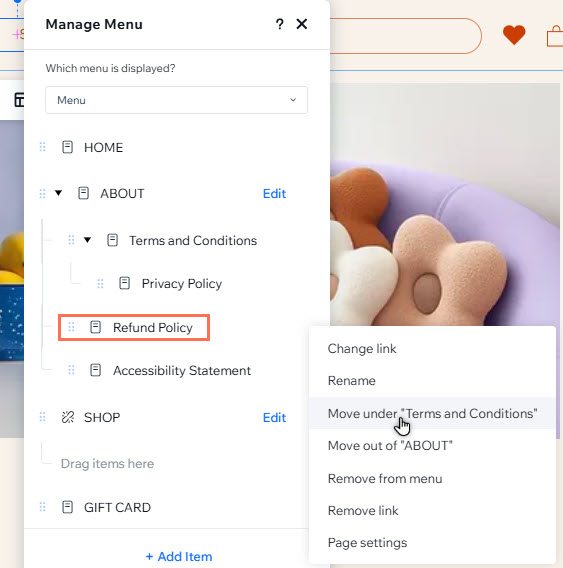
- Hover over the sub-item and click the More Actions icon
 .
. - Select Move under "Item name".
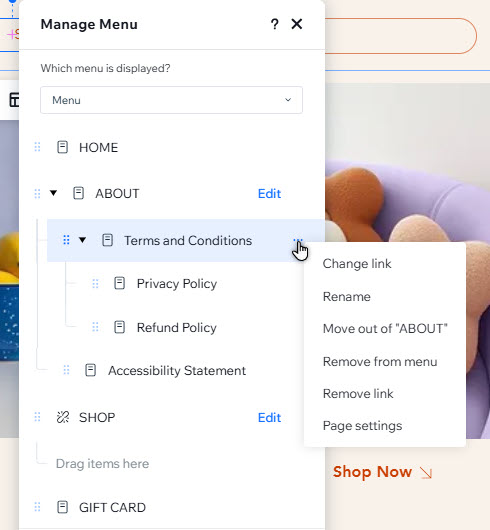
Managing dropdown menu items
You can always adjust existing items and sub-items in a dropdown menu. Remove irrelevant ones, rename them, or change the order of the content to keep it fresh.
To manage dropdown menu items:
- Select the relevant menu in the editor.
- Click Manage Menu.
- Choose what to do next:
Change an item's link
 .
.Rename an item
Move an item out of the dropdown menu
Remove an item
Reorder items
 next to an item and drag it to the desired position.
Good to know:
You can manage the dropdown item itself by following the same steps as above.
Adding elements to a dropdown container
Since dropdowns are containers, you can use them to display a variety of elements. Add images, buttons, and more to create a unique look on your client's site.
To add elements to a dropdown:
- Select the relevant menu in the editor.
- Click Manage Menu.
- Hover over the dropdown in the panel.
- Click Edit to edit the dropdown container.
- Click Add Elements
 on the left side of your editor.
 - Click and drag the elements you want to add them to the container.
Note:
Navigation elements (e.g. buttons, linked text) that link to site pages are not fully accessible in dropdown containers. If you want to link to a site page from the dropdown, we recommend adding it as a dropdown item instead.

What's next?
Customize every part of the dropdown to complement the site and menu's design.
FAQs
Select a question below to learn more about dropdowns in new menus.
What's the difference between mega menus and dropdowns?
How many levels of navigation can I add to the new menu?
Can I set dropdown sub-items to expand on click or hover?
