Studio Editor: Managing Old Menus
8 min
In this article
- Managing an existing menu
- Creating drop-down submenus
- Displaying multiple menus on the same site
- Updating your menu to the new experience
Manage menus to help visitors find their way around the site. Menus are fully customizable, showing any link your client wants – site pages, external websites, or even their phone number.
Before you start:
- This article refers to the old menu. These menus are no longer available to add in the Add Elements panel. However, you can manage any existing old menus with the steps in this article.
- We recently released our new menu component, which affects horizontal, vertical, and hamburger menus. For steps on adding and setting up new menus, please click here.
How can I tell if I have the old menu experience?
 .
.

Managing an existing menu
You can always adjust an existing menu and the items it shows. Add more items, remove ones that are irrelevant or change their order to keep the menu fresh.
To manage a menu:
- Select the relevant menu in the editor.
- Click Manage Menu.
- Choose what to do next:
Add more menu items
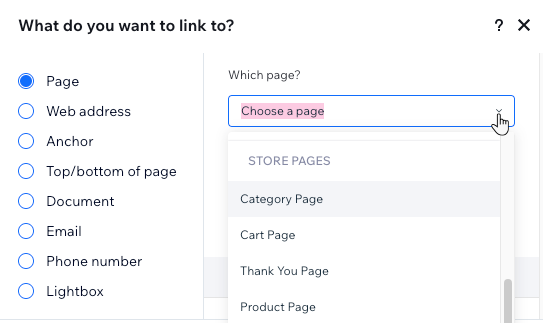
Change a menu item's link
 .
.Rename a menu item
Remove a menu item
Reorder menu items
 next to an item and drag it to the desired position.
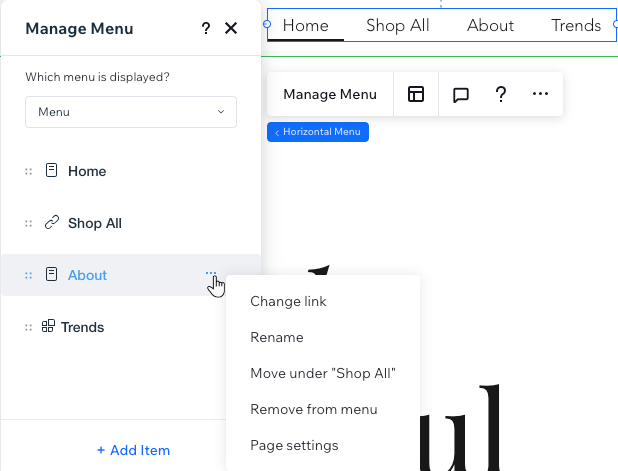
Creating drop-down submenus
There are 2 ways to create a new submenu, depending on what you want the title to be:
- An existing menu item: Decide on an existing item (page or link) from the menu to show the submenu when visitors hover over it.
- A title that is not clickable: Add a Submenu title that does not lead to any page. Visitors hover over it to see the submenu.
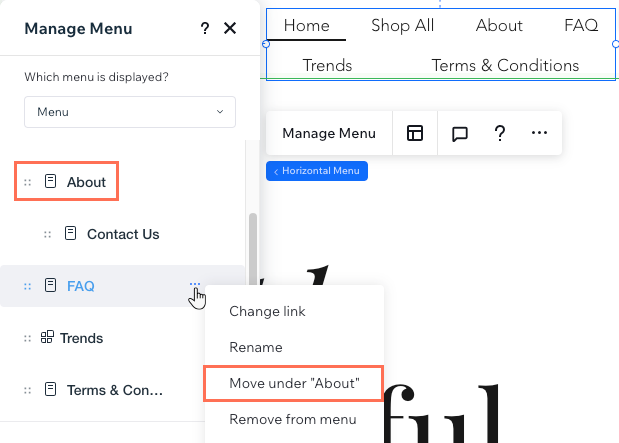
To move items under a new submenu:
- Select the relevant menu in the editor.
- Click Manage Menu.
- (Optional) Add a non-clickable title for the submenu:
- Click + Add Item.
- Select Submenu title.
- Enter the new title for the submenu.
- Press the Enter key on your keyboard to save your changes.
- Move menu items to the submenu:
- Drag a menu item to move it below the submenu title.
Tip: The submenu title is either another menu item, or the non-clickable title you added. - Hover over the same item and click the More Actions icon
 .
. - Select Move under "Page Name".
- Repeat step a - c for all other submenu items.
- Drag a menu item to move it below the submenu title.
Displaying multiple menus on the same site
You can create as many menus as you need and show completely different items in each.
After adding a new menu element, you can choose which menu it should display: An existing menu that you saved, or a new one that you create on the spot. This means you can save menus and reuse them on various menu elements across the site.
Click below to learn how to:
Choose which menu is displayed on a page

Save a new menu

 at the top right.
Showing the same item on multiple menus?
You can give the item a unique name on each menu so it always match the specific intent. All the menus that you create are completely independent of one another.
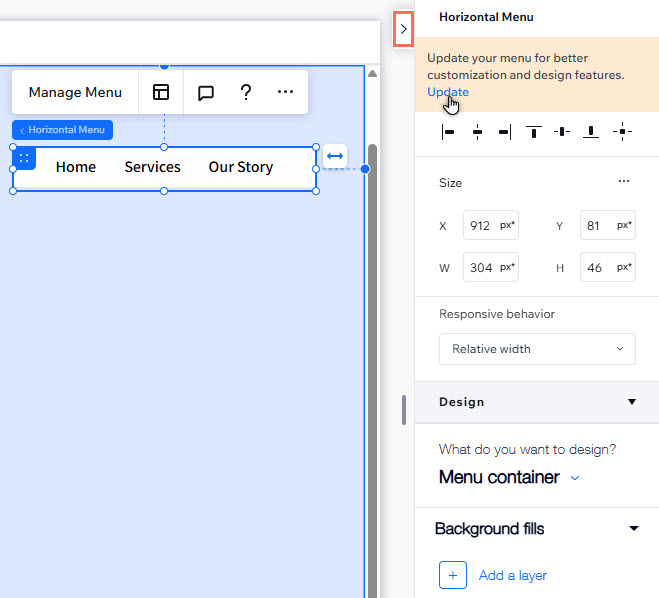
Updating your menu to the new experience
Want to keep the design of your menu, but get the new experience? Update to our latest menu to create dropdowns, use multiple layers of navigation, and more.
Previously, you needed to add separate menus to each breakpoint in order to display different layouts across screen sizes. The new menu allows you to choose the layout for each breakpoint, making it even easier to create the look you want.
To update your menu:
- Select the menu in your editor.
- Click the Open Inspector icon
 at the top right of the editor.

- (In the Inspector) Click Update at the top.
- Select Update in the pop-up.
- (Optional) Remove old menus from site breakpoints:
- Click the relevant breakpoint at the top of the editor.
- Click Layers
 on the left side of the editor.
 - Remove the older menu:
- Hover over the older menu element and click the More Actions icon
 .
. - Select Delete.
- Hover over the older menu element and click the More Actions icon
- (If hidden) Click the Show icon
 next to the updated menu element.
 - Choose the menu layout you want for the breakpoint.