

Studio Editor: Adding and Managing New Menus
11 min
In this article
- Adding a menu
- Adding menu items
- Managing menu items
- Creating dropdowns
- Switching the menu to a different type
- Displaying multiple menus on the same site
Add our latest menu element to streamline your site-building process while enhancing navigation for your client's visitors. Choose the best layout for each breakpoint – horizontal, vertical or a hamburger menu. Switching between layouts is straightforward, so you can adjust on the fly as your design evolves.
Manage the menu items as needed by adding, removing and reordering the items. You can use dropdowns to display submenus with your own content, giving you the ability to create a tailored experience that fits your client's needs.
Important:
This article refers to the new menu element in the Studio Editor. For steps on managing the previous menu experience, please click here.
How do I know which menu I have?
 .
.

Adding a menu
Add a menu to the site to get started. We recommend adding a menu to the site header, but you can add and set up as many as you need to tailor the experience for different pages and sections.
To add a menu:
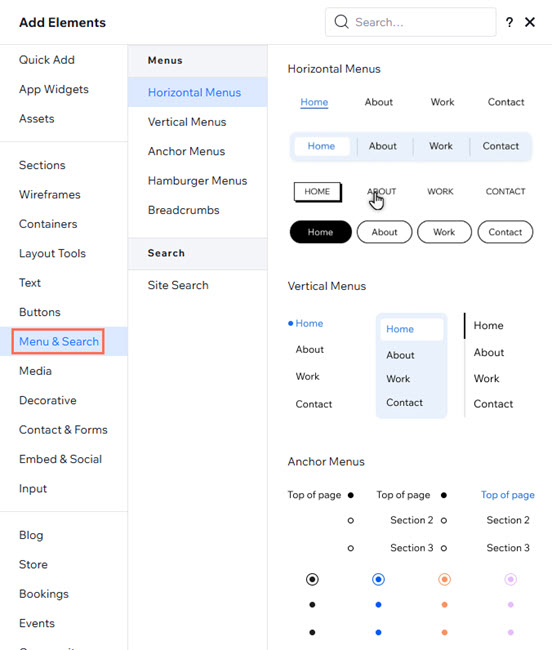
- Click Add Elements
 on the left side of your editor.
 - Select Menu & Search.
- Select the menu type you want:
- Horizontal Menus: These advanced menus offer tons of unique customization options. You can tailor them to your exact needs, adjusting the layout and design of every single area.
- Vertical Menus: Vertically arranged menus that look great on the right or left sides of websites.
- Hamburger Menus: Minimalist, space-saving menus where the menu items are only displayed when visitors click the menu icon. The menu has an open and closed state.
- Click the menu and drag it to the desired position on the page.
Changed your mind about the menu layout (type)?
Don't worry - you can always change it later.
Adding menu items
Once you've added the menu, choose the items you want to display.
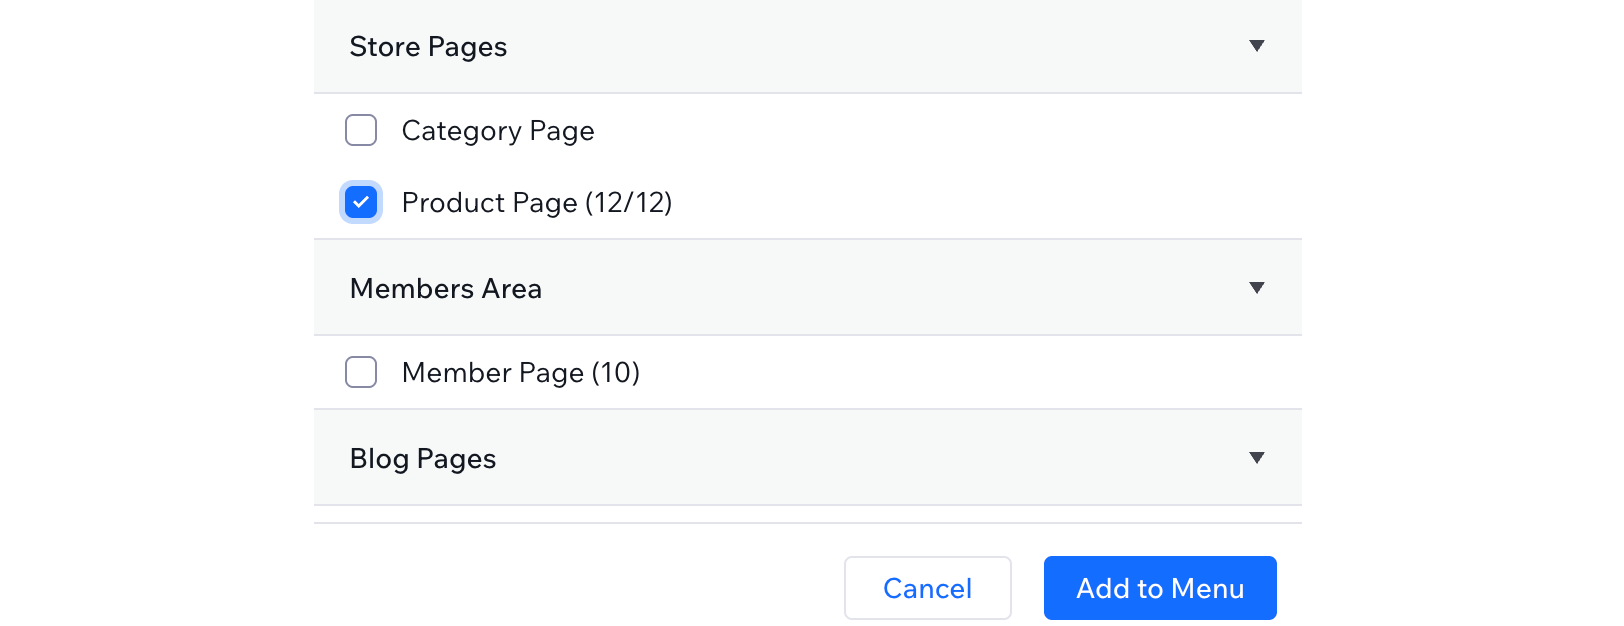
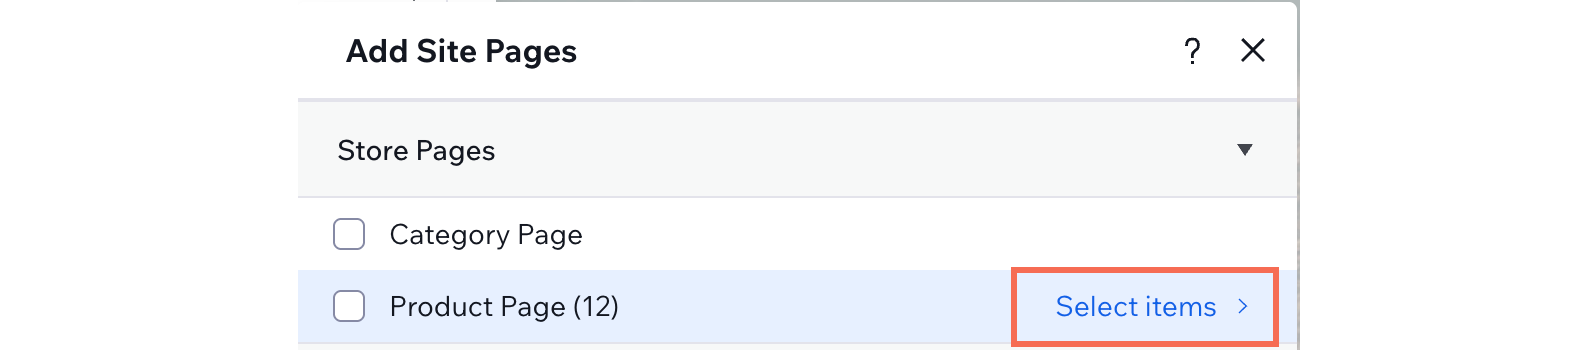
Select regular site pages, collections of app and CMS pages, or specific pages within a collection. You can also add dropdown containers and links to truly tailor the experience for your client's needs.
To add menu items:
- Select the menu in your editor.
- Click Manage Menu.
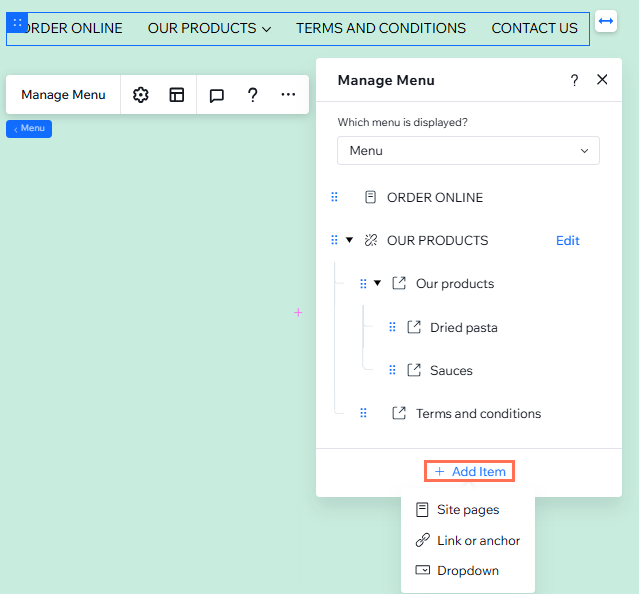
- Click + Add Item at the bottom.
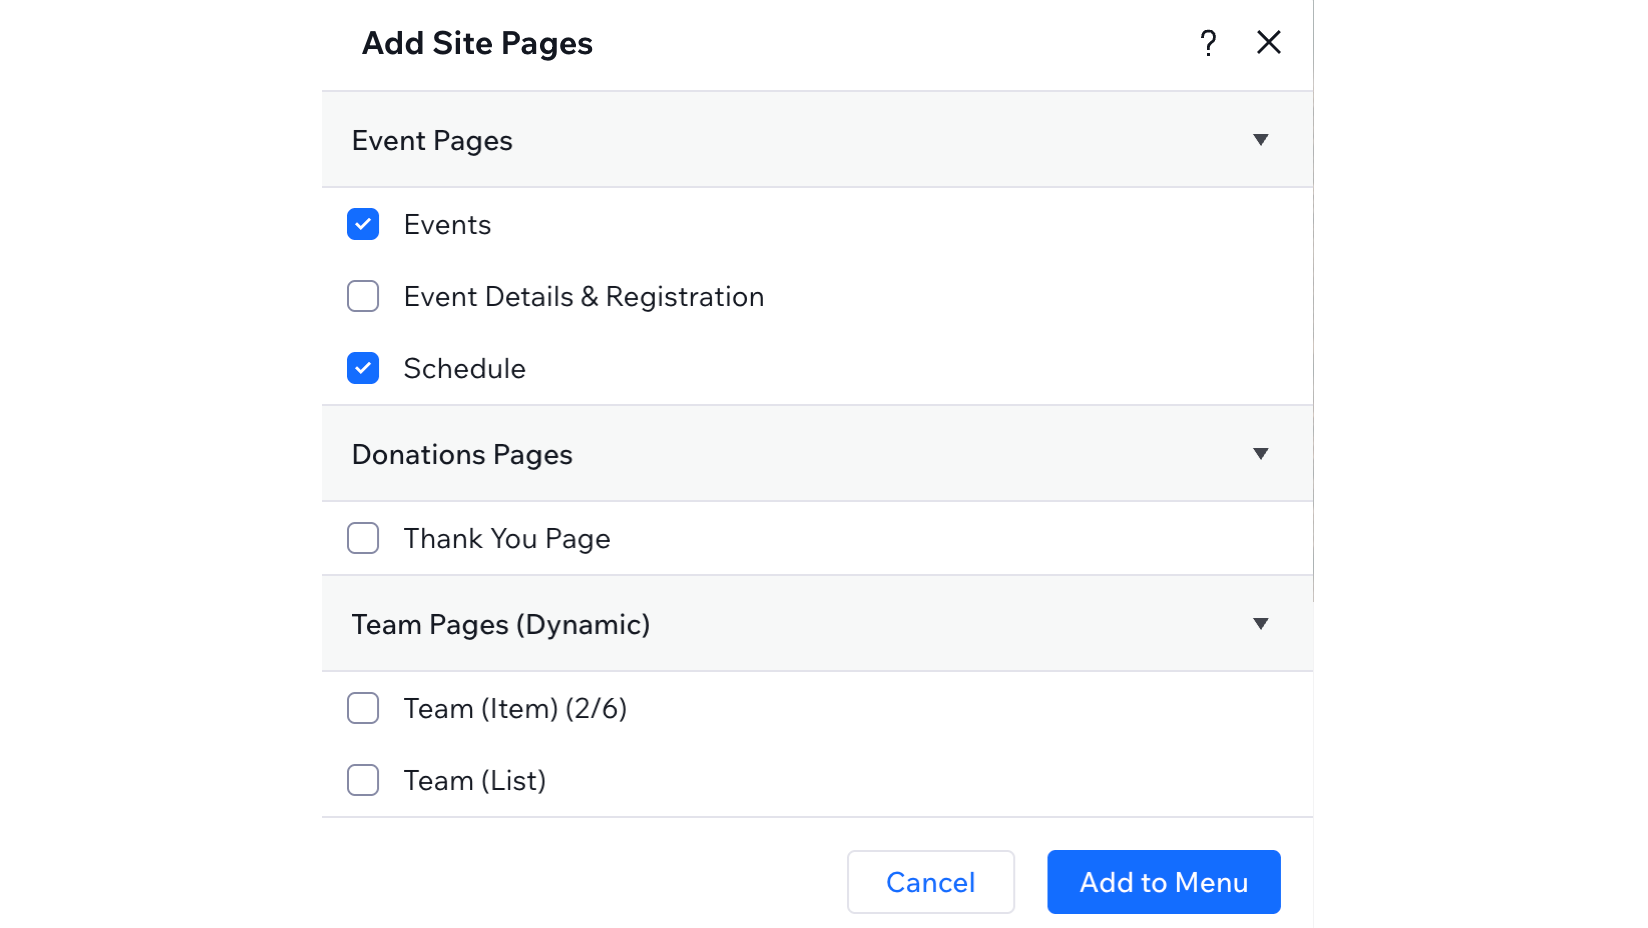
- Select the item you want to add and set it up:
Site pages
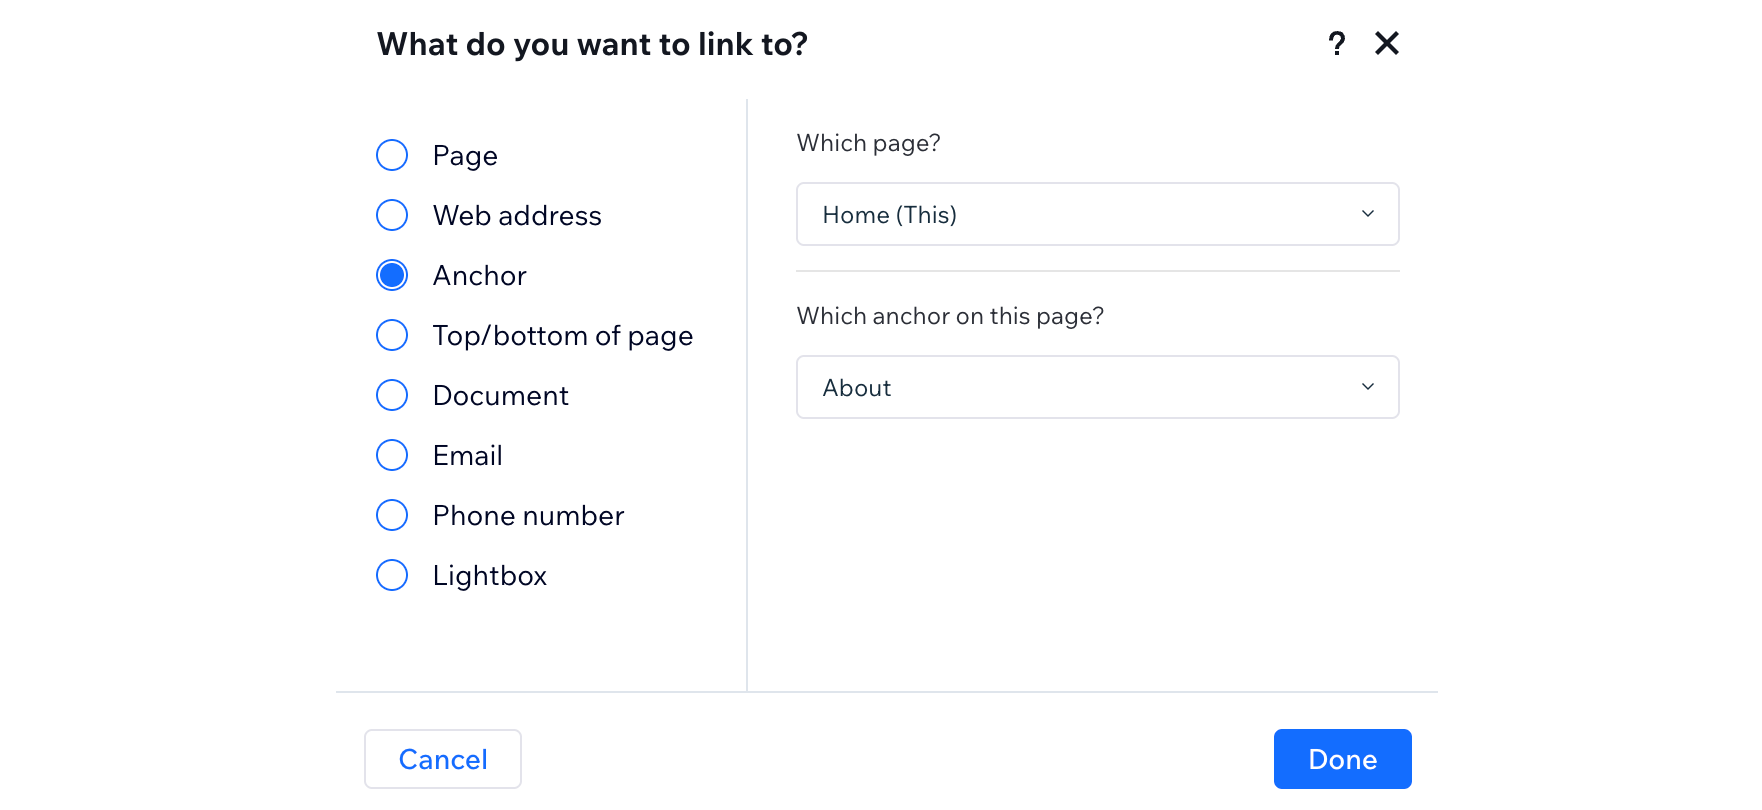
Link or anchor
Dropdown
Managing menu items
You can always adjust an existing menu and the items it shows. Add more items, remove ones that are irrelevant, or change the order to keep the content fresh.
To manage a menu:
- Select the relevant menu in your editor.
- Click Manage Menu.
- Choose what to do next:
Add more menu items
Change a menu item's link
 .
.Rename a menu item
Remove or delete an item
Reorder menu items
 next to an item and drag it to the desired position.
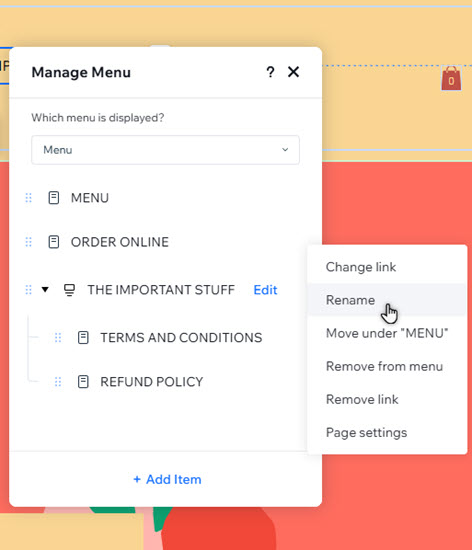
Creating dropdowns
There are 2 ways to create dropdowns in a menu, depending on what you want the title to be:
- An existing menu item: Decide on an existing item (page or link) from the menu to show the dropdown when visitors hover over it.
- A title that is not clickable: Add a dropdown title that does not lead to any page. When visitors hover over it, the dropdown container opens.
Tip:
Dropdowns were called mega menus in the previous menu experience.
To add and set up a dropdown:
- Select the relevant menu in the editor.
- Click Manage Menu.
- Choose what you want to do:
- Use an existing menu item:
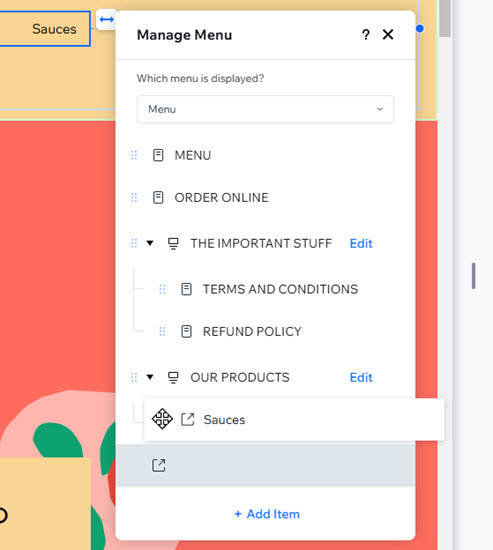
- Drag a menu item to move it below the item you want as the dropdown title.
- Hover over the same item and click the More Actions icon
 .
. - Select Move under "Page Name".
- Repeat steps a - c for all other items.
- Create a new dropdown:
- Click + Add Item.
- Select Dropdown.
- Enter the title for the dropdown.
- Press the Enter key on your keyboard to save your changes.
- Drag and drop menu items under the dropdown to add them.
- Repeat step e for all other items you want to add.
- Use an existing menu item:
Switching the menu to a different type
Change the menu's layout for each breakpoint on the site. You can select a horizontal or vertical navigation bar, or a hamburger menu.
To set the menu type and layout:
- Go to your editor.
- Click the relevant breakpoint at the top of the editor.
- Click the menu.
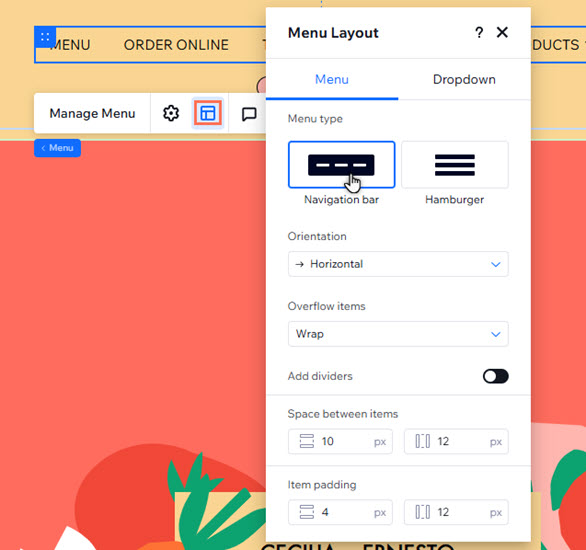
- Click the Layout icon
.
- Select the menu type:
- Navigation bar: Menu items are displayed in a bar. Under Orientation, choose whether the bar is horizontal or vertical.
- Hamburger: An icon is displayed. When site visitors click the icon, the menu opens.
- Adjust the layout settings for your menu type.
- Repeat steps 2-6 for each breakpoint.
Need more info?
Displaying multiple menus on the same site
You can create as many menus as you need and show completely different items in each.
After adding a new menu element, you can choose which menu it should display: An existing menu that you saved, or a new one that you create on the spot. This means you can save menus and reuse them on various menu elements across the site.
Click below to learn how to:
Choose which menu is displayed on a page

Save a new menu

 at the top right.
Display different menu items on different breakpoints
Want to improve accessibility?
Open the Settings panel  to add an accessible name to your menu. Accessible names are short titles (usually 1-3 words) that describe an element's function and content to assistive technologies.
to add an accessible name to your menu. Accessible names are short titles (usually 1-3 words) that describe an element's function and content to assistive technologies.