

Studio Editor: Inviting Collaborators to Edit a Site
7 min
In this article
- Inviting people to a site
- Resending an invite
- Creating and managing roles
- Managing permissions per page
- Performing an unauthorized action in the Studio Editor
- FAQs
Invite teammates or other external collaborators to work with you on a site directly from the Studio Editor. Assign a role based on each person's area of expertise, or create roles with the permissions of your choice. The roles you give determine the permissions inside the editor.
Tell me more about collaborators in Wix Studio
In addition, you can set page editing permissions to control which pages your teammates and collaborators can update. The editor is automatically adjusted to each person's role so unauthorized actions are either hidden or disabled.
Tip:
The Studio Editor allows concurrent editing, so everyone on your team can edit the same site simultaneously. Your changes are synced in real time.
Inviting people to a site
Invite people to collaborate on the Studio Editor site you're currently working on. Using separate login credentials, site collaborators get access to the relevant features for their role (whether they're in the editor or the dashboard).
To invite people to your site team:
- Click the Wix Studio icon
 at the top left.
 - Hover over Site.
- Hover over Team Work.
- Click Invite People to Collaborate.
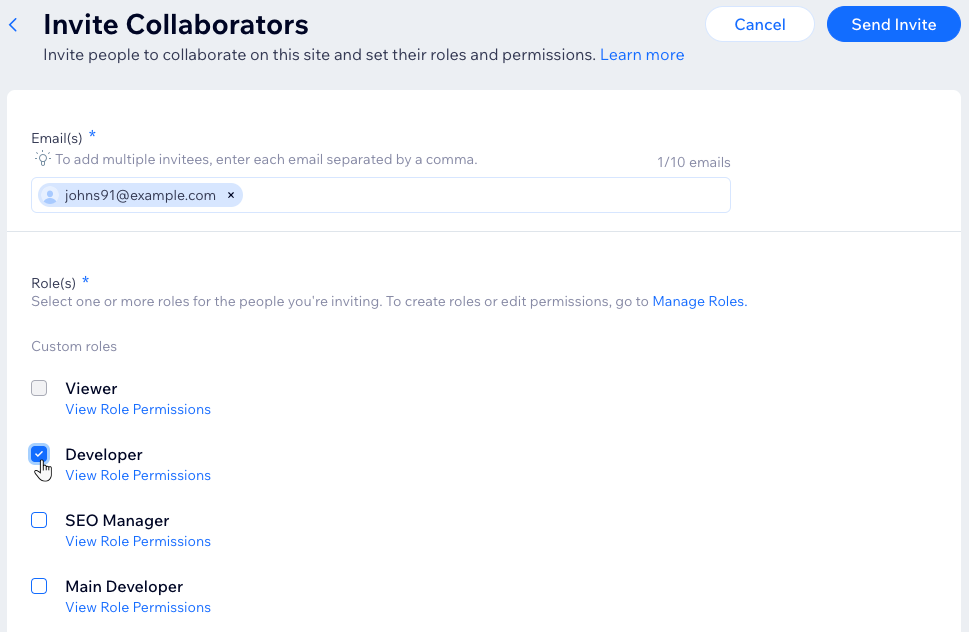
- Enter the email address of the person you want to invite.
- Select the checkbox next to the role(s) you want to assign to this person.
Tip: You can create custom roles for people, where you handpick the permissions. - Click Send Invite.
What's next?
The person you invited gets an email, from which they can accept and join the site.
Resending an invite
You can always send someone another invite if they didn't receive the first email. Whether their current invite is valid or expired, send them another one directly from Wix Studio.
To resend an invite:
- Click the Wix Studio icon at the top left.
- Hover over Site.
- Hover over Team Work.
- Click Roles and Permissions.
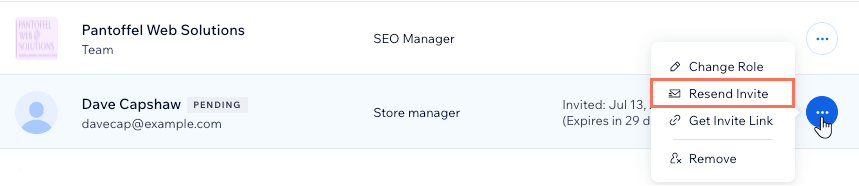
Note: This opens the relevant page on a new browser tab. - (In the new tab) Click the More Actions icon
 next to the relevant person.
 - Click Resend Invite.
Creating and managing roles
You can manage your site's roles at any time. Create and edit custom roles, delete roles that you no longer need or duplicate predefined roles to adjust their permissions.
What permissions are specific to the Studio Editor?
To create and manage roles:
- Go to Sites in your Wix Studio workspace.
- Hover over the Collaborators icon on the relevant site.
- Click Manage Roles & Permissions.
- Choose what to do next:
Create a new role
Edit an existing role
Tip: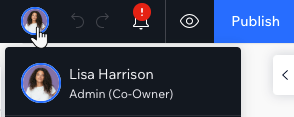
When hovering over their avatar at the top left, teammates can see their own role(s) in the system:
Managing permissions per page
In addition to site and team roles, site owners can apply another type of permission that controls pages and global sections.
Site and team roles control the actions people can perform, while permissions per page control the pages and global sections they're allowed to work on.
To manage permissions per page:
- Click the Wix Studio icon
 at the top left.
 - Hover over Site.
- Hover over Team Work.
- Click Permissions Per Page.
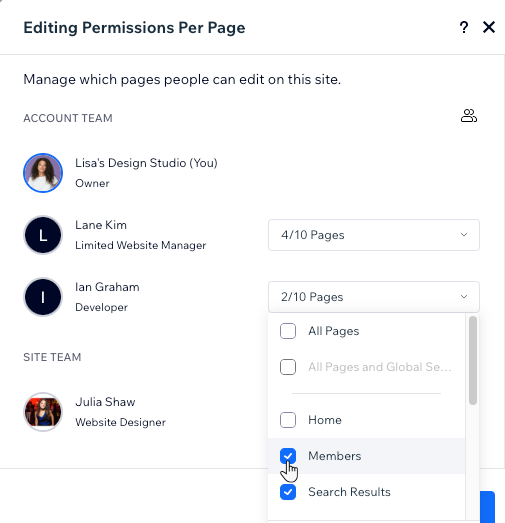
- Click the drop-down next to a person's name to edit their permissions.
- Select the checkbox(es) next to the relevant access level:
- All pages: Can edit all site pages.
- All pages and global sections: Can edit all site pages as well as any global sections.
Note: To select this option, you must first select the All pages checkbox. - Specific pages: Select the checkbox next to the pages this person should be able to edit.
Performing an unauthorized action in the Studio Editor
Every user has a specific role in the system with permissions that the site owner can change at any time.
Areas that aren't included in your permissions appear in gray and are not clickable.
To access a feature that is disabled, contact the site owner and ask them to add the relevant permission(s) to your role.
FAQs
Click a question below to learn more about inviting collaborators to edit a site.
How many collaborators can I invite to edit my Studio site?
What happens to my collaborators if I transfer my Studio site to a non-Studio account?
What happens if I already have more collaborators than my plan allows?
Can I keep track of how many collaborator seats I have filled?

Can I change a collaborator's role after inviting them?
Can collaborators work on the site at the same time?
