Site Members: Adding and Customizing the Featured Members List
5 min
In this article
- Adding the Featured Members list
- Managing the Featured Members
- Choosing which details to show about Featured Members
- Designing the Featured Members list
- Changing the layout of the Featured Members list
Important:
As of January 2024, we're no longer actively maintaining the Featured Members element. If you currently have the element on your site, you can continue using it in the meantime.
However, we suggest the following alternatives:
- Use a repeater or the Pro Gallery to achieve a similar effect.
- Add a pre-designed strip (Wix Editor) or section (Studio Editor) featuring the team.
- Add the Staff Member widget (Wix Bookings).
Use the Featured Members element to showcase your site members. Display a list of the members you want to highlight, on any page of your site. You can customize the layout and design of this list so it fits your site's look.
Adding the Featured Members list
You can add the Featured Members element to any page of your site - not just the Members Area. This means you can make this list available to all site visitors, if needed.
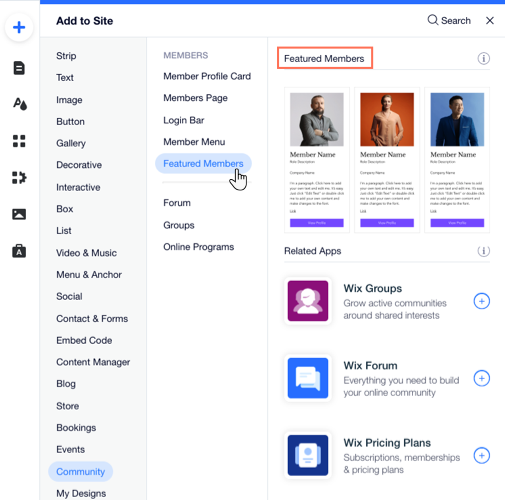
To add the Featured Members element:
- Click Add Elements
 on the left side of the Editor.
 - Click Community.
- Click Featured Members.
- Drag the Featured Members element onto your page.
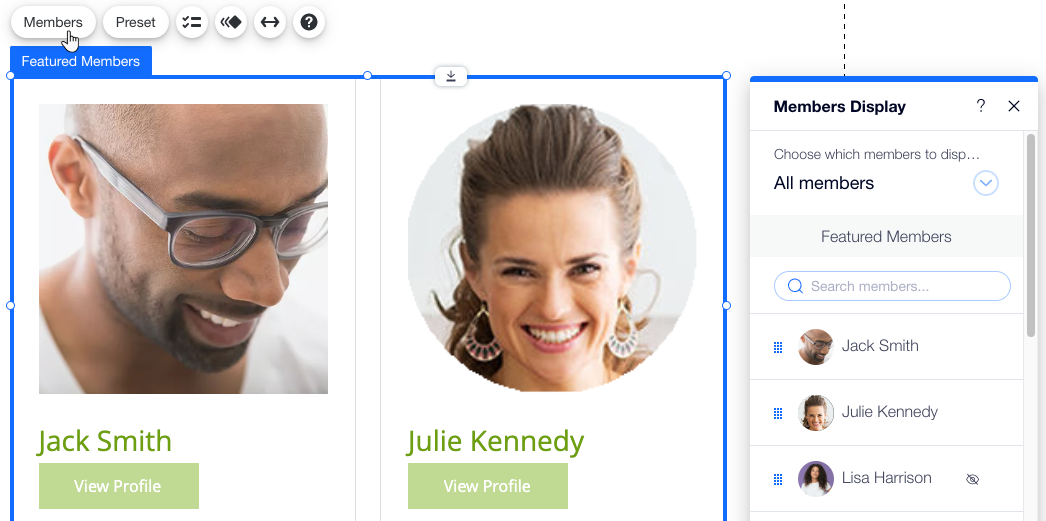
Managing the Featured Members
Select which members to showcase on your Featured Members list. You can choose from all of your site members, so use the search bar and the drop-down menu to find those you need.
To manage the list of members:
- Click the Featured Members element in your Editor.
- Click Members.
- Choose what you want to do:
Find and add featured members
 .
.Change the order of the list
Remove a featured member
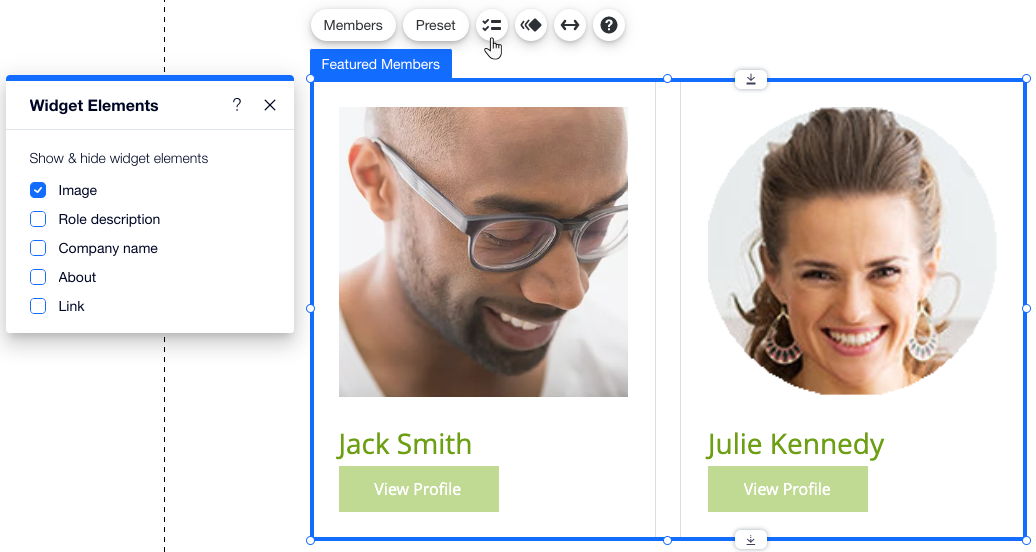
Choosing which details to show about Featured Members
Control which details appear next to your featured members. This includes information from your member's account (e.g. profile picture), as well as information that members add on their own to their profile, like company, link or "About" info.
To select the elements on the Featured Members list:
- Click the Featured Members element in your Editor.
- Click the Elements icon
 .
. - Select the checkbox next to the elements that should appear about each member:
- Image: The member's profile pic.
- Role description: The member role you assigned to this person.
- Company name: The company they work for, if that information is available on your member list.
- About: The description the member wrote about themselves on their profile page.
- Link: This could be any URL that you add to the person's contact info. For example, a link to a site or a web page that introduces this member.
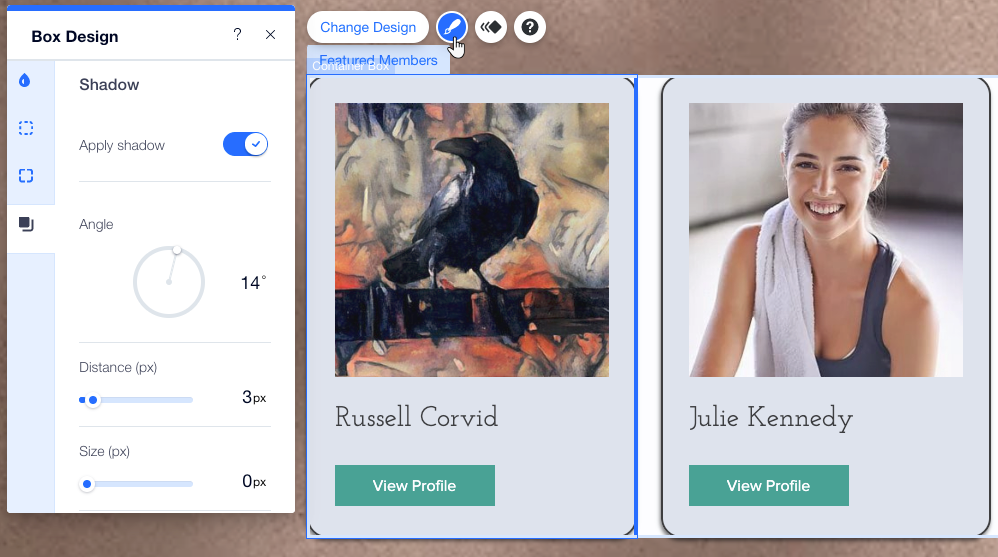
Designing the Featured Members list
Personalize the design of the containers showing your members in the Featured Members list. You can change their background color, add a border, apply shadow and more – once you design one container, the others adjust accordingly.
To design the Featured Members list:
- Click the Featured Members element in your Editor.
- Click the element again to select a container box.
- Click the Design icon
 .
. - Adjust the following design options:
- Fill Color & Opacity: Change the containers' background color and adjust its opacity.
- Border: Design the border of your containers to make them stand out.
- Corners: Round the corners of your containers to make them look more circular.
- Shadow: Design a shadow for your containers to create a 3D effect.
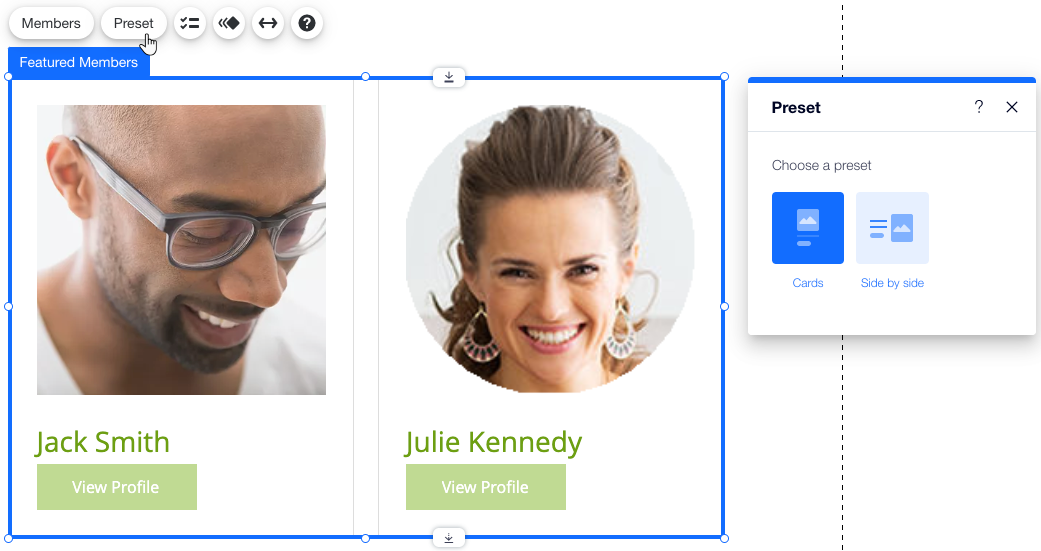
Changing the layout of the Featured Members list
Choose how to display members' images and details on your Featured Members list.
To change the layout preset:
- Click the Featured Members element in your Editor.
- Click Preset.
- Choose the layout that suits your look:
- Cards: Each member's "card" (container box) shows their profile pic and their details below.
- Side by side: Each member's "card" (container box) shows their profile pic on the right and their details on the left.