

Wix Restaurants: Setting Up Online Ordering for Your Restaurant
7 min
In this article
- Step 1 | Enable your online ordering system
- Step 2 | Set your online ordering schedule
- Step 3 | Set your pickup options
- Step 4 | Set your delivery options
- Step 5 | (Optional) Set up contactless dine-in
- Step 6 | Manage how you receive order notifications
- Step 7 | Set your advanced order settings
Important:
- This article is about the original Restaurants Orders app.
- We've released a new online ordering app. Learn how to add and set up the new Wix Restaurants Orders (New) app.
Expand your business by enabling your restaurant's online ordering system. Allow customers to order and pay straight from your website. You can also choose your pickup and delivery areas, as well as how you get notified about incoming orders.
Connecting Square POS to Wix Restaurants?
If you connect Square POS to your Wix Restaurant site, your online orders are displayed on Square. You can also see them in Orders in your site's dashboard.
Before you begin:
To accept payments for your restaurant's online orders, you must first set up payment methods for your site. You can choose your online payment methods in Accept Payments in your dashboard. Wix offers multiple payment providers, or you can also choose manual payments to accept cash or other forms of payment.
Step 1 | Enable your online ordering system
From Order Settings, you can enable your restaurant's online ordering system to receive online orders from customers.
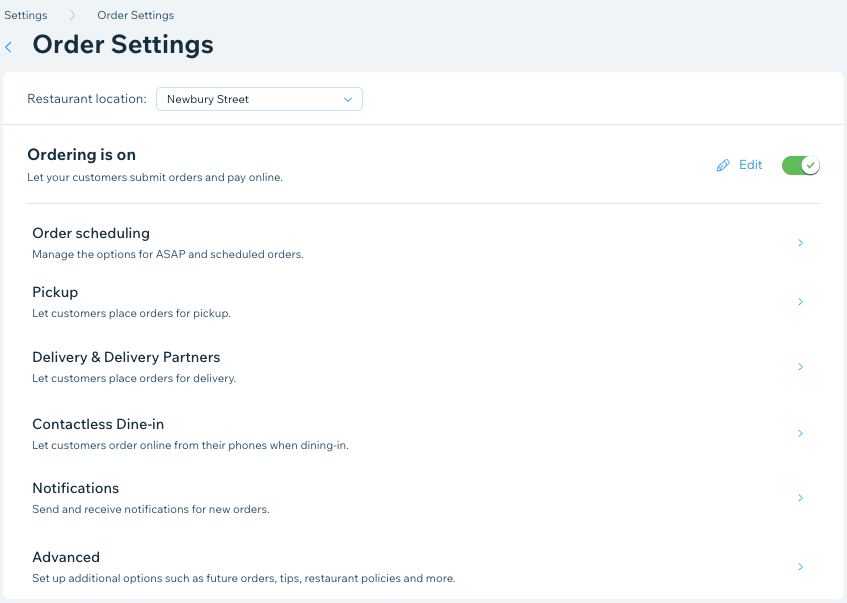
To enable online ordering:
- Go to Order Settings in your site's dashboard.
- Click the Ordering is on/off toggle to enable online ordering.
Tip:
You can temporarily disable online ordering by clicking Edit next to the toggle and leaving a message for customers explaining why online ordering is currently off.
Step 2 | Set your online ordering schedule
Set your restaurant's schedule for online orders. You can enable ASAP to accept orders for immediate preparation, and scheduled orders to give customers the option of placing orders a few hours or days before the delivery time.
For example:
A bakery needs a few days notice in order to bake and decorate a birthday or a wedding cake. You can set a minimum time in advance (e.g. 3 days) that customers need to book in order to get their order delivered when they want it.
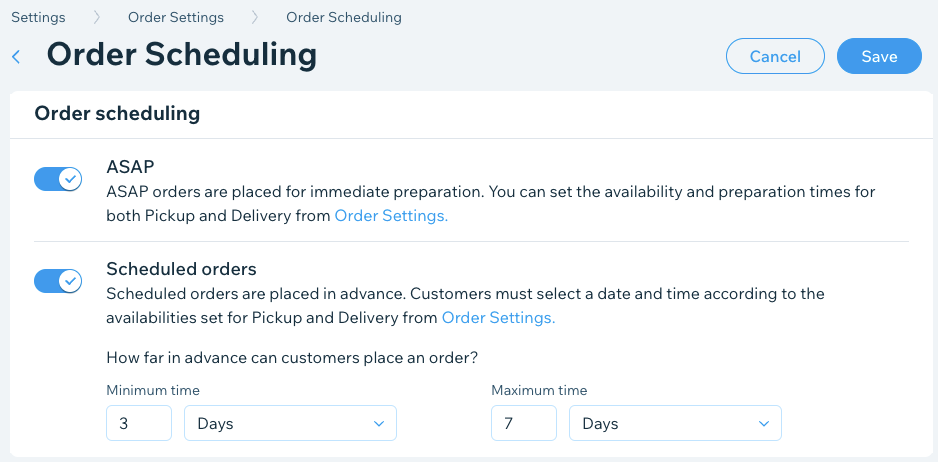
To set your order scheduling:
- Go to Order Settings in your site's dashboard.
- Click Order scheduling.
- Click the toggles to set your restaurant's online order schedule:
- ASAP: To allow customers to place orders for immediate preparations.
- Scheduled orders: To allow customers to place orders in advance.
- Minimum time: Enter a number and select Minutes, Hours or Days from the drop-down list.
Note: This is the minimum time customers can place a future order in advance. - Maximum time: Enter a maximum number and select Minutes, Hours or Days from the drop-down list.
Note: This is the maximum time customers can place a future order in advance.
- Minimum time: Enter a number and select Minutes, Hours or Days from the drop-down list.
- Click Save.
Step 3 | Set your pickup options
From Pickup in Order Settings, you can offer your customers the choice of picking up their orders from your restaurant, or having their order brought to them right outside your restaurant with curbside pickup (e.g. to your restaurant's parking lot). Learn more
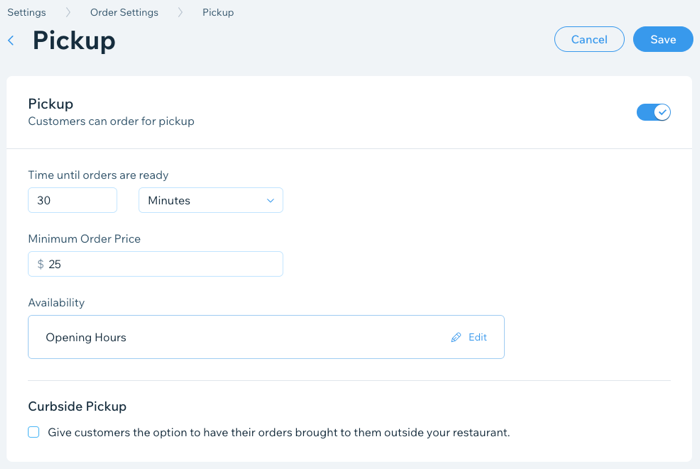
To set your pickup options:
- Go to Order Settings in your site's dashboard.
- Click the Pickup tab.
- Click the Pickup toggle to enable it.
- Time until orders are ready: Enter the time it takes for orders to be ready for pickup after customers have placed their orders. This is shown to customers at checkout.
- Minimum Order Price: Enter a minimum amount for pickup orders. Your customers will be alerted if they don't reach the minimum amount. Note: If you don't want to set a minimum amount, just set it to $0.
- (Optional) Click Edit under Availability to edit your pickup hours and then click Apply.
- Select the checkbox under Curbside Pickup to give customers the option of having their food brought to them outside your restaurant (e.g. your restaurant's parking lot).
- Curbside pickup instructions: Enter the curbside pickup instructions that are displayed for your customers when placing their order.
- Additional customer information: Choose if you want to require additional information from the customer.
- Enter the field label for the additional information.
- Click Save.
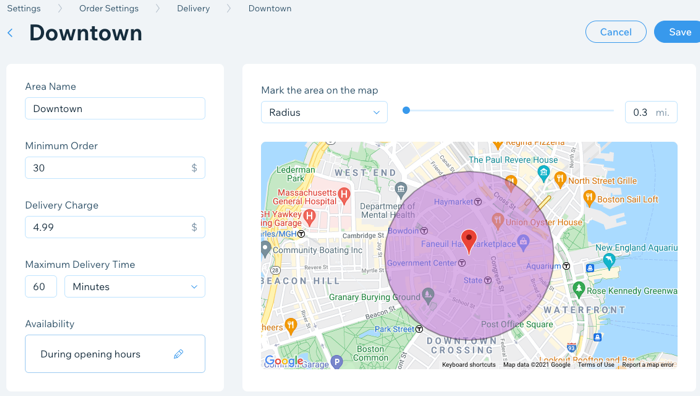
Step 4 | Set your delivery options
From Delivery in Order Settings, you can set up your delivery areas. Choose which areas you deliver to and set different costs and delivery times for each area. For example, if a location is further away from your restaurant, you can charge extra to deliver there and increase the delivery time. You can also temporarily switch delivery areas on and off based on your availability.
Note:
Before you can set up a delivery area, make sure you've added your business location. Learn more
To set your delivery options:
- Go to Order Settings in your site's dashboard.
- Click the Delivery tab.
- Click + New Area to set up a delivery area:
- Area Name: Enter the name of the area (customers do not see this name).
- Minimum Order: Enter the minimum order amount for the area.
- Delivery Charge: Enter the delivery charge for the area.
- Maximum Delivery Time: Select the maximum delivery time for the area.
- (Optional) Click the Edit icon under Availability to edit your delivery hours and then click Apply.
- Click Save.
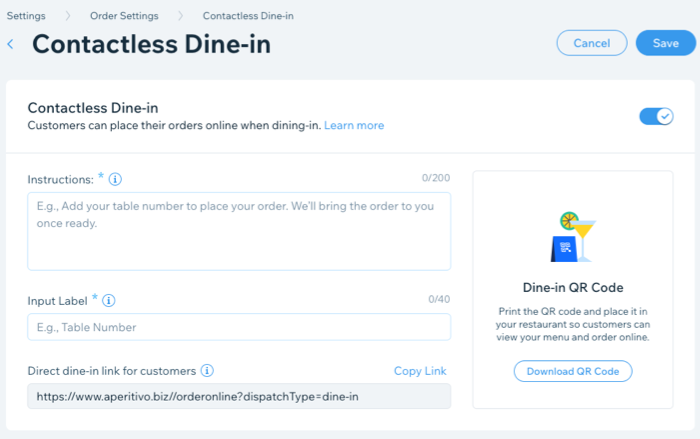
Step 5 | (Optional) Set up contactless dine-in
From Contactless Dine-in in Order Settings, allow your customers to place orders, pay, and get their food delivered to their table without interacting closely with the restaurant staff. You can set up the contactless dine-in ordering process for your customers by giving instructions, adding a table number field, printing your restaurant's QR code and place it in your restaurant so customers can view your menu and order online.
Important:
For contactless dine-in to work, you have to enable Pickup (see Step 2).
You also have to toggle on ASAP orders in Order scheduling.
To set up contactless dine-in:
- Go to Order Settings in your site's dashboard.
- Click the Contactless Dine-in tab.
- Click the Contactless Dine-in toggle to enable it.
- Enter the information that you want your customers to see when placing their orders:
- Instructions: Add instructions for your customers (e.g. "Welcome! Fill in your table number and choose your dishes. We'll bring your order right to you when it's ready.").
- Input Label: Add a field for table or booth numbers. Customers are asked to fill this out while placing their order.
- (Optional) Direct dine-in link for customers: Click Copy Link to share a direct link with your customers for contactless dine-in.
- Click Download QR Code to download your code. You can print your QR code and place it in on the tables of your restaurant so that customers can scan it, view your menu and place an order online.
- Click Save.
Note:
You can see your contactless dine-in orders in My Orders tab marked as Dine-in. Learn more
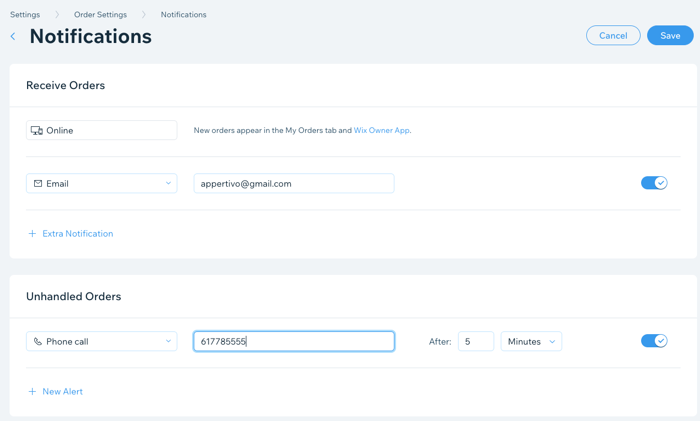
Step 6 | Manage how you receive order notifications
From Notifications in Order Settings, you can choose how you want to get notified about online orders. You can also set an alert for when an order hasn't been accepted after a certain period of time.
Note:
New orders automatically appear in the My Orders tab and the Wix app. Learn more
To manage your notifications:
- Go to Order Settings in your site's dashboard.
- Click the Notifications tab.
- Click + Extra Notifications to add an additional notification method.
- Select the drop-down list and choose how you want to get notifications (Email, Fax, Phone call or Webhook).
- Enter the relevant information in the text field beside the new notification.
- (Optional) You can disable the toggle beside the new notification to temporarily shut it off.
- Click + New Alert under Unhandled orders to set an alert for when an order hasn't been accepted after a certain period of time.
- Select the drop-down list and choose an alert method.
- Enter the relevant information in the text field beside the alert method.
- Enter an amount of time before you receive the alert about an unhandled order in the After field.
- (Optional) You can disable the toggle beside the new alert to temporarily shut it off.
- Click Save at the top right.
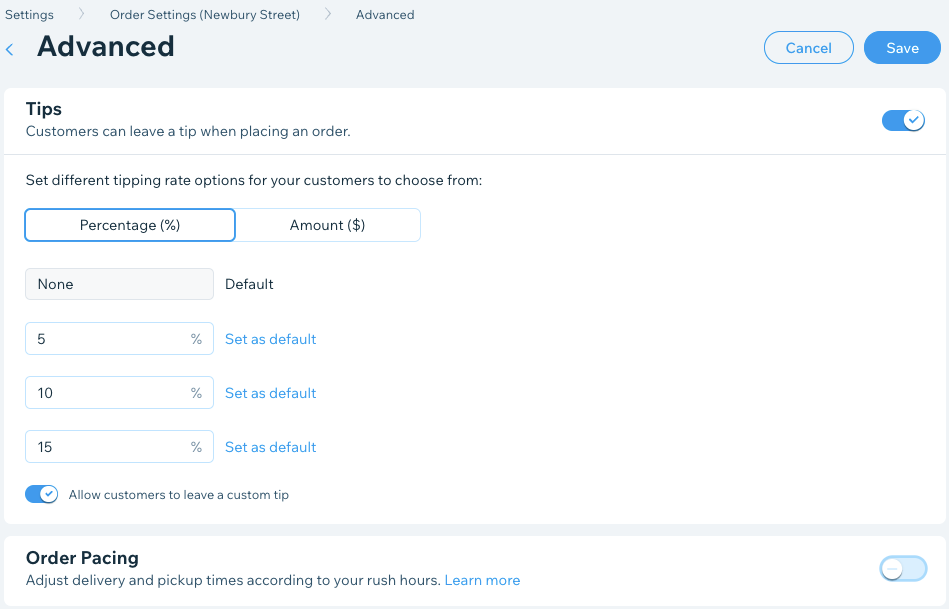
Step 7 | Set your advanced order settings
From Advanced in Order Settings, you can set up tips, SMS validation restaurant policies, and more. You can also increase your fulfillment time using order pacing to ensure smooth service during your peak hours.
To set your advanced options:
- Go to Order Settings in your site's dashboard.
- Click the Advanced tab.
- Set the advanced options for online ordering:
- Tips: Allow customers to leave a tip when placing an order online.
- Order Pacing: Set a limit on the number of orders your staff can fulfill every 15 minutes and your restaurant's rush hour. If the limit is reached, customers will be informed of longer wait times. This helps ensure timely delivery and quality service.
- Service fees: Add a service fee to online orders in your Wix Restaurant site to help you cover operational costs and state regulation fees.
- Policies: Add a Terms & Conditions or Privacy Policy document to your site. Customers will see the link to your documents when checking out.
- Click Save.
