

Wix Online Programs: About Automations for Your Program
4 min
In this article
- Preinstalled Automations
- Custom Automations
- Choose a trigger
- Choose an action
- FAQs
Boost your site's success with minimal effort by creating automations to manage your program. Automations streamline repetitive tasks and help you hit your marketing targets. Think of them as a combination of triggers and actions—like sending a welcome email when someone joins your program. You can use built-in triggers and actions, or customize your own.
Ready to create automations for your program?
Go to Automations in your site's dashboard.
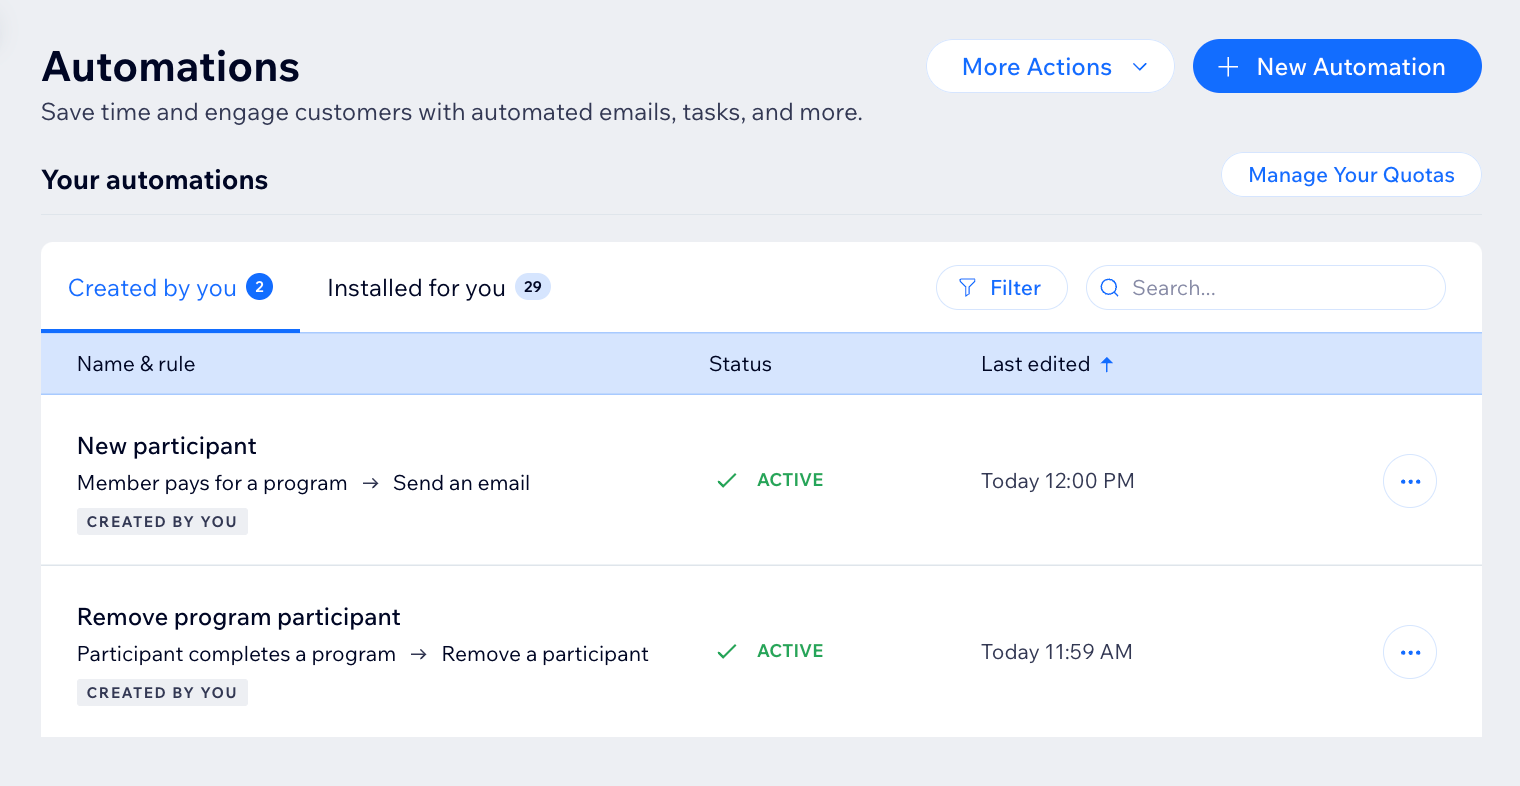
Preinstalled Automations
When you add Online Programs to your site, some automations come already installed to ensure the app functions properly. An example is the preinstalled automation that notifies members that their request to join the program was approved. This saves you time on manual work and helps you manage your site more efficiently. Learn to view and manage preinstalled automations.
Custom Automations
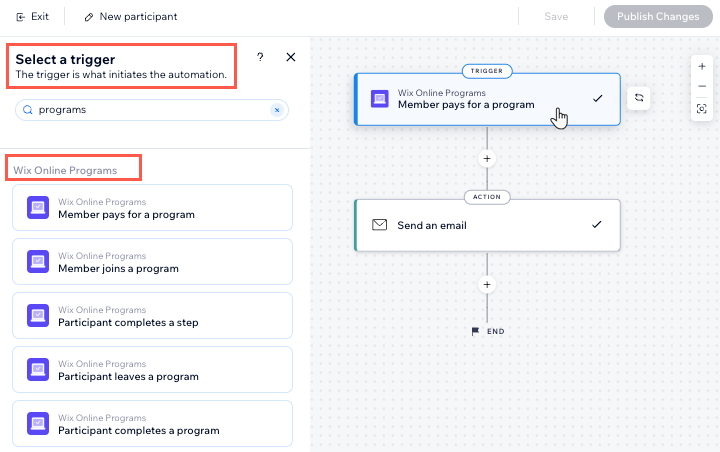
Choose a trigger
Select the Online Programs app in the automation flow to see its triggers. A trigger is an event that a member or participant does involving your program. This event initiates an automatic response. You can choose from a list of available triggers and select specific programs.
For example, you can remove a participant when they complete a self-paced program. To do so, use the trigger "Participant completes the program". Add a delay of 3 days, and the action "Remove participant", for a specific program.
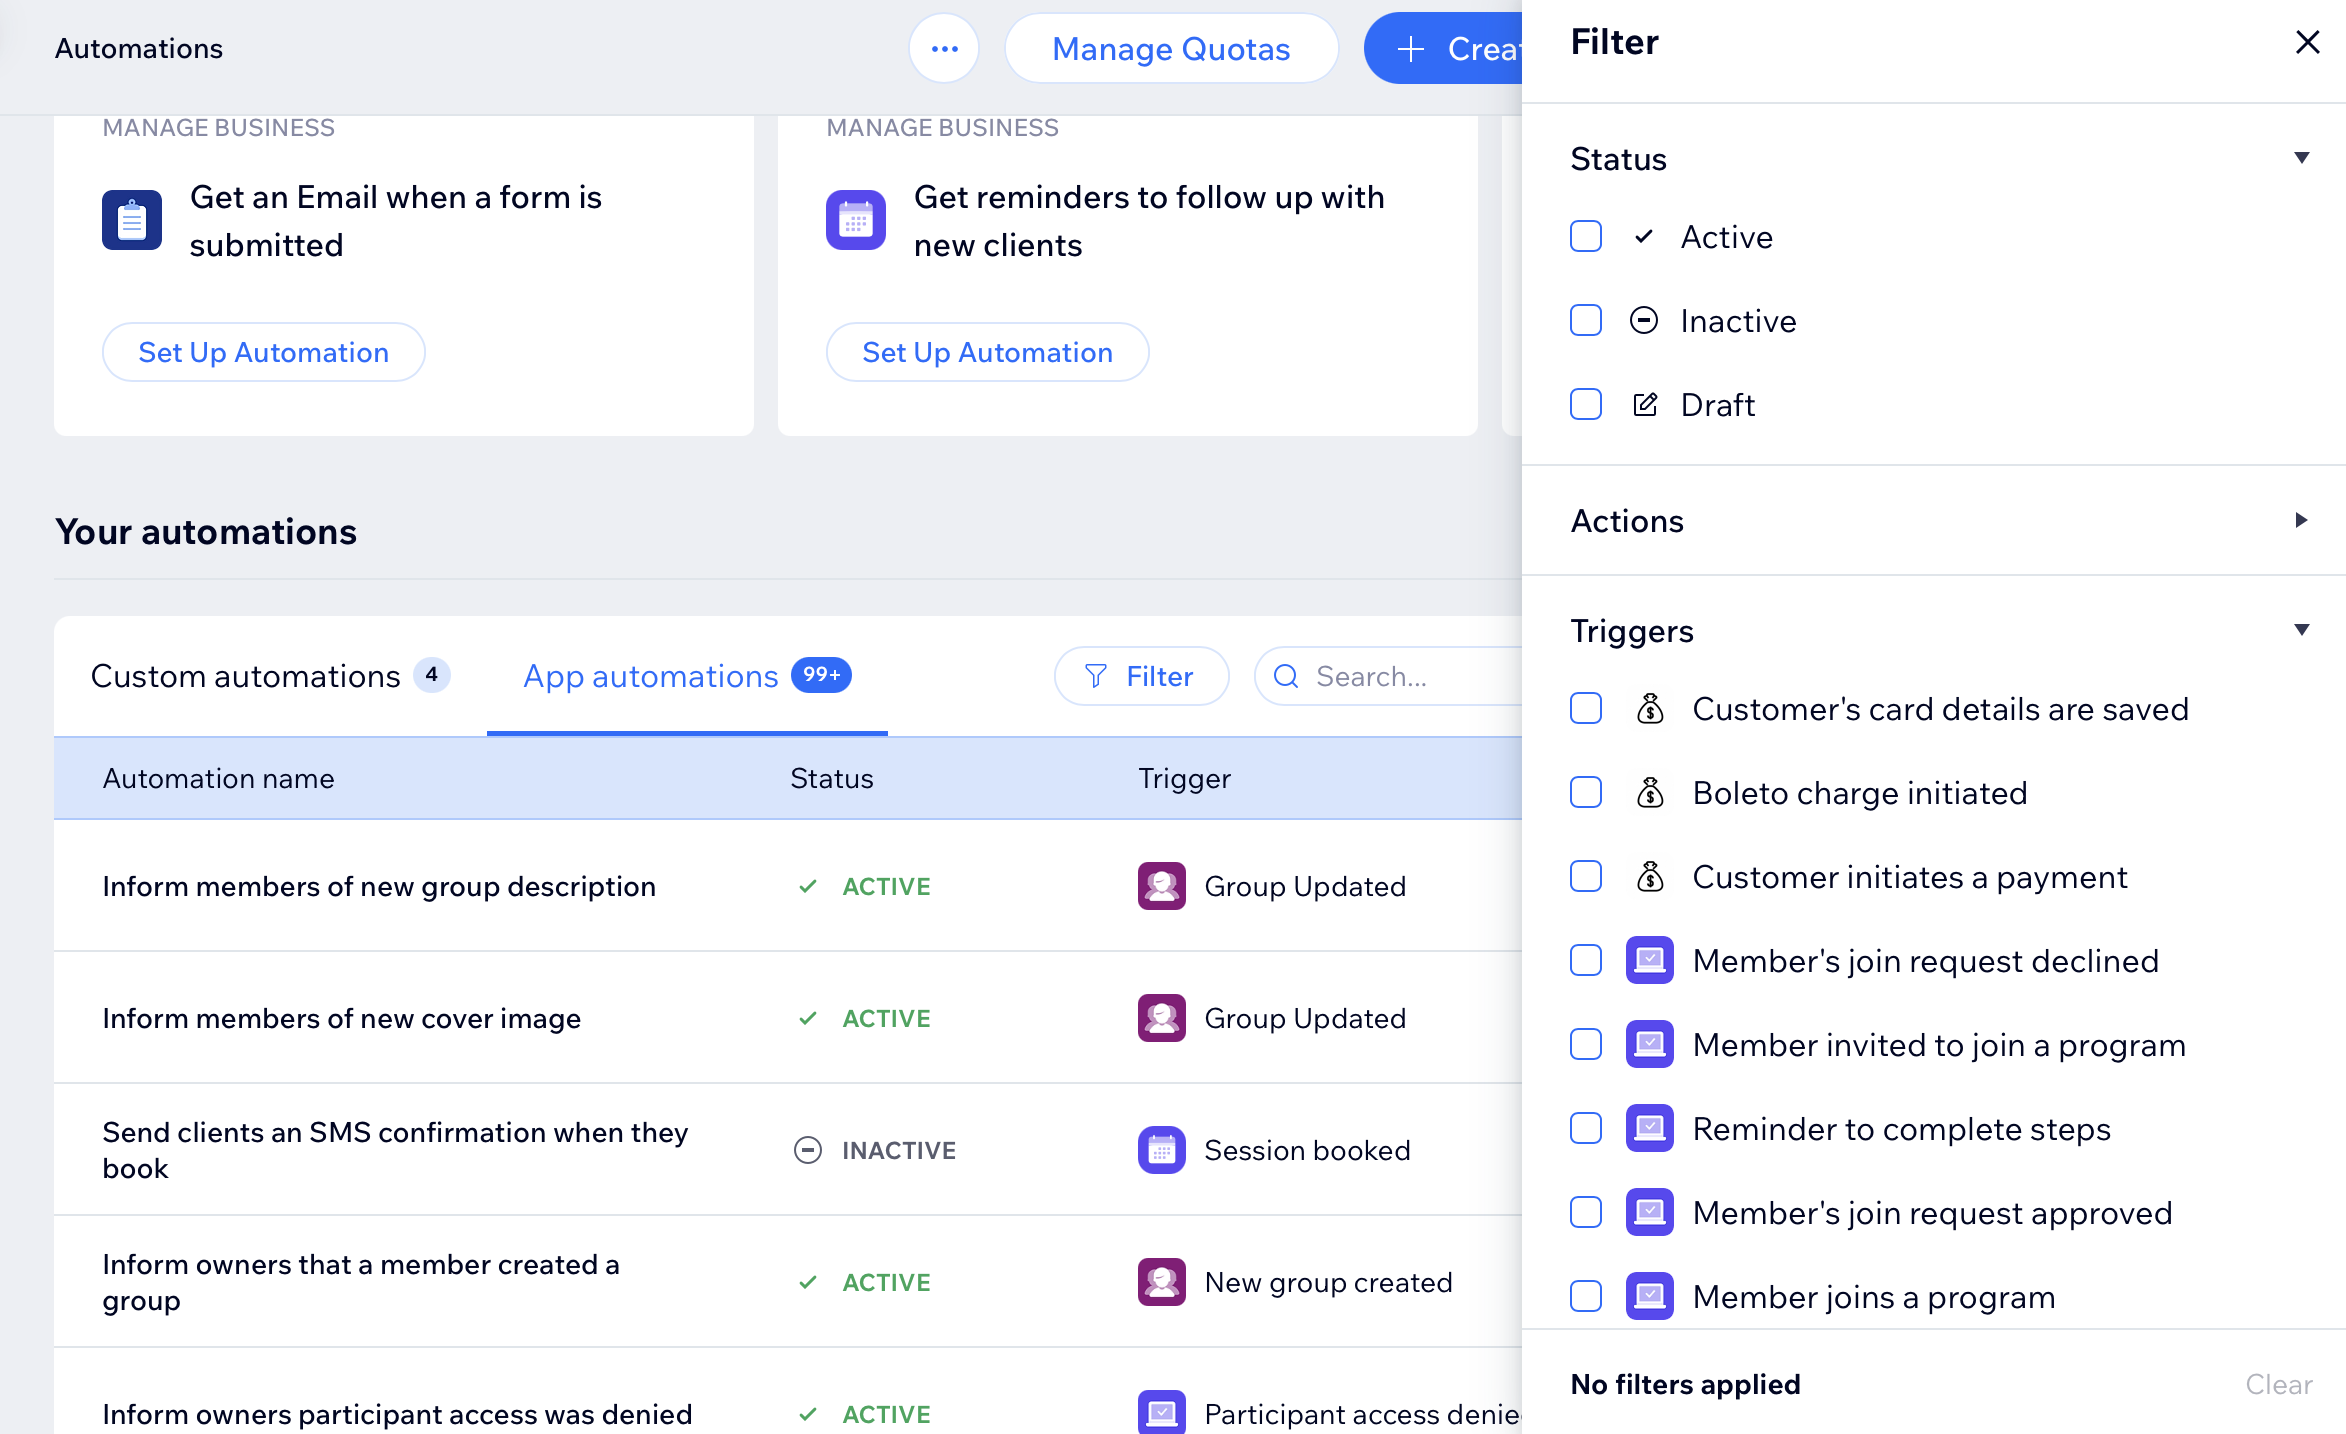
The built-in triggers for Online Programs are:
- Member pays for a program
- Member joins a program
- Participant completes a step
- Participant leaves a program
- Participant completes a program
- Member's join request declined
- Member invited to join a program
- Reminder to complete steps
- Member's join request approved
- Offline payment declined
- Program ended without all steps completed
- Certificate available to download
- Program end date has passed
- Payment failed
- Participant manually added to program
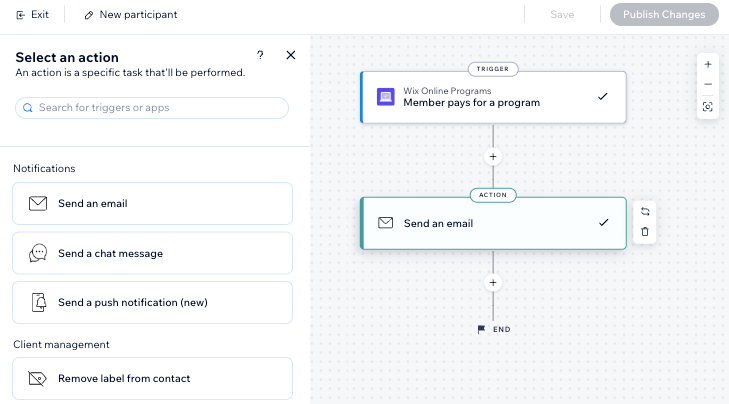
Choose an action
Select actions that respond to your trigger. You can choose general actions like sending an email or updating Google Sheets. You can also use the specific Online Programs action: Remove a participant. For example: Combine "Program end date has passed" with the action "Remove participant". This will remove participants from a program when it ends.
Participants that are removed by an automation are labeled as Auto-Removed.

FAQs
Click a question below to learn more.
How does the reminder to complete steps automation work?
How do I select the members or participants who initiated a trigger for a new action?
How can I manage or edit my program automations?
