Wix Editor: Formatting Your Text

5 min read
Formatting helps you organize your text for clearer communication. There are thousands of possible combinations:
  • Align, bullet or number your text to keep it neat. 
  • Add italics, underlining, highlighting or bold your text to make it stand out. 
  • Upload your own fonts, and choose language fonts that are compatible with the language(s) of your site to get your message across exactly as you intended.

To format your text:

  1. Highlight the text you want to format.
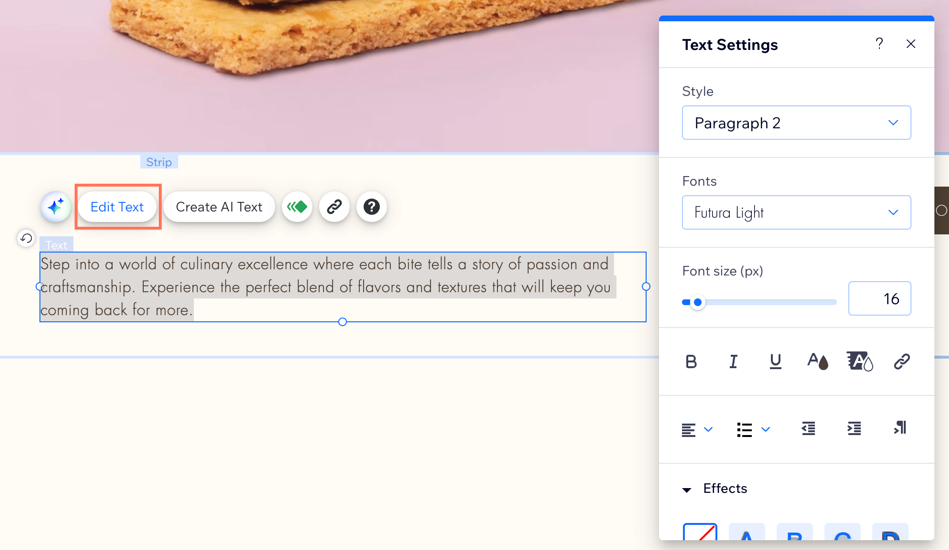
  2. Click Edit Text.
  3. Format your text using the tools:
Formatting Tool
Explanation
How-To
Theme
These themes have been created to match your site. You can edit a theme and save the changes so that you can use it again on your site.
Click the Theme drop-down and select a theme. Customize the theme using the formatting tools, then click Save Theme to save the changes.
Font
Choose from hundreds of fonts. You can also upload your own fonts and add language fonts.
Click the Font drop-down and choose a font. 
Font Size
Set a specific font size.
Click the Font Size drop-down and set the size. You can enter values between 6 to 999 px.
Bold 
Bold the text.
Click the Bold icon .
Italicize 
Italicize the text.
Click the Italics icon .
Underline
Underline the text.
Click the Underline icon .
Color
Change the color of the text.
Click the Color icon and select a color.
Highlight
Add a color to the background of the text to highlight it.
Click the Highlight icon and select a color .
Link Text
Hyperlink your text so that when visitors click it, they are taken to the linked destination.
Click the Link icon to choose the link destination and enter the link details.
Align
Align your text to the left, center or right, or justify it across the textbox.
Click the Alignment icon .
Bullets & numbering
Create a bulleted or numbered list with your text.
Click the Bullets & numbering icon to choose the list type.
Indent
Indent your text.
Click the Decrease indent  icon or the Increase indent icon to change the size of the indent.
Text Direction
Change the direction of your text between left-to-right and right-to-left.
Click the Change text direction icon .
Effects
Add glow, blur, shadow, outline effects and more.
Click Effects and select one.
Character spacing
Change the spacing between the characters in your text box.
Click Character & line spacing and set the amount of space between the characters.
Line spacing
Change the spacing between the lines in your text box. You can set a specific amount, or use automatic spacing.
Click Character & line spacing and set the line spacing or select  Automatic to automatically fill the text box.
Vertical text
Make your text vertical instead of horizontal. This is mostly useful for languages such as Japanese.
Click Vertical text and the Enable vertical text toggle to flip your text.
SEO & accessibility
Use HTML tags to structure your content to improve your site's SEO and assist in accessibility. 
Click Choose HTML tag and select one from the drop-down.
Notes:
  • You cannot link text that spans over two paragraphs. This means that if you have two words or sentences that are separated by Enter, they act as two paragraphs and you cannot link them both at the same time. You can link text that spans over two paragraphs if you use Shift + Enter to create the line space instead of Enter.
  • You can remove the underline of hyperlinked text by selecting the linked text and clicking the Underline icon.
  • Wix has licenses for the fonts in the Editor. They are available for digital use ONLY and within your Wix site. For more information, view the Wix Terms of Use. You cannot download the fonts to use, but you may find the open source versions and install them to your computer. Be careful with fonts found in external URLs. These are not owned by Wix so you need to contact the author for permission to use them.

Did this help?

|