

CMS: Using Category Collections to Organize Your Content
9 min
In this article
- Step 1 | Creating a category collection
- Step 2 | Adding a 'Category' field to your items collection
- Step 3 | Assigning categories to items
- Step 4 | Managing categories from the category collection
- FAQs
Category collections help you organize items in one or more CMS collections with a built-in 'Category' field. You define the categories — whether that's topics for a blog, cuisines for a recipe site, cities for a restaurant menu, or any other grouping that fits your content.
When you use the 'Category' field to associate an items collection to a category collection, Wix creates a two-way relationship between them. You can manage the same category assignments from the items collection or from the category collection, and both views stay in sync automatically.
Wix also creates a hidden 'Primary Category' field in your items collection. The Primary Category stores the one category that best represents each item for search engines — especially useful when items belong to more than one category.
Learn how to create dynamic category pages after you finish setting up your categories.
Before you begin:
- Make sure you already have a CMS collection that you want to categorize.
- We recommend learning how datasets work before you create dynamic category pages.
Step 1 | Creating a category collection
A category collection is a dedicated collection that stores your list of categories — up to 1,000. Unlike a regular items collection, a category collection does not contain the content items themselves. It holds only the categories that get assigned to items in other collections.
For example, you might create a "Cities" category collection containing "New York", "Chicago", and "Detroit", then use it to organize items in a "Pizza Menu" collection by city. The same category collection can serve multiple items collections, so you could also use "Cities" to organize a "Restaurants" collection or an "Events" collection.
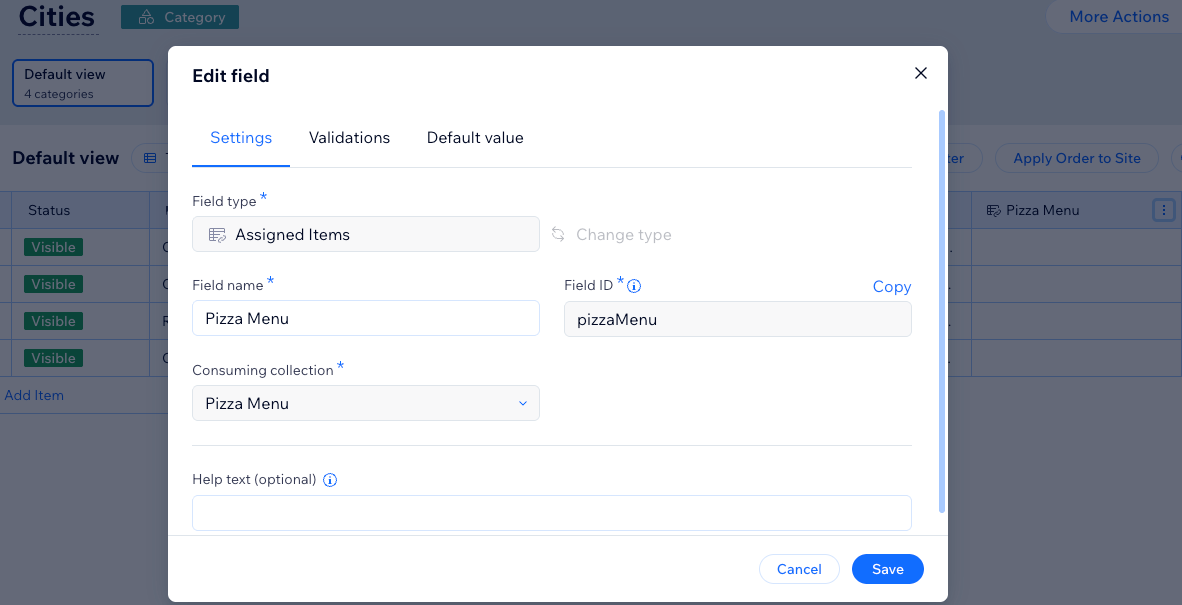
When you first create a category collection, it only contains the fields you add. The 'Assigned Items' field, which shows which items belong to each category, appears automatically in Step 2 after you connect the category collection to an items collection using a 'Category' field.
To create a category collection:
- Go to CMS in your site's dashboard.
- Click + Create Collection at the top right.
- Select Category collection and click Next.
- Enter a name for the collection in the Category collection name field.
- (Coding only) Enter a Category collection ID to use in your code.
- Click Create collection.
- Add fields to your collection manually or by importing a CSV file:
- Add fields manually: Click + Add Field on the right side of the table to begin adding fields to your collection manually.
- Import a CSV file: Click More Actions and select Import items to upload a CSV file and use its fields and items in the collection.
- Add items to your collection:
- Click + Add Item at the top right.
- Enter details about the item in all the relevant fields and click Save.
- Repeat these steps to add more items to the collection.
Step 2 | Adding a 'Category' field to your items collection
Add a 'Category' field to any items collection to connect it with a category collection. For example, if you have a "Pizza Menu" items collection and a "Cities" category collection, you can add a "Cities" 'Category' field to organize your pizza menu items by city (e.g. New York, Chicago, Detroit).
When you add a 'Category' field, Wix automatically creates an 'Assigned Items' field in the connected category collection and a hidden 'Primary Category' field in your items collection. The 'Assigned Items' field shows which items are linked to each category, while the 'Primary Category' field stores just one category per item for SEO purposes — even when the 'Category' field holds several. You can only add one 'Category' field per items collection, and you can't duplicate it.
To add a 'Category' field to your items collection:
- Go to CMS in your site's dashboard.
- Click the items collection in which you want to add a 'Category' field.
- Click Manage Fields.
- Click + Add Field.
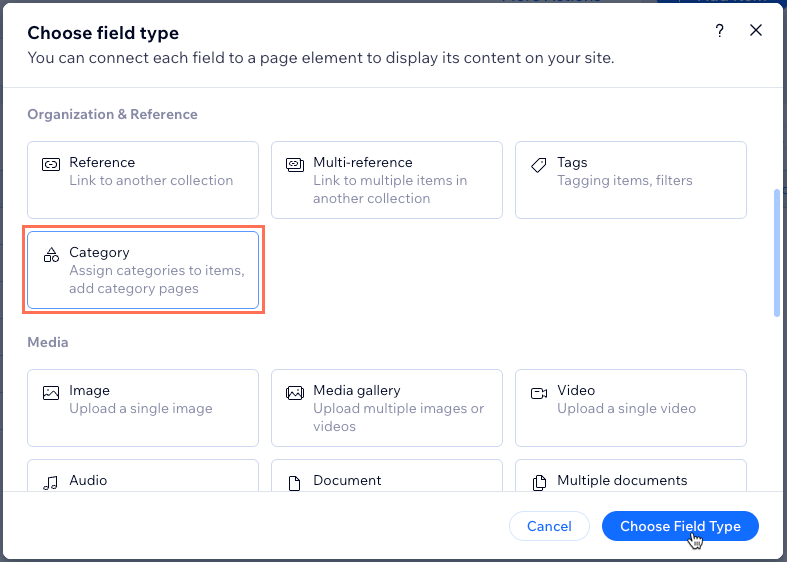
- Under Organization & Reference, select the Category field type and click Choose Field Type.
- Click the Category collection dropdown and choose the category collection you want to assign to the field.
- (Optional) Edit the Category field name, the Field ID that cannot be changed later, and Help text, if needed.
- Click Save.

Notes:
- Your item collection now includes that 'Category' field type you just added and a new hidden 'Primary Category' field type.
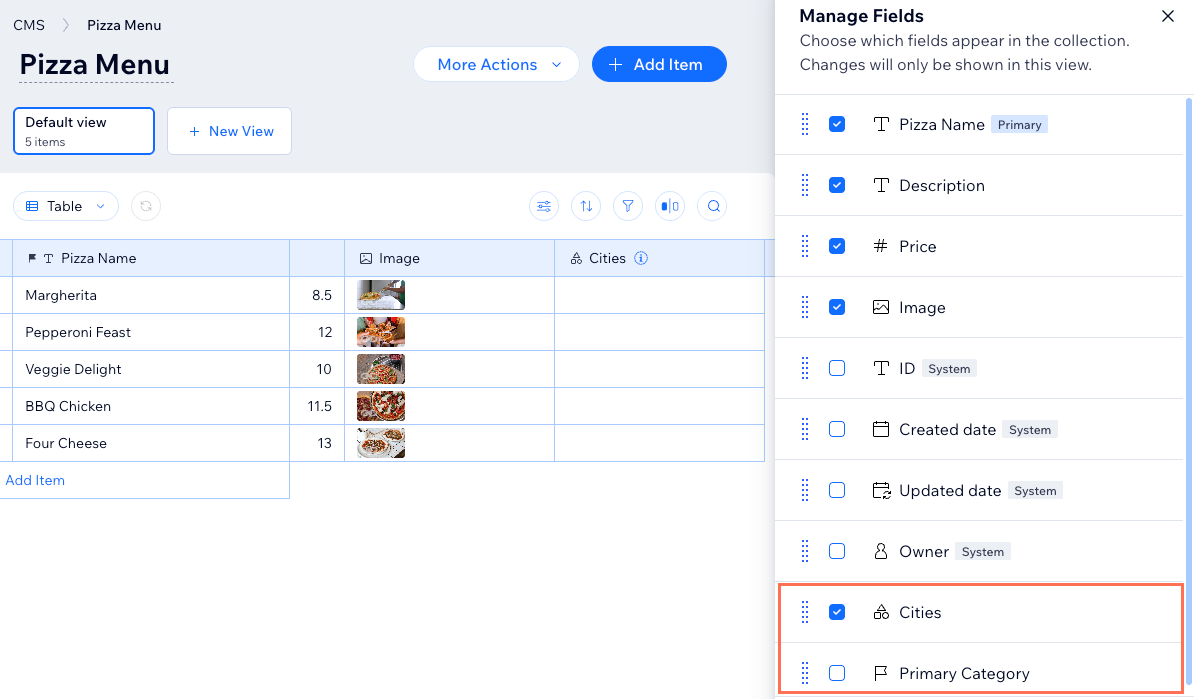
- Your category collection now includes an 'Assigned Items' field type that connects to the consuming (item) collection.
Step 3 | Assigning categories to items
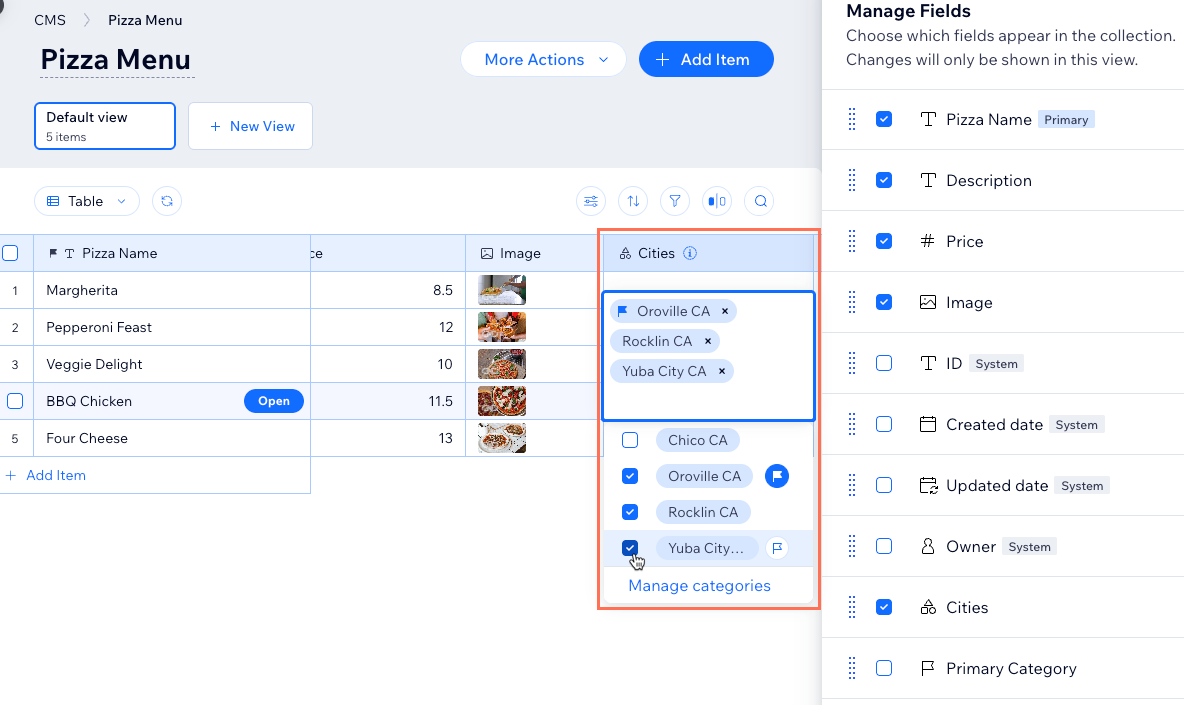
After you add the 'Category' field to your items collection, you can assign categories to each item. The 'Category' field can store more than one category for the same item. For example, one pizza menu item may be available in multiple city categories.
To assign categories to items:
- Go to the items collection in which you just added a 'Category' field.
- Click the relevant cell in the 'Category' field and select the categories you want to associate with the item. The first category you assign to an item become its primary category. You can click the Flag icon
 next to a different category to make it the item's primary category. Click outside of the panel to finish selecting an item's categories.
Tips:
- Click Manage categories to view and manage the category collection content.
- If you need to assign a category that has not been created yet in the category collection, enter the name of the category and click Create '{Category-name}'.
- Repeat step 2 above for each item in the collection that you want to categorize.
Step 4 | Managing categories from the category collection
Category assignments work in both directions — you can assign categories from the items collection using the 'Category' field, or from the category collection using the 'Assigned Items' field. Both collections stay in sync automatically.
Managing from the category collection side is helpful when you want to focus on a single category and review everything linked to it. For example, open the "New York" category in your "Cities" collection to see all the pizza menu items assigned to it from one place.
To manage categories from the category collection:
- Go to CMS in your site's dashboard and select the relevant category collection.
- Locate the 'Assigned Items' field type, which is on the far right of the table by default.
Tip: The Assigned Items icon appears next to the field name and the field name matches the name of the items collection.
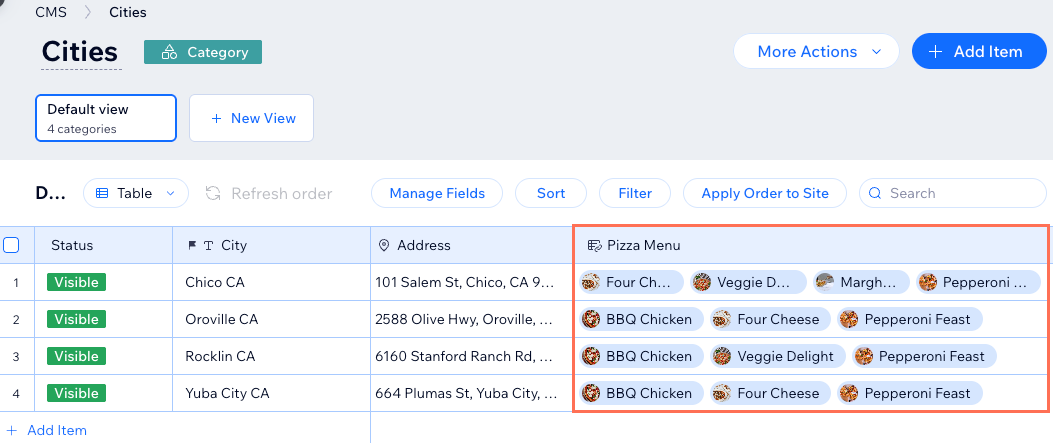
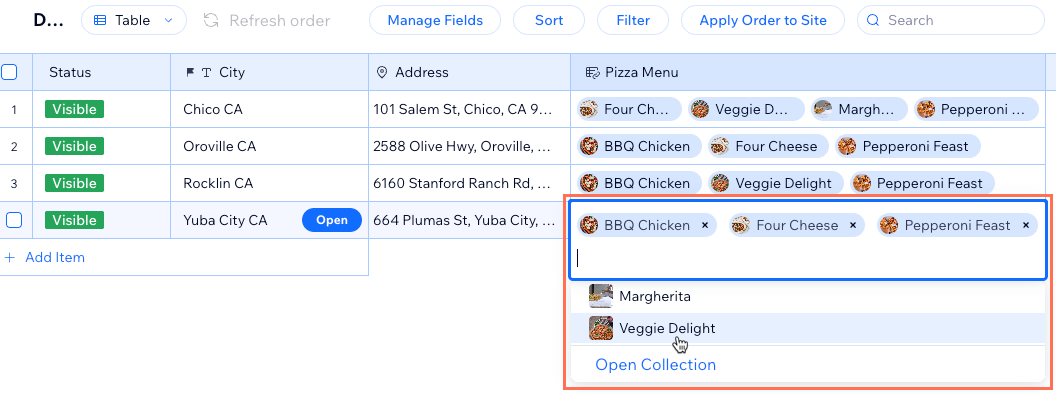
- Click the relevant 'Assigned Items' field next to the relevant category to see which items are assigned to the category.
- Edit the assigned items:
- Add item: Select the item you want to assign to the category in the list of options.
- Remove item: Click the X on the relevant item to remove it from the category.
- Open collection: Click Open Collection to view the assigned items category.
- Repeat steps 3-4 above for each category in which you want to edit the assigned items.
FAQs
Click below for answers to common questions about category collections.
What are the limitations of category collections?
What happens if I delete a category collection?
What happens if I delete a 'Category' field in an items collection?
What's the difference between a 'Category' field and a 'Multi-Reference' field?
Can I change the primary category of an item?
 next to the relevant category to make it the primary category.
How do I view the hidden 'Primary Category' field?
Can I hide a category from my live site?
Can I sort or filter my collection view by a 'Category' field?
