

CMS: Displaying Blog Posts in a Repeater or Table
5 min
In this article
- Step 1 | Add a repeater or table
- Step 2 | Add and connect a dataset
- Step 3 | Connect the table or repeater to the dataset
- Step 4 | Adjust the dataset settings
- (Optional) Step 5 | Only show posts from a specific category
You can use the CMS (Content Management System) to display your blog posts within a table or a repeater. This gives you extra flexibility with the design of your blog posts.
Important:
With this method of displaying blog posts in a repeater or table, visitors cannot comment on or 'like' blog posts.
Before you begin:
- Add Wix Blog to your site and create posts and categories.
- Add Wix CMS to your site.
- Enable Wix app collections so you can connect site elements to your blog content.
Step 1 | Add a repeater or table
Go the page in your editor where you want to display the blog posts. Then add a repeater or table to the page. Repeaters display content using various customizable elements such as text, images, and buttons. Tables allow you to display the content using rows and columns. Choose the element that best fits your needs for displaying the posts.
Learn how to:
Step 2 | Add and connect a dataset
Use a dataset to connect your repeater elements or table to the content in your blog collection.
Wix Editor
Studio Editor
- Go to your editor and navigate to the relevant page.
- Click CMS
 on the left.
 - Click Add Content Elements.
- Click Dataset.
- Click the Choose a collection drop-down, scroll down past Wix App Collections and select Posts under the Blog Wix app collection.
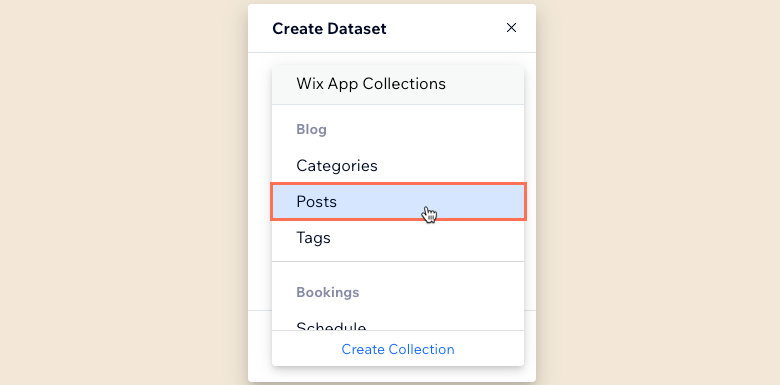
- Enter a name for the dataset and click Create.
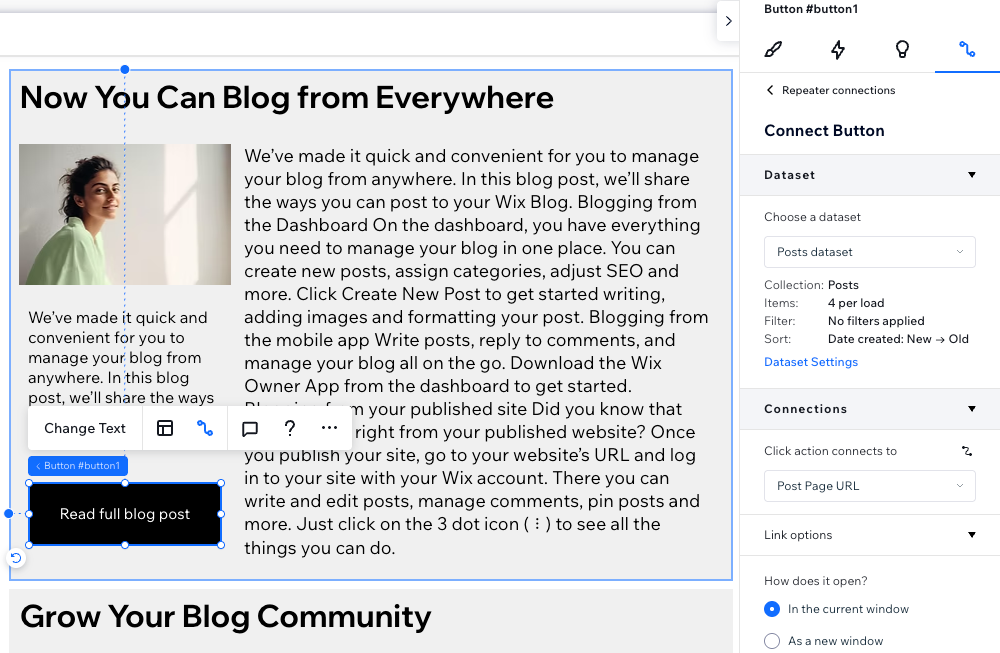
Step 3 | Connect the table or repeater to the dataset
Connect the table or repeater's components (e.g., text, images, buttons) to specific fields in the dataset.
- Click the repeater or table in your editor.
- Click the Connect to CMS icon
 .
. - Click the Choose a dataset drop-down and select the dataset that connects to your blog posts collection.
- Under Connections, connect the elements (for repeaters) or columns (for tables) to the relevant blog collection fields. View a full list of the Wix Blog 'Posts' collection fields.
Step 4 | Adjust the dataset settings
Fine-tune how the connected collection content interacts with your repeater or table. Make sure the dataset mode is set to 'Read'. You can add filters to show only certain posts and sorts to set the order in which the items load. If you're using a repeater, edit the Items per load field to control the number of items that initially load. Learn how to edit dataset settings.
For tables:
The Items per load field does not apply to tables. You can limit the number of items displayed by clicking the Layout icon  , then setting a custom table height and enabling pagination.
, then setting a custom table height and enabling pagination. You may also want to add:
- A pagination bar to your repeater to separate the posts into 'pages' of items.
- 'Load More' or navigational buttons for your repeater.
(Optional) Step 5 | Only show posts from a specific category
You may want to only show blog posts from a specific category in your table or repeater. To do so, add another dataset that connects to your blog 'Categories' collection and filters for the specific category. Then, add a filter to your 'Posts' dataset that uses the 'Categories' dataset to determine which category of blog posts to display.
- Add another dataset and connect it to the blog Categories collection:
- Click CMS on the left.
- Click Add Content Elements.
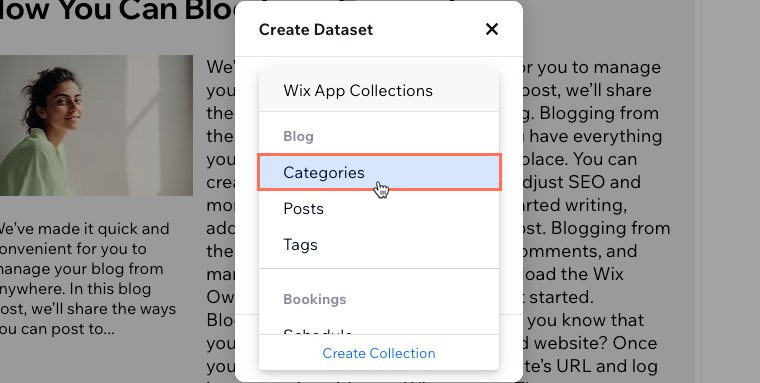
- Click Dataset.
- Click the Choose a collection drop-down, scroll down past Wix App Collections and select Categories under the Blog Wix app collection.
- Enter a name for the dataset and click Create.
- Click CMS
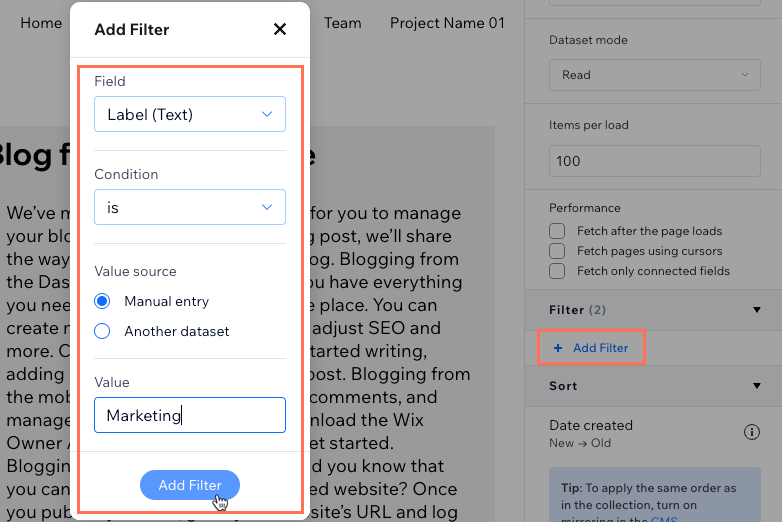
- Add a filter to your 'Categories' dataset:
- Click + Add Filter in the dataset settings.
- Enter the name of the category that you want to show in the Value field.
Note: Leave the Field set to Label (Text), the Condition set to is, and the Value source set to Manual entry. - Click Add Filter.
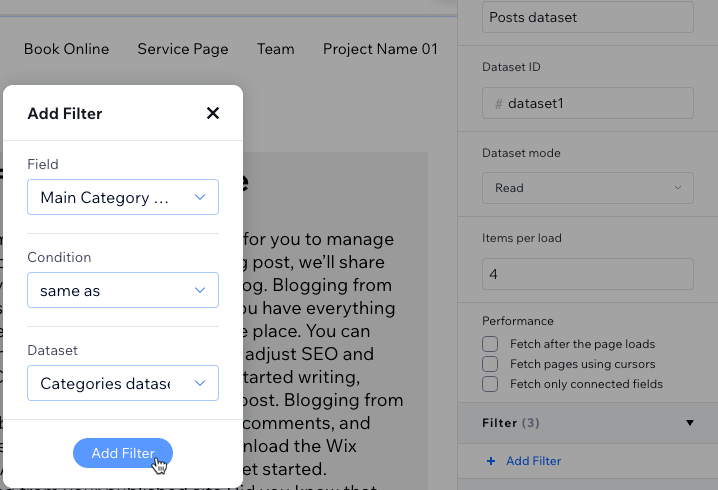
- Add a filter to your 'Posts' dataset that uses the 'Categories' dataset to determine which category of blog posts to display:
- Click View All Page Datasets at the bottom of the datasets panel on the right.
- Click the More Actions icons next to your Posts dataset and select Dataset settings.
- Click + Add Filter in the dataset settings.
- Click the Field drop-down and select Main Category (Categories).
Note: Leave the Condition set to same as and the Dataset set to Categories dataset. - Click Add Filter.
After adding this filter, your repeater or table should adjust to only show blog posts from the category you entered in the 'Categories' dataset filter.
