CMS: Displaying Collection Content on Your Wix Stores Product Page
10 min
In this article
- Step 1 | Create a collection that references your Wix app collection
- Step 2 | Set up datasets and connect elements to them
Your Stores Product page has different versions for each of your products that share the same layout. Using the CMS (Content Management System), you can now customize this page to include additional product details that are saved in a separate CMS collection. You can also hide default Product page contents and instead display them in supported elements for more control over the page layout. This gives you the ability to personalize your Product page and enhance your product listings, creating a richer experience for your customers.
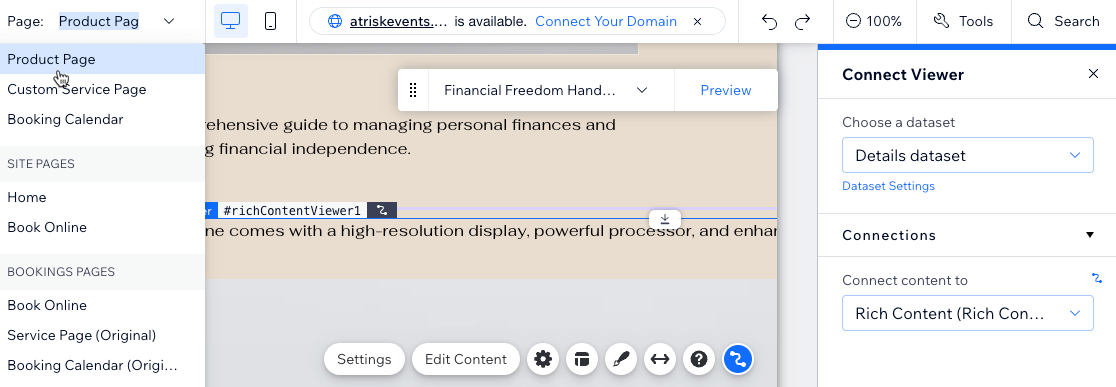
First, you create a 'Details' CMS collection that references your Stores Wix app collection. This 'Details' collection is where you'll save the additional info you want to integrate into your Product page. Then, set up datasets on your page, connecting them to your Stores Wix app collection and your 'Details' CMS collection. Finally, connect supported elements, like the Rich Content element, to your 'Details' collection to display the additional information.
If necessary, you can hide the default content on your Product page widget and display it elsewhere by linking elements to your Stores Wix app collection. For example, you could hide the Product page's built-in gallery, then add a pro gallery and connect it to your Stores Wix app collection's Media Gallery field type. This gives you more control over customizing your gallery and displaying it anywhere on the page. The same goes for any of the Stores widget elements you'd like more control over.
This can be a game-changer for your online business. Imagine being a boutique owner who wants a uniquely tailored Product page that gives customers a more in-depth look at your products. With this process, you can easily add extra details, such as a product's backstory or specific care instructions, right on your customized Product page.
Before you begin:
- Make sure to add the CMS to your site if you haven't already.
- Enable Wix app collections so you can use Wix Stores with the CMS. Your Stores Wix app collection is read-only and automatically includes all the product details you've set up in Wix Stores.
Step 1 | Create a collection that references your Wix app collection
If you want your Product page to include details about your products that do not already exist in Wix Stores, you need to create a CMS collection with the additional info. For each item in the collection, you'll also need a reference field that connects to the relevant product in your Stores Wix app collection.
Tip:
If you don't need to show additional product info, and instead, only want to use existing Wix Stores data in connected page elements on the Product page, skip this step.
To create a CMS collection that references your Stores Wix app collection:
- Create a Multiple item collection where you will keep the additional info you want to integrate into your Product page.
- Click + Add Item to add items for each product you want to save additional details about.
- Click + Add Field to add fields for each type of content you want to save (e.g. Rich Content).
- Click the relevant cells to add your content to each item.
- Add a Reference field type and connect it to the Stores Wix app collection:
- Click Manage Fields then click + Add Field.
- Select Reference and click Choose Field Type.
Tip: Select the Multi-reference field if you want to use an item's content for more than one product. - Enter the Field name.
- (Velo only) If necessary, update the Field ID, which is used in the site's code. You cannot update this ID later.
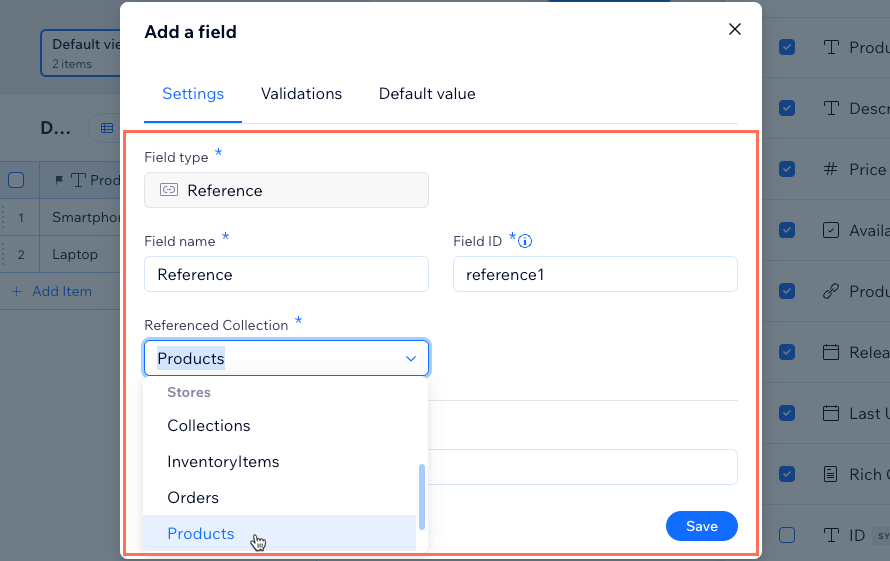
- Click the Referenced Collection drop-down and select Products under Stores.
- (Optional) Enter help text to include a tooltip in your collection next to the field name.
- Click Save
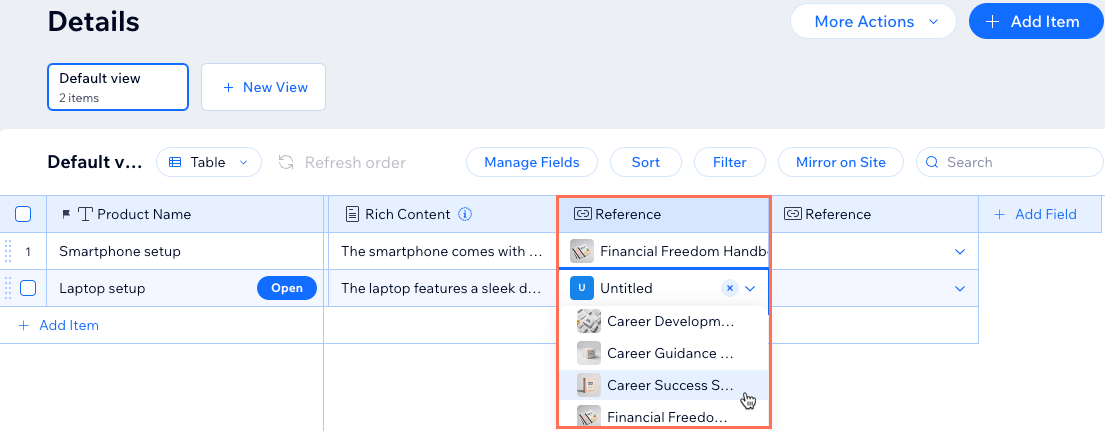
- For each item, click the reference field and select the relevant product. You can select multiple products if you added a multi-reference field in the previous step.
Step 2 | Set up datasets and connect elements to them
Datasets are the tools that link page elements like text, buttons, and images to collection content. They facilitate the connections between the elements and your collection field contents.
You'll need to add one or two datasets to the Product page, depending on whether you want to show additional details from your CMS collection or not.
The steps in this section show you how to add the following datasets to your Product page:
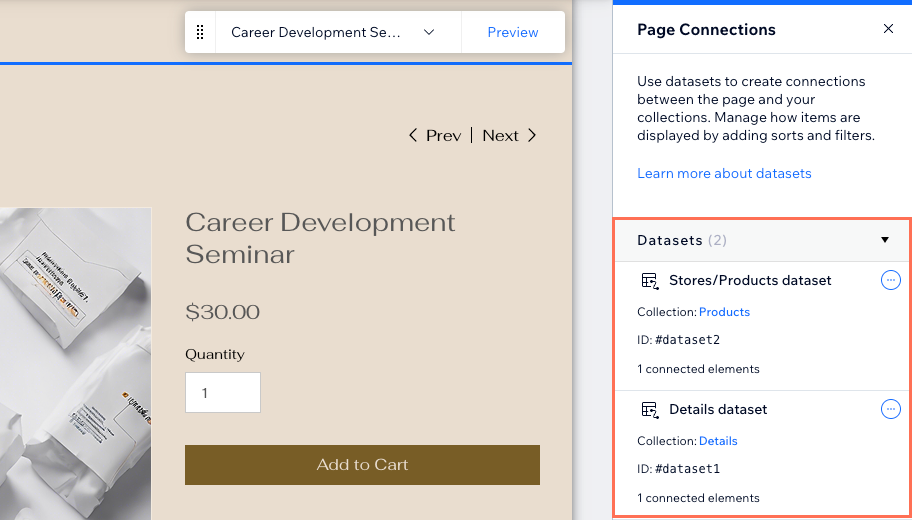
- Wix app collection dataset: This reads product info that is stored and managed within your Wix Stores app. Add a URL slug filter to this dataset. You can connect supported elements to the dataset to show content from Wix Stores.
- Details dataset: This reads the additional content you've stored about your products from your own CMS collection. Add a filter to the dataset that filters your collection's reference or multi-reference field. Connect elements, such as the Rich Content element, to this dataset to display the additional content you've added to your CMS 'Details' collection.
Note: You do not need this dataset if you do not need to display additional info from your 'Details' CMS collection, and instead just want to show content from your Stores Wix app collection.
Wix Editor
Studio Editor
- Go to your editor.
- Go to your Product page:
- Click Pages & Menu
 on the left side of the editor.
 - Click Store Pages and select the Product Page.
- Click Pages & Menu
- Add a dataset that connects to your 'Details' CMS collection and filters for your reference or multi-reference field:
Note: Skip this step if you do not need to show additional details from a 'Details' CMS collection.- Click CMS
 on the left.
 - Click Add Content Elements.
- Click Dataset.
- Click the Choose a collection drop-down and select your 'Details' collection.
- Edit the Dataset name if needed and click Create.
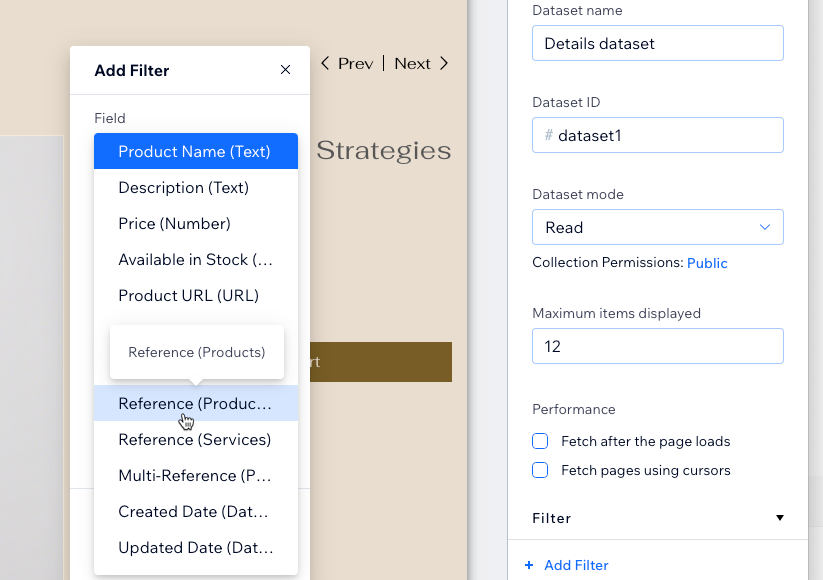
- Click + Add Filter under Filter in the dataset settings.
- Click the Field drop-down, select your Reference (Products) field or Multi-Reference (Products) field, then click Add Filter.
- Click CMS
- Add a dataset that connects to your Stores Wix app collection:
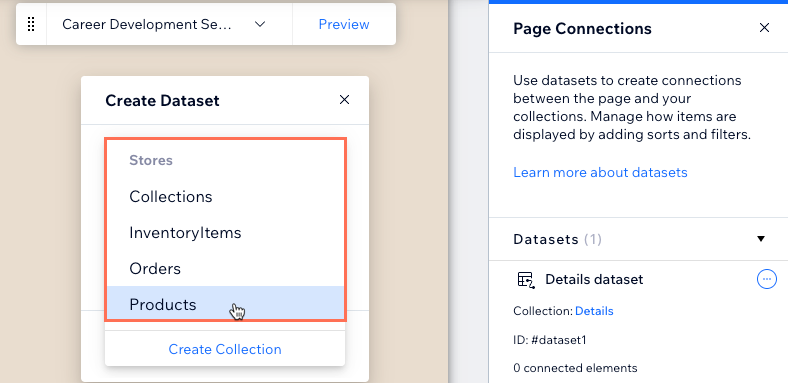
- Click Add a Dataset at the bottom of the panel on the right.
- Click the Choose a collection drop-down and select the Products collection under Stores.
- Edit the Dataset name if needed and click Create.
- Add a URL slug filter to your Stores/Products dataset:
- Click the More Actions icon
 next to your Stores/Products dataset and select Dataset settings.
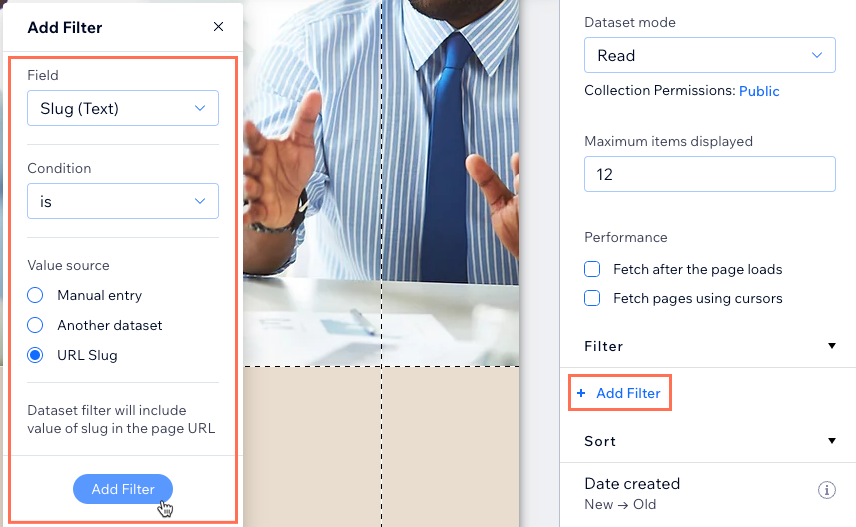
 - Click + Add Filter under Filter.
- Click the Field drop-down and select Slug (Text).
- Leave is selected as the Condition.
- Under Value source, select URL Slug.
- Click Add Filter.
- Click the More Actions icon
- Add the supported elements that you want to connect.
- Connect the elements to the relevant fields in the relevant dataset:
- Details dataset: Connect to the collection fields in this dataset to use content from your 'Details' CMS collection.
- Stores/Products dataset: Connect to the collection fields in this dataset to use content from your Stores Wix app collection.
Tip: You can add a button or image, then connect its click action to the Add to cart dataset action to create your own 'Add to Cart' button. Similarly, connect to the Open quick view action to create a button that opens the 'Quick View' window.

- (Optional) Hide default details from your Product Page widget:
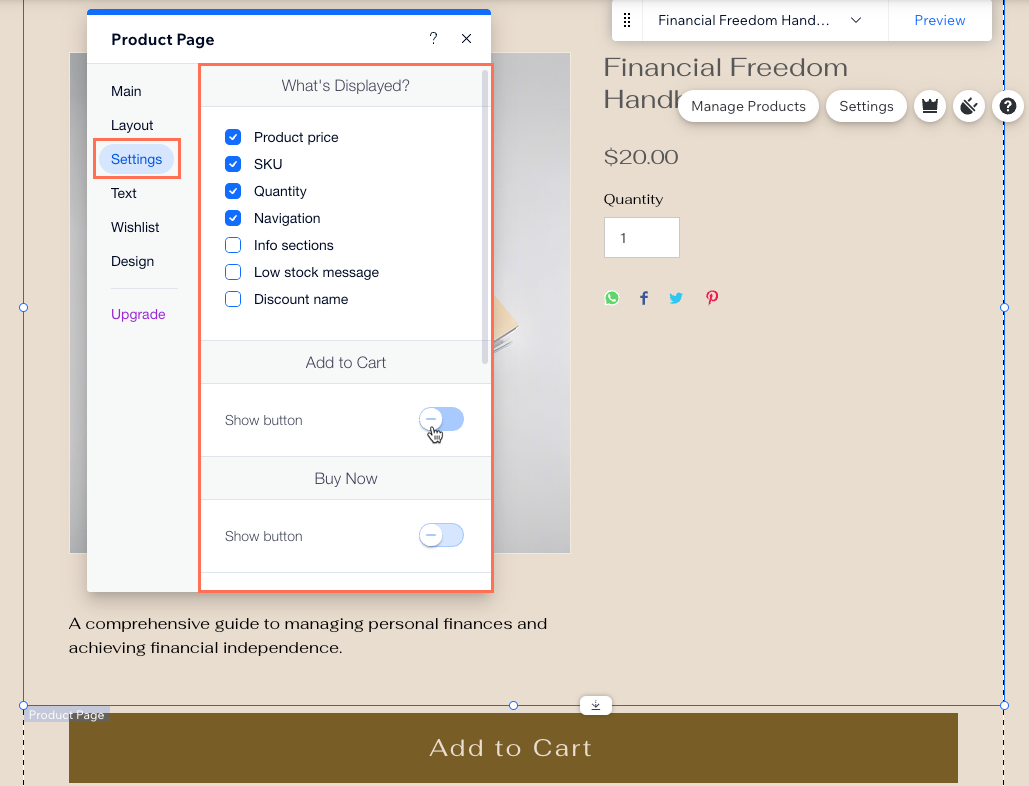
- Click the Product Page element and select Settings.
Note: If you don't see Settings, you're using the new Wix Stores Product Page. Select the Elements icon instead and uncheck the boxes next to each widget element you want to hide. Then skip ahead to step 9.
 - Click the Settings tab.
- Uncheck the checkboxes next to each detail you want to hide from the Product page widget.
- Disable the toggle next to the relevant buttons or icons to hide them from the widget.
- If necessary, customize your Product page widget further.
- Click the Product Page element and select Settings.
- Use the Preview toolbar to test the connections for the relevant products.
- Publish your site when you are ready to make the changes go live.


