

AI Tools: Creating a Task with the AI Custom Agent
10 min
In this article
- Step 1 | Create a new task
- Step 2 | Define the task
- Step 3 | Set a trigger to automate the task
- Step 4 | (Optional) Connect an integration
- Step 5 | Test your task
- FAQs
The AI Custom Agent runs tasks proactively to help you manage your business - no coding needed. Whether you want to automate follow-up emails, generate reports, or handle daily routines, the AI Custom Agent gives you the flexibility to create tasks in the way that works best for you.
Important:
The AI Custom Agent is an AI agent and as such may produce inaccuracies. Tasks may not executed accurately or exactly the same every time.
Step 1 | Create a new task
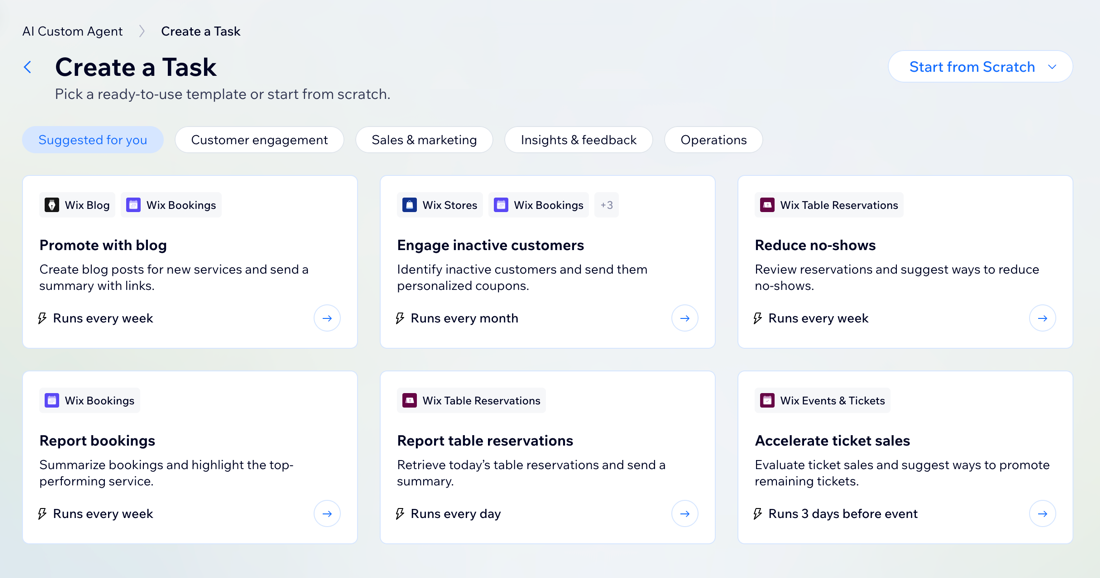
Start by defining the goal you want to reach with a task and choose how you want to create it. You can use a ready-made template, describe your task to AI, or build your own workflow from scratch.
Tip:
For best results, write your task in English, even if your account is in another language.
To create a new task:
- Go to Custom Agent in your site's dashboard.
- (1st time only) Click Let's Get Started and skip to step 4 below.
- Click Create Task.
- Choose how you want to create your task:
- Select a template: Browse ready-made templates for the most common business needs.
- Click a template to preview the workflow and tasks included.
- Click Edit Template to continue creating this task.
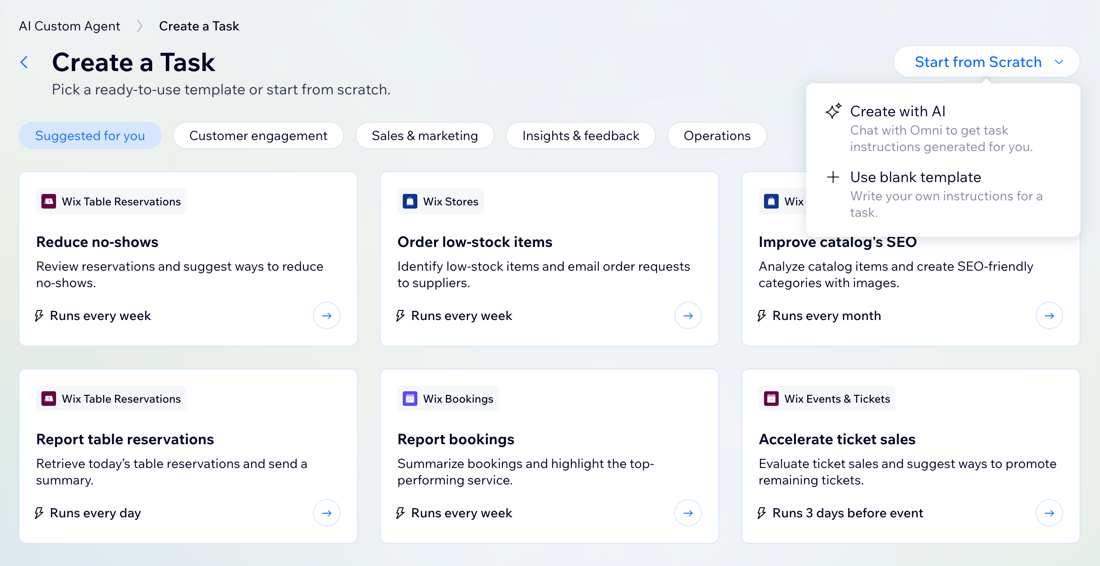
- Create with AI: Chat with Omni, your AI agent, to describe the goal or workflow you want help with. Click Start from Scratch at the top right and select Create with AI.
Tip: Omni will suggest and draft step-by-step instructions for your task, which you can review and edit. - Use a blank template: Enter your own instructions for the custom agent to follow. Click Start from Scratch at the top right and select Use blank template.
Tip: Continue following the steps below to learn how to fill out the task fields.
- Select a template: Browse ready-made templates for the most common business needs.
Step 2 | Define the task
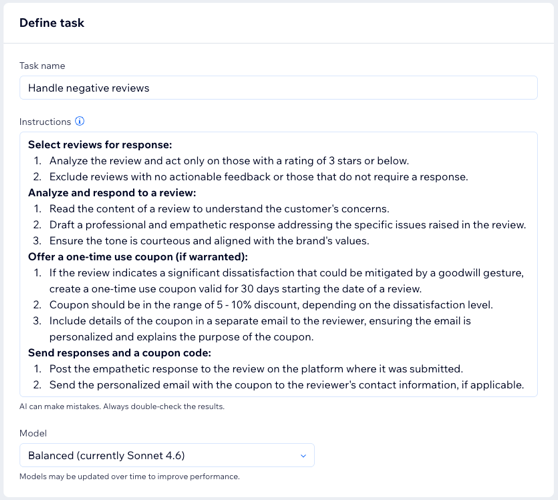
Defining your task tells the agent exactly what it should do and how. The clearer your instructions are, the better the agent can work for you. Here you’ll set the task’s name and add detailed step-by-step instructions.
When there's a task that the agent needs your approval to run, you'll get notified on your dashboard. Approvals are required by default for actions that impact data on your live site or communicates with your customers, like sending an email.
Created your task with a template or AI?
You'll see that your task's details have already been filled out for you, but you can edit and change every field.
To define a task:
- Enter a Task name that describes your task clearly.
- In the Instructions field, write out exactly what you want the agent to do.
Tip: Write clear and structured prompts to organize the instructions. For example, make important actions bold and break down steps into a numbered list to clearly state the order of actions. - Click the Model dropdown and select the Al model tier you want to use:
Note: This feature is still in Beta and might not yet be available for all users.- Basic (currently Haiku): Best for small and simple tasks, and optimizing your credits consumption.
- Balanced (currently Sonnet): Best for most tasks, with a good mix of speed, intelligence, and cost. Uses a medium credit cost.
- Smartest (currently Opus): Best for complex logic, multi-step reasoning, and nuanced decisions. Uses the highest credit cost.
Notes:
- Models may be updated over time to improve performance.
- Since each task runs in real time, results may differ slightly on each run to reach the goal you described in the task instructions.
Step 3 | Set a trigger to automate the task
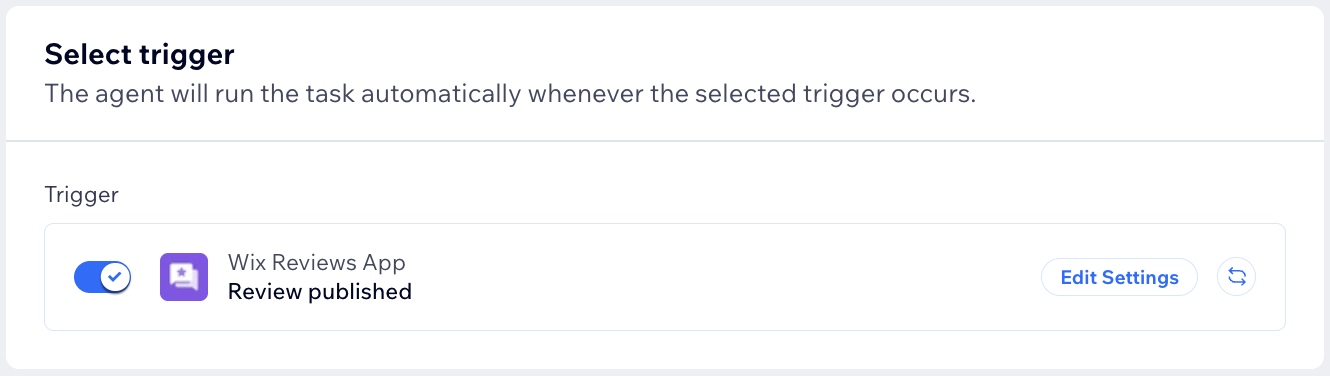
To automate a task, you need to connect it to an automation trigger, like a new order, form submission, or scheduled time. This means that once a task is triggered by an event on your site, the agent can run it on its own, letting it work 24/7.
To set a trigger:
- Click + Add Trigger.
Tip: If a trigger has been added for you, you can change it by clicking the More Actions icon and selecting Replace.
 - Choose a trigger event from the list (e.g. order placed, form submitted).
- Click Apply.
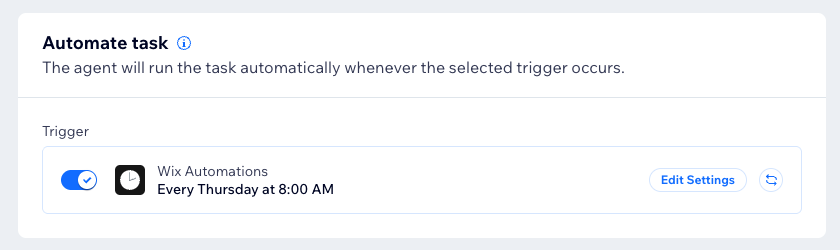
- (Optional) Click Edit Settings to customize the automation to your preferences.
Notes:
- Based on the trigger you choose, you will see different settings to finish configuring it. For example, if you added a Wix Automations scheduled time trigger, you need to set a time for the task to happen.
- The triggers you'll see listed differ depending on which apps are installed on your site (e.g. Wix Forms, Wix Stores).
Step 4 | (Optional) Connect an integration
Integrations let the agent connect to external platforms and tools so it can proactively perform tasks on your behalf. Built-in tools are always enabled and don't require authentication while external integrations require you to connect to third party services.
Click an option below to learn how to connect an integration to your task:
Connect an integration for the first time
Enable an integration that is already connected
 and then click the Account drop-down to select a different account.
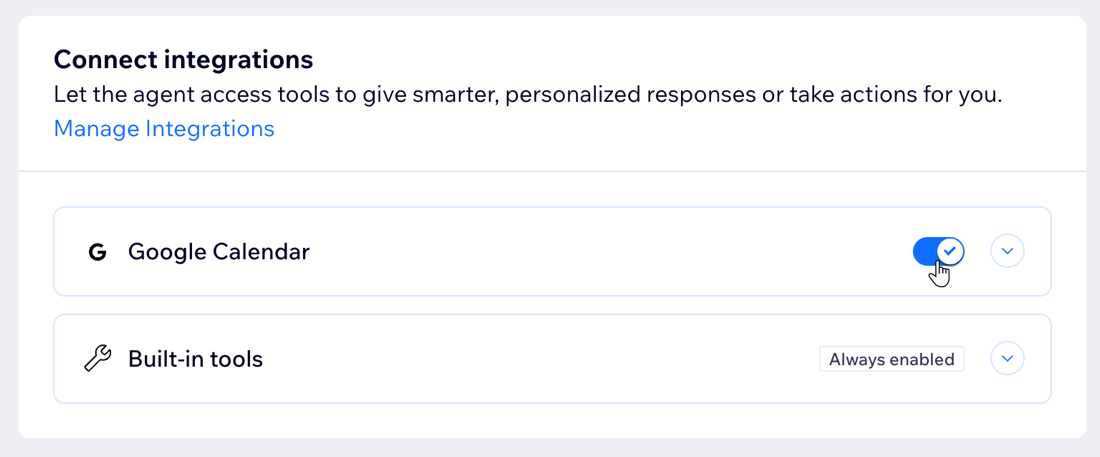
Step 5 | Test your task
Testing your task lets you see how the agent will perform before going live. By running a test, you can review the agent’s output and ensure everything works as you expect. This helps minimize surprises once the task is active.
We recommend running multiple tests to make sure the agent's output is consistent and reliable. For example, if different users submit negative feedback, you want to make sure the agent will send an email and respond similarly to each.
Notes:
- When testing a task, the agent will always ask for your approval, even if you’ve disabled the Require approvals toggle. However, it will not send you notifications, even if you have them enabled.
- The task gets tested using the instructions you see on the screen. In other words, if you have just saved the task, then changed the instructions (even if you did not click the save button) - the test will run on the new instructions.
To test your task:
- In the Test task section, click Run Test.
- (If your task has a trigger) Perform the relevant action on your site. For example, leave a review on your site if "Review created" is the trigger.
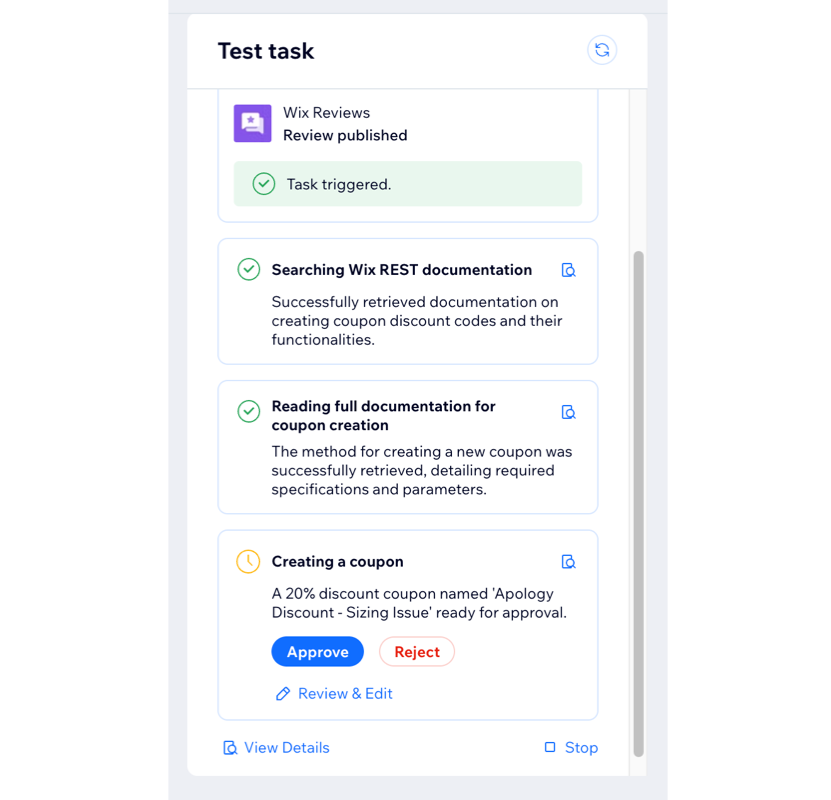
Note: If you have a scheduled trigger, it will run automatically during your test. - Choose how to handle the test's result:
- Approve: Approve the agent's proposed action.
- Reject: Reject the agent's proposed action.
- Review & Edit: Go over the agent's proposed action and make any necessary changes. For example, if the agent creates a coupon for 15% off, you can edit the value before approving the action.
- Inspect your data: View the code for your task's data. Click View details to inspect your full task data log or click the View details icon
 next to each step to view request and result data.
- When you’re happy with the result, click Save to activate the task.
Tips:
- Click the Start over icon
 to restart the test.
 - Click Stop to prevent the agent from running the test.
FAQs
Click a question below to learn more about creating tasks.
Can I create multiple tasks for my agent?
Who can access the AI Custom Agent dashboard?
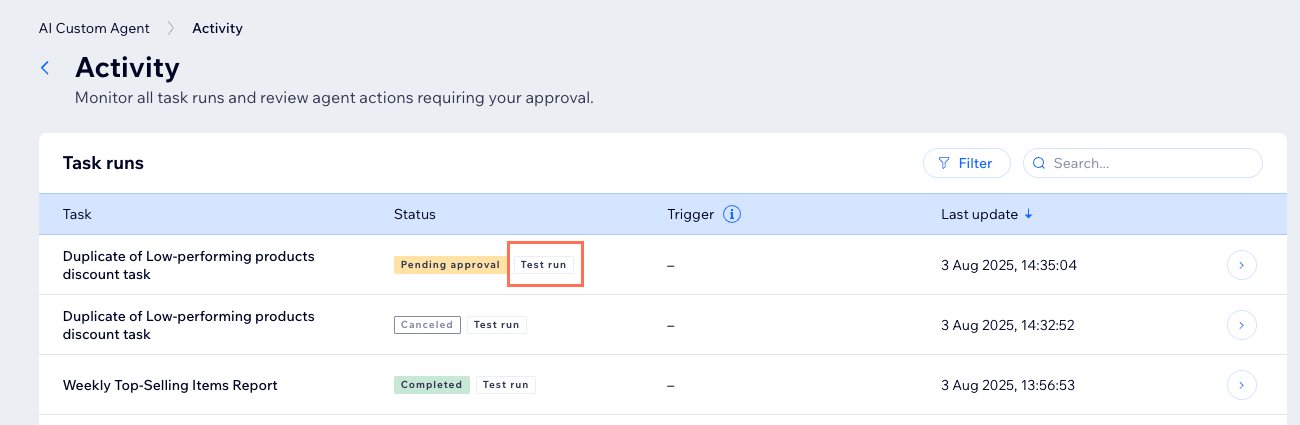
How can I track the tasks the AI Custom Agent has performed?
Can I manually trigger a task?
What should I do if the AI Custom Agent runs a task differently than I expected?
How do I re-authenticate or remove an account that's connected to an integration?
 at the top.
What are some best practices for creating a task with AI?
What happens to a task run if I change the model tier?
