Wix Mobile Apps: Creating and Connecting an Apple Developer Account
5 min
In this article
- Step 1 | Create and set up your Apple Developer account
- Step 2 | Create and connect your push notification and API Key
- Frequently asked questions (FAQs)
Creating an Apple Developer account is the first step to get your own native app live on the App Store. You complete most of the process on Apple’s Developer website, with Wix guiding you at every step.
From your mobile app dashboard, follow the instructions to register for an account. Once Apple provides details like your API Key, return to your dashboard and enter the information. Invite Wix to your app, so we can submit it to the App Store for you.
Important:
- To create an Apple Developer account you also have to enroll in Apple's Developer Program. This is a separate cost through Apple starting at $99 USD a year.
- This article covers the new developer account setup, which isn’t available to all users yet. If you're using the previous version, click here.
Step 1 | Create and set up your Apple Developer account
To start using Apple’s Developer Program, create an Apple ID if you don’t already have one. Then, create an Apple Developer account and connect it to Wix so we can verify that you are the owner of the account. After you create and set up your Apple Developer account, it can take a few business days before Apple approves it. Once Apple approves your account, you can create and connect your push notification and API Key

Already have an Apple Developer account linked with Wix?
Connect an existing account:
- Follow steps 1-3 below.
- Click Connect Existing Account under Apple Developer account, then click Connect.
- Click Connect to confirm.
Note: Once your existing account is connected, you can skip the rest of the steps in this article.
To create and set up your Apple Developer account:
- Go to Mobile App in your dashboard.
- Click the Your own mobile app tab or click the tab with the name of your own mobile app.
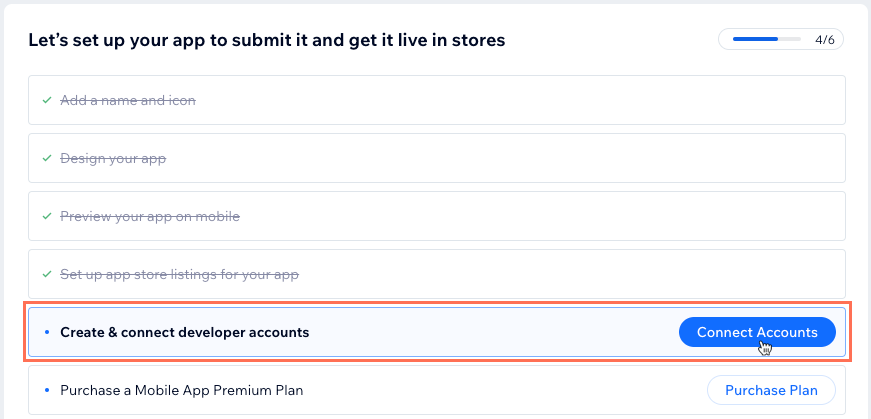
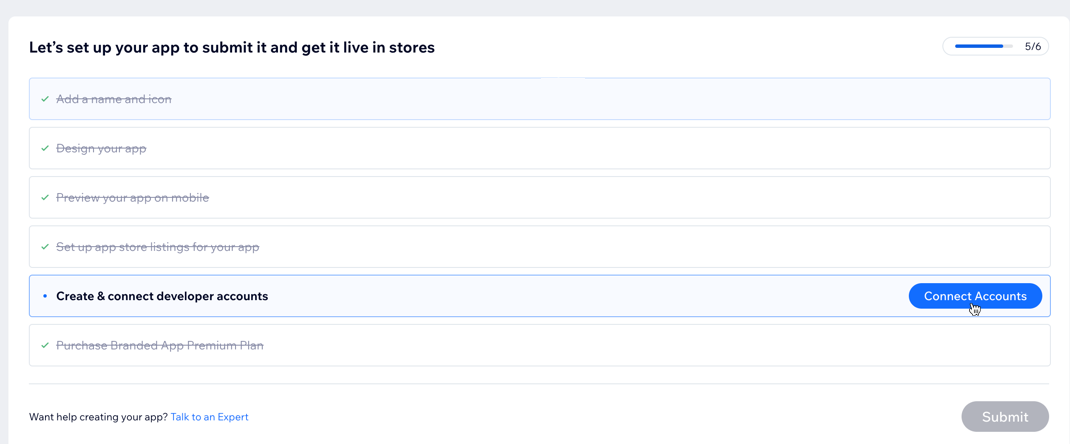
Note: If this is your first time in the mobile app dashboard, click Get Started to start building your app. - Scroll down and click Connect Accounts next to Create & connect developer accounts.

- Click Create and Connect under Apple Developer account. This is where you'll provide Wix with all the necessary information to connect to your Apple Developer account.
Note: If you already have an Apple Developer account, select whether you want to connect a new or an existing account. - Click Get Started.
Note: You need an Apple ID before getting started. - (If you do not have an Apple Developer account) Click Create Account and follow the steps to create your account.
- Click Save and Continue.
- Enter your developer account email and click Save and Continue.
- Wait for Apple to approve your account.
Step 2 | Create and connect your push notification and API Key
Important:
It can take a few business days for Apple to approve your account.
Once Apple approves your account, create and connect your API Key. This is the final step to register your Apple Developer account and give Wix access to submit the app on your behalf.
Then, set up a push notification key with Apple to let Wix send notifications to your iOS app users. Once you connect your Apple ID, use it to enroll in the Apple Developer Program on Apple's website.
To create and connect an API key:
- Go to Mobile App in your dashboard.
- Click the tab with the name of your own mobile app.
- Scroll down and click Connect Accounts next to Create & connect developer accounts.
- Click Continue under Apple.
- Follow the instructions to create a push notification key under Create push notification key. You'll be asked to set up a key via the Apple Developer website. Then click Save and Continue.
- Connect your push notification key to Wix, then click Save and Continue.
- Follow the steps under Create API Key. You'll set this key from App Store Connect, then click Save and Continue.
- Once you've generated an API Key, follow the steps under the Connect API key section. Enter the Issuer ID, Key ID, and upload the API Key File.
- Click Finish.
Frequently asked questions (FAQs)
Here are some common questions asked about creating and connecting an Apple Developer account:
Do I need an Apple Developer account to have my own native app in the Apple App Store?
What is the cost of creating an Apple Developer account?
If I have other native mobile apps, can I link my existing developer accounts to my new app?
Can I publish my app on Google Play if I publish it in the App Store?
Once I connect an Apple Developer account can I change it to a different developer account?
What do I do with the emails I receive from Apple after I connect my account?
Can I change the developer name? I don't want my name on the app.
I have an issue with setting up my D-U-N-S Number with Apple. What do I do?
I already have an Apple Developer account. Can I set up Apple login?


