Wix Editor: Adding and Setting Up the Quick Action Bar on Your Mobile Site
3 min
In this article
- Step 1 | Add the Quick action bar
- Step 2 | Add actions
- Step 3 | Set up your actions
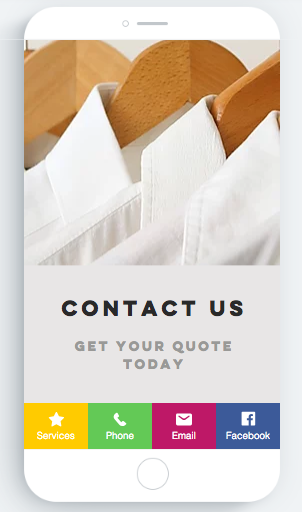
Add a Quick action bar (QAB) to your mobile site to help your visitors contact you instantly from their mobile devices. You can add actions such as Facebook and email, and create custom links to give your visitors immediate access to the information they need.

Step 1 | Add the Quick action bar
Add the Quick action bar to begin building a smooth, interactive experience for visitors on mobile.
You should know:
If you have Wix Chat installed, the QAB is automatically added to your mobile site. Go straight to step 2 to set it up.
To add a QAB:
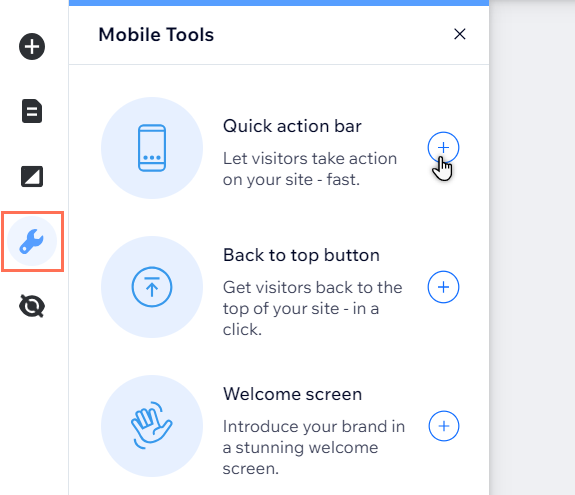
- Access the mobile Editor.
- Select Mobile Tools
on the left menu.
- Click the Add to site icon
beside Quick action bar.

Tip:
The QAB is added to the bottom of your mobile site. If your QAB covers up part of your footer, use the Editor toolbar to make the footer height 50 pixels longer.
Step 2 | Add actions
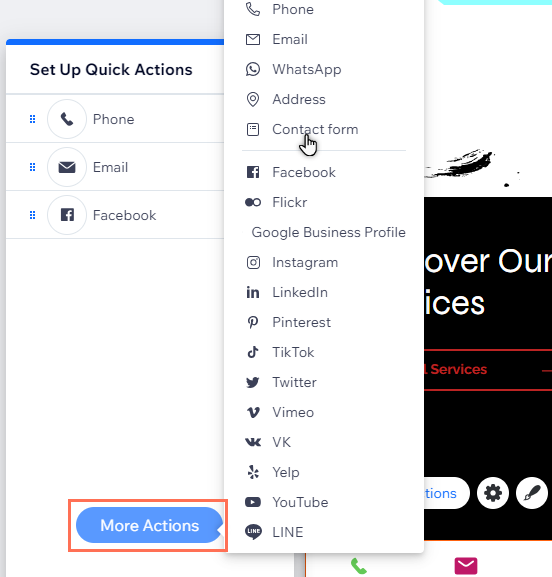
Add the actions you need to your QAB. There are several preset actions available such as Facebook, LinkedIn, and TikTok.
To add actions to your QAB:
- Select your QAB in the mobile Editor.
- Click Set Up Quick Actions.
- Click More Actions.
- Select the actions you want from the list to add them to your QAB.
Did you know?
You can add and set up a custom action to direct visitors to external URLs, documents, and more. Learn how to add and set up a custom action

Step 3 | Set up your actions
Once you've chosen the channels you want, add the relevant details to make it even easier for your visitors to contact you.
To set up your actions:
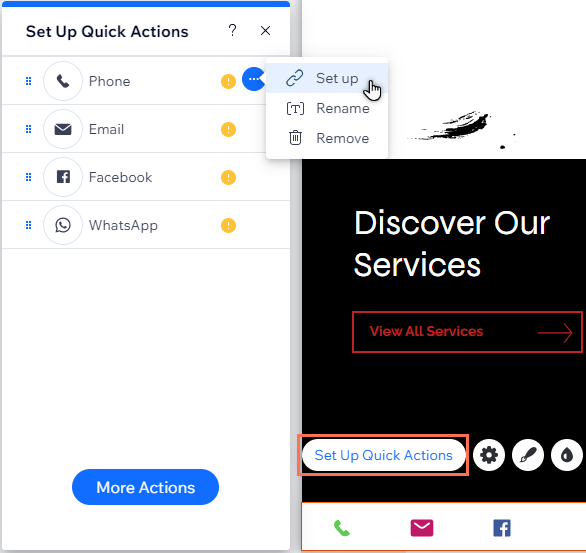
- Select your QAB in the mobile Editor.
- Click Set Up Quick Actions.
- Hover over an action in the panel and click the More actions icon
 .
. - Click Set up and enter the details for the action.

What's next?
You can manage your actions to update what you display, and customize the bar's design the way you want.


