

Wix Donations: Adding and Setting Up Wix Donations
14 min
In this article
- Step 1 | Add Wix Donations
- Step 2 | Create a donation campaign
- Step 3 | Display the campaign on your site
- Step 4 | Customize the donation form
- Step 5 | (Optional) Customize the Checkout Page
- Step 6 | Display multiple campaigns on your site
- FAQs
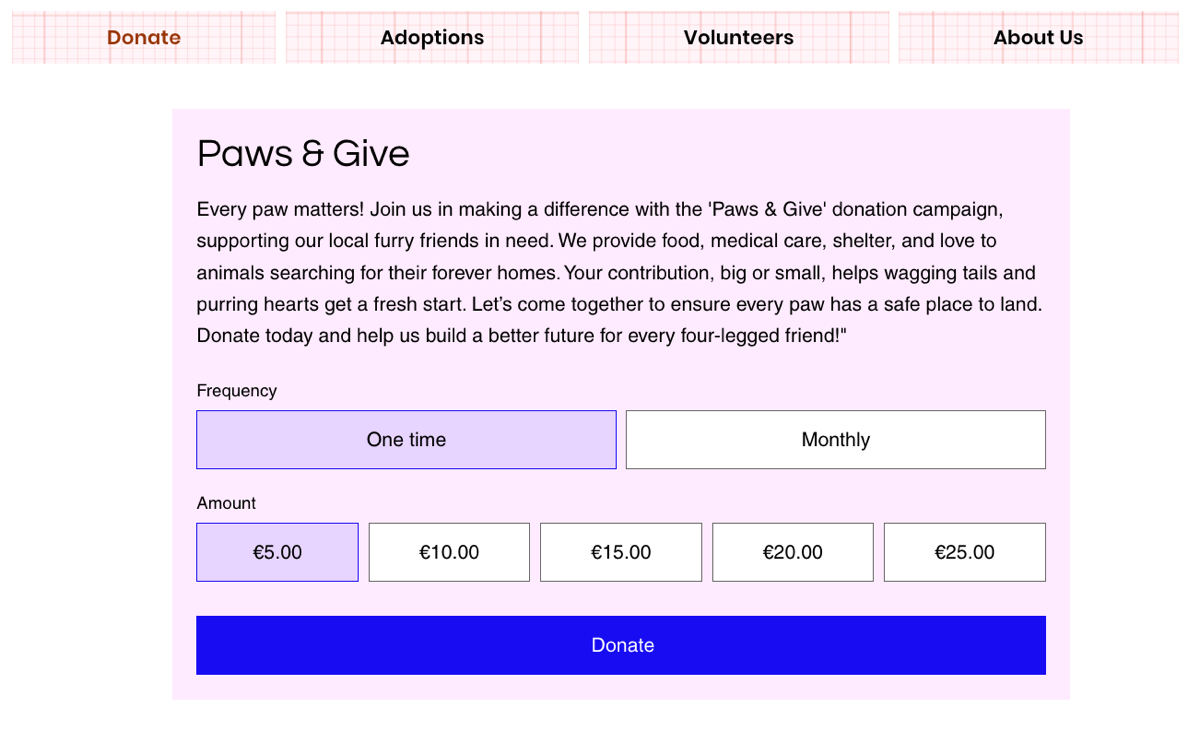
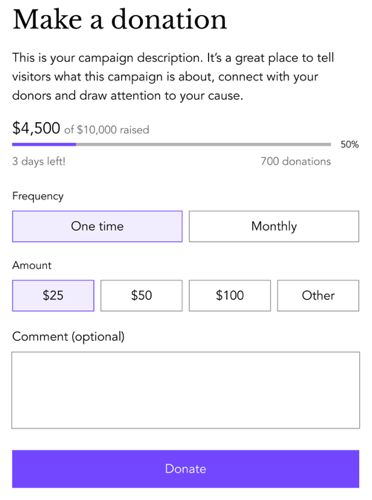
Wix Donations makes it easy for site visitors to donate to your cause. Create multiple donation campaigns and customize each one to suit your goals.
For example, if you run a local animal shelter and need funds for veterinary care, you can set up specific campaigns for different needs, allowing supporters to contribute.
Before you begin:
- To accept donations on your site, you need to upgrade your site to a plan that supports payments and connect a payment provider.
- To accept recurring payments from donors, set up a payment method that supports recurring payments.
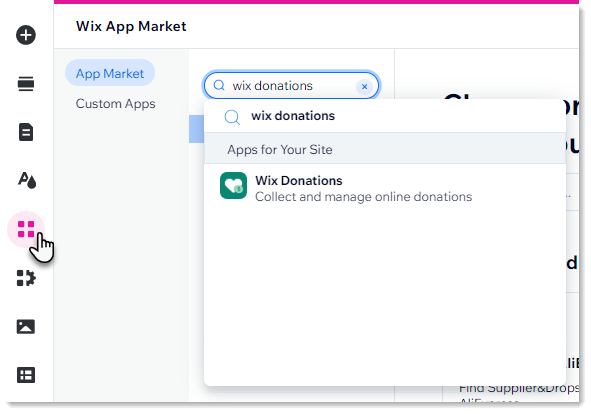
Step 1 | Add Wix Donations
To get started, head over to the App Market to add the Wix Donation app.
Wix Editor
Studio Editor
Wix Harmony Editor
- Go to your editor.
- Click Add Apps
 on the left side of the editor.
 - Search for the Wix Donations app in the search bar.
- Click Add to Site.
What's next?
- A Donations page with a donation form, and a Thank You page, are automatically added to your site.
- You can delete, duplicate, or rename the Donations page, create your own, or add the donation form widget anywhere on your site (like other pages or a popup) from the Add panel under Payments.
Step 2 | Create a donation campaign
For each type of donation you want to request, you can create a separate campaign. For example, if you run an animal shelter, you can create a campaign for dogs and a separate one for cats. You can choose whether each one has the same donation frequency, suggested amounts, and so on.
To create a campaign:
- Go to Wix Donations in your site's dashboard.
- Click Create Campaign.
- Enter a Campaign name.
Tip: This name appears on the Checkout Page and in your donor's email confirmation. If you plan on running multiple campaigns, give each one a clear name (e.g. "Donate for dogs") to help visitors select the right cause. - (Optional) Add a campaign image to appear next to its name:
- Click the icon under Image.
- Select or upload an image and click Add to Page.
- Set up your campaign using the options available:
Donation frequency

Donation amounts
 to delete an existing suggestion.
 to delete an existing amount.
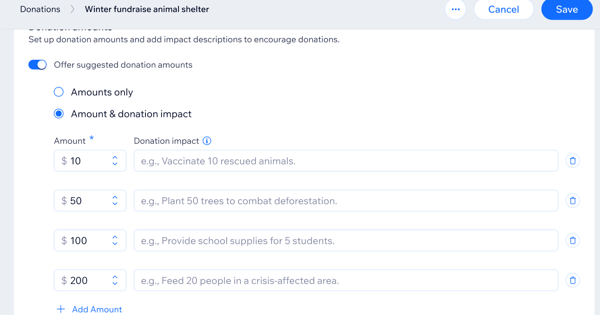
Campaign goal

Cover fees

Notes from donors

Step 3 | Display the campaign on your site
Now that you have at least one campaign, you can display it on your site. You can connect one campaign to a donation page.
To display a specific campaign in a donation form:
- Go to your editor.
- Navigate to your Donations page.
- Click the donation form.
- Click Choose Campaign and select an option:
- Select an existing campaign from the drop-down.
- Click Add New Campaign to create a new campaign.

What's next?
After selecting a campaign, the form title is still "Make a donation". You can edit the name and description in the next step.
Step 4 | Customize the donation form
Now that you created a campaign, you can customize it to suit your business needs and your site's design.
To customize the donation form:
- Go to your editor and navigate to your Donations page.
- Click the donation form.
- Choose what to customize:
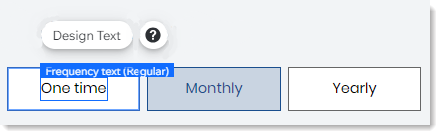
Edit the default "Make a Donation" title
Edit the default description
Hide campaign elements
 .
. Select default donation options
 .
.Adjust the layout
 .
.Design the form
 .
.Customize individual elements in the form

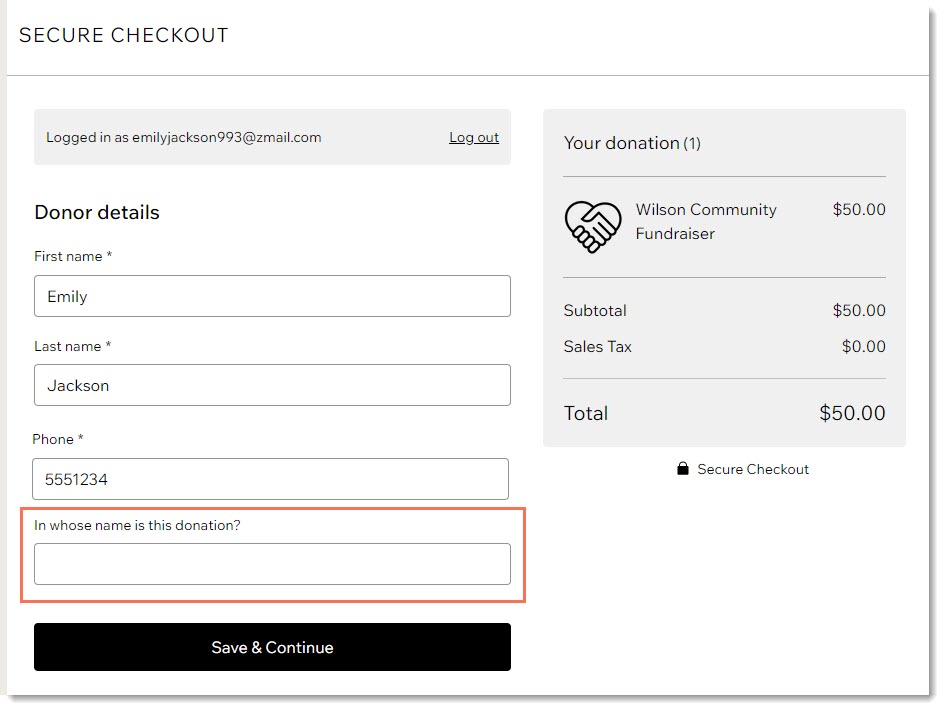
Step 5 | (Optional) Customize the Checkout Page
You can make any necessary customizations to the Checkout Page. For example, you can add extra fields to collect additional information.
Learn how to customize the Checkout Page.
Step 6 | Display multiple campaigns on your site
If you collect donations for multiple campaigns, you'll need to display multiple donation pages on your site - one for each campaign.
If you want your donation pages to have a similar look as well as similar settings, save time by duplicating a page you already set up.
Choose the kind of form you want to add:
Start with a duplicated, customized page
 .
.
Start from scratch
 next to Donations Pages, then click Create New Page.
Tip:
Want to create a free website for nonprofit organizations or a church? Explore our website builder for nonprofits or church website builder for templates, tools, and inspiration. You can also learn more about creating a fundraising website to collect donations for your cause.
FAQs
Click a question below to learn more about Wix Donations.
How can I add a donation form?
 on the left side of the editor.
 on the left side of the editor.
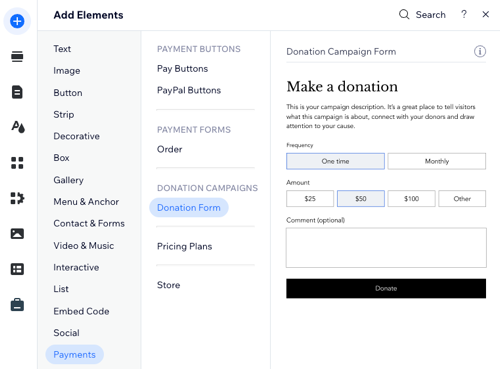
Can I edit my campaign goal?
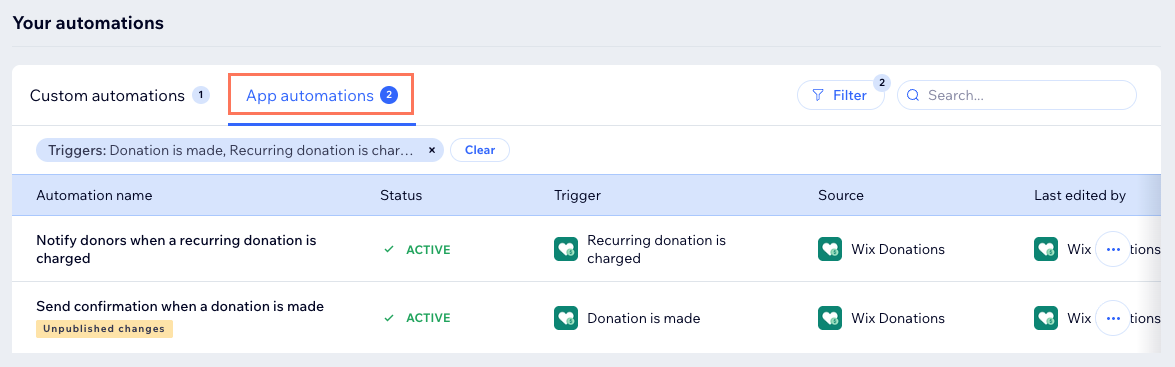
Which emails are sent to my donors?
Can I customize the emails my donors receive?
 next to the relevant email.
Are there any fees associated with accepting donations through Wix Donations?
Is it possible to automatically send an invoice every time I receive a donation?
What happens when donor chooses a recurring donation option (e.g. monthly donation)?
How do subscription renewals work?
Can the donor cancel their recurring donation by themselves?

Where can I view analytics reports about my donations?
How can I learn more about creating a successful nonprofit website?
