Studio Editor: Working with Site Typography
5 min
In this article
- Fonts and text styles
- Updating site typography
- Applying text styles to a page
- Applying a style to a text element
- Overriding text styles
- Enabling fallback fonts
Ensure your design is consistent across your client's site by setting the site typography. This area in the Site Styles panel is divided into Fonts and Text styles, which you can customize individually to match the look you want to achieve.
How do I access the site's typography?
Fonts and text styles
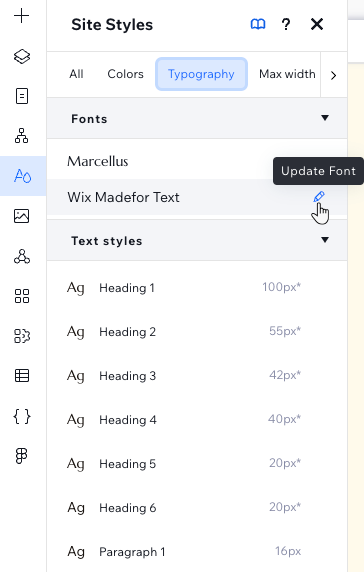
The Fonts section shows all of the fonts you are using in the site's text styles. When you change a font in the Fonts section, it automatically updates all of the text styles that were using the old font.
The Text styles refer to the individual text types used on the site (e.g. Heading 2, Paragraph 1).
Tip:
H1 - H6 are heading tags that are automatically assigned to these titles. Keeping the top-down hierarchy of your titles, in accordance with the heading tags, helps both SEO and accessibility.
Updating site typography
Revamp your design by updating the typography across your client's site. You can change the site fonts, or adjust the look of the 9 individual text styles (6 headings, 3 paragraphs).
What happens when I update text styles / fonts?
To update the typography:
- Click Site Styles
 on the left side of the editor.
 - Click the Typography tab.
- Choose what you want to customize - a font, or a text style:
- Font:
- Click the font you want to update under Fonts.
- Select a new font from the drop-down.
- Click Update to apply the new font.
- Text style:
- Click the text style you want to update under Text styles.
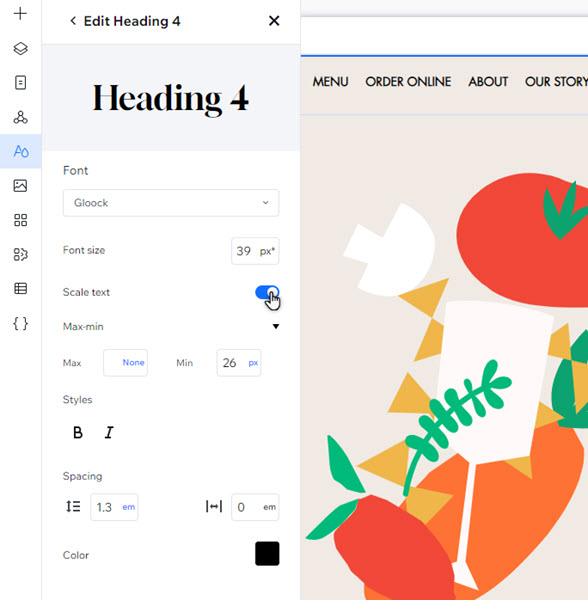
- Customize the text style as you wish:
- Choose a new font from the drop-down.
- Choose the font size.
- Make the text scale proportionally so it looks ideal on every screen size and set the maximum and minimum size in px (pixels).
- Bold and / or italicize the text.
- Set the line and character spacing.
- Choose the text's color.
- Go back to the main panel by clicking the Arrow icon
at the top left.
- Font:
Applying text styles to a page
Once you've established your client's site typography, you can easily add text elements with the relevant fonts and text styles.
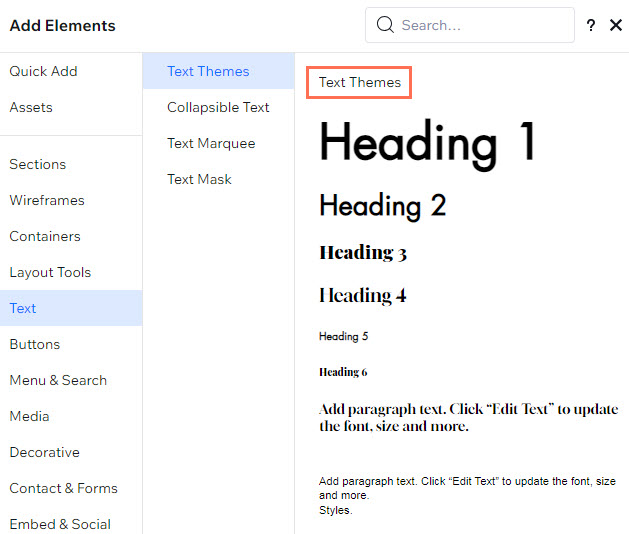
Head over to the Add Elements panel to add themed titles and paragraphs. Click Text and drag the relevant style under Text Themes to the desired location.
Themed elements are connected to the site typography, so they'll update automatically if you ever make changes to the Site Styles panel.
Applying a style to a text element
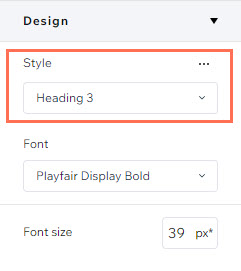
You can also apply a style on an existing text element on the page. Click Edit Text on the element and select the relevant Style from the drop-down in the Inspector.
This connects the element to the chosen text style, which means it'll update automatically if you ever make changes to it in the Site Styles panel.
Overriding text styles
If you change a text element's design after selecting a style (theme) for it, you're creating a "design override". This means that any updates to the chosen style don't apply to this text element.
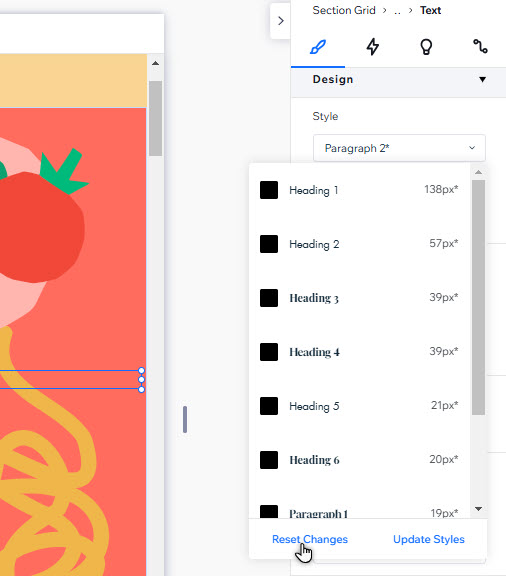
You can reset text elements with overrides to their original style. Click the Style drop-down and select Reset Changes.
You can also select Update Styles to apply the overrides you made to the actual text style. This will also update every text element with this style across your client's site.
Enabling fallback fonts
Using heavy custom fonts? Enable fallback fonts to optimize the site's performance. These fonts load faster, and are displayed temporarily on the live site while your custom fonts download in the background. Learn more about fallback fonts
To enable fallback fonts:
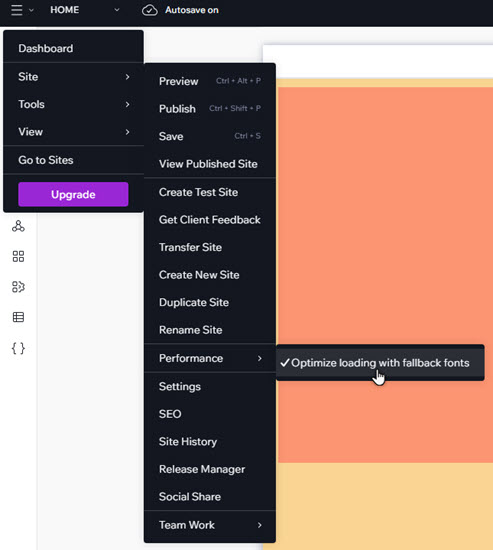
- Go to your editor.
- Click the Wix Studio icon
 at the top left.
 - Hover over Site.
- Click Performance.
- Click Optimize loading with fallback fonts to enable it.
Good to know:
The setting displays a tick when it's enabled.


