Managing Your Page's Heading Tags
6 min
In this article
- Adding a heading tag to your page
- Changing the hierarchy of your text's heading tag
- Customizing your heading tags
- Viewing your heading tags in your page's source code
Heading tags are elements in your site's HTML code that represent the headings on your page. The tags have a top-down hierarchy from H1 (Heading 1) to H6 (Heading 6).
Headings help your site visitors understand what each page is about and can help your site's search engine optimization.
You can use different levels of heading tags as titles to structure the content on a page into sections and sub-sections. For example, you could use H2 tags for section titles and H3 tags for sub-section titles in your Wix Blog posts.
Important:
Heading tags are important for your site's accessibility as they help web browsers and screen readers understand how your site is organized, and how to present the content. Learn more about accessibility
Adding a heading tag to your page
You can add heading tags (i.e. HTML tags) to your site's pages in your editor.
For example, you can add an H1 tag to the top of your page. The H1 heading tag acts as the title of each page. This tag is the headline of a page, similar to the headline of a page in a newspaper.

Important:
- You can assign a heading tag to more than one line of text (or have line breaks between words) by pressing Shift + Enter to create line breaks.
- Make sure there are no empty line breaks set to the H1 text theme, as these generate blank H1 tags.
To add an H1 tag:
Wix Editor
Studio Editor
Wix Harmony Editor
- Go to your editor.
- Click Add Elements
 on the left side of the editor.
 - Click Text.
- Click Add Heading 1 and drag it to your site page.
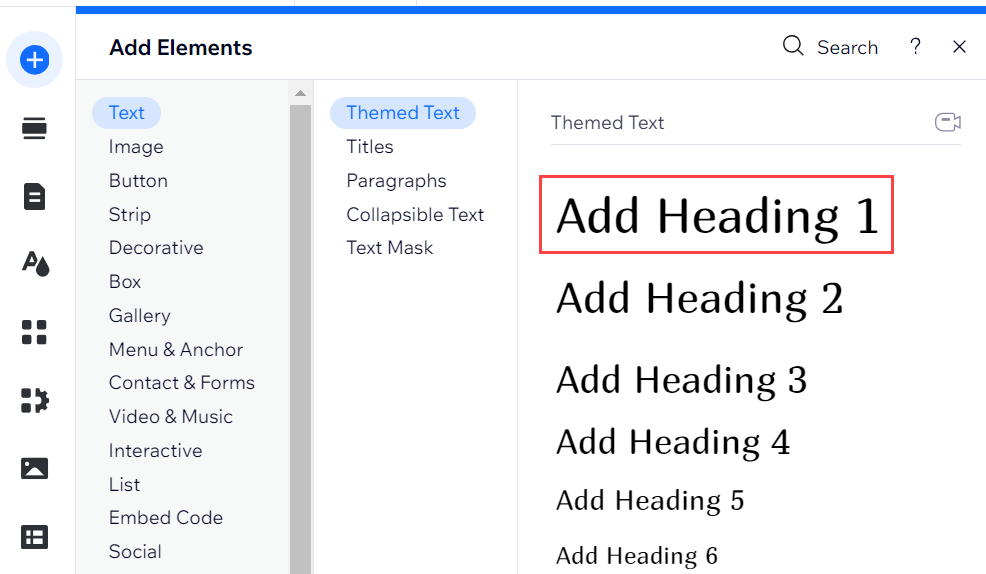
- Click the text element and enter your headline.
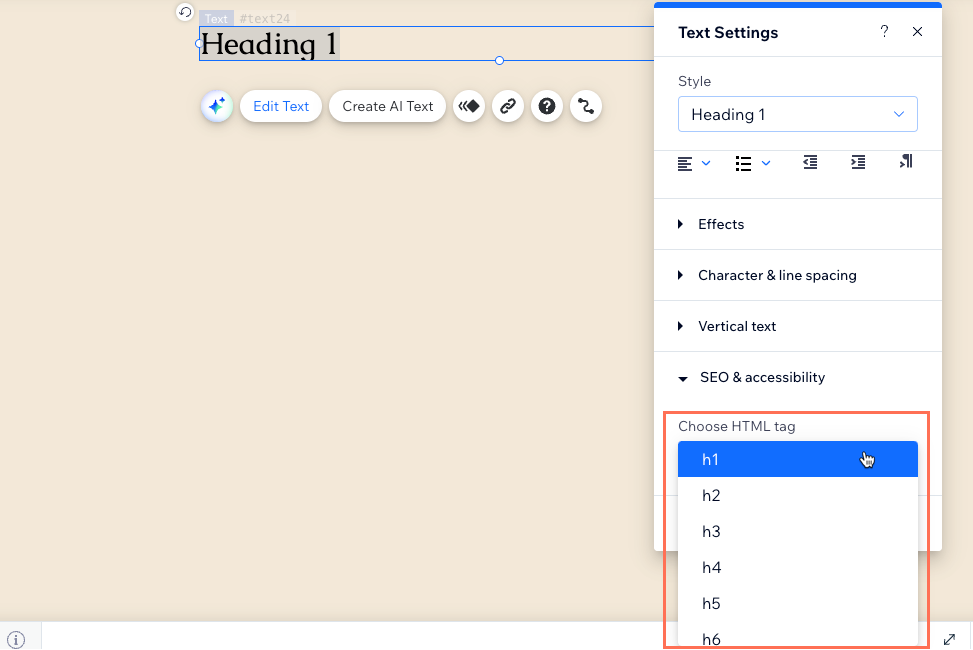
Changing the hierarchy of your text's heading tag
You can change the hierarchy of a heading tag of a piece of text without affecting its content or design. For example, you could change a title's heading tag from H1 to H4. This can be helpful if you need to restructure your page while keeping the look of your text the same.
To change your heading tag's hierarchy:
Wix Editor
Studio Editor
Wix Harmony Editor
- Go to your editor.
- Select the relevant text element.
- Click Edit Text.
- Click SEO & accessibility.
- Select the new heading tag from the Choose HTML tag drop-down.
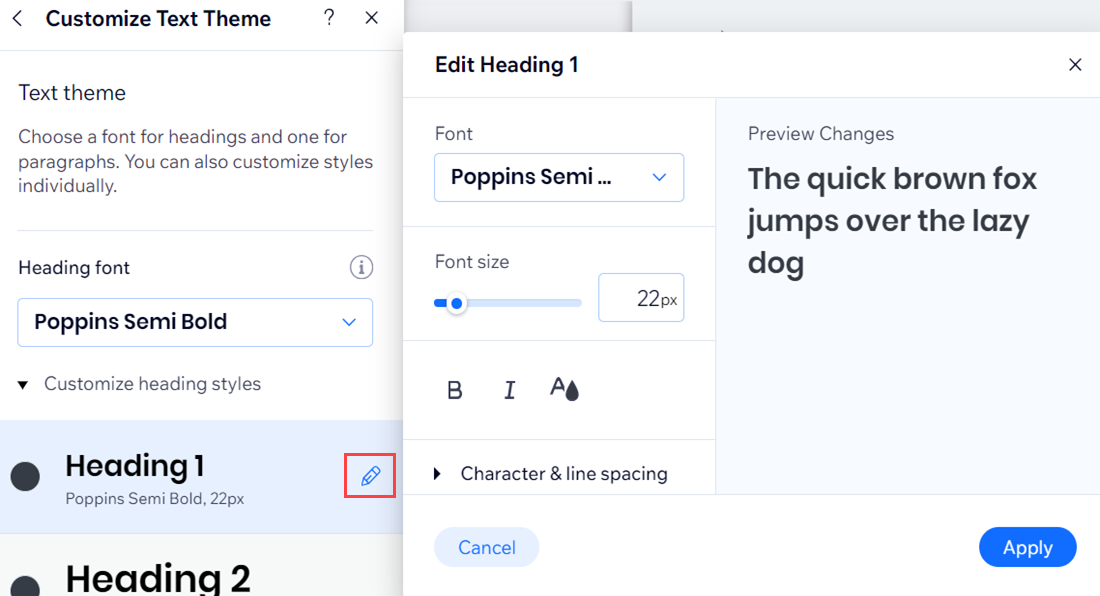
Customizing your heading tags
You can make changes to the font, color and font size, and text style of your heading tags in your editor. After you save it, the change is applied across your whole site.
To customize a heading tag:
Wix Editor
Studio Editor
Wix Harmony Editor
- Go to your editor.
- Click the text box that is used as the title of the page.
- Click Edit Text.
- Click the Style drop-down and select Edit Theme at the bottom.
- Customize a heading theme using the options. You can change the font, color and formatting.
Tip: If needed, click Reset to Theme at the bottom to change the text theme back to the most recently saved version of the theme. - Click Apply.
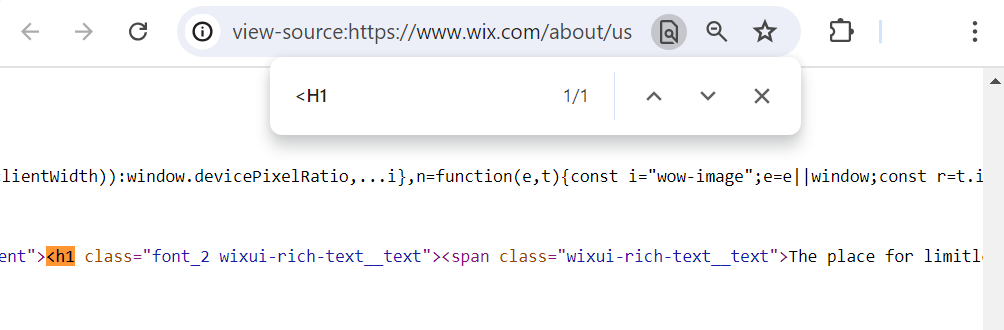
Viewing your heading tags in your page's source code
You can check the source code to make sure it displays the correct heading tags for your page.
To view your page's heading tags in the source code:
- Access the source code of the relevant page on your live site.
- Press Ctrl + F to open the search bar.
- Type <H1 (or <H2, <H3, etc.) in the search bar to locate the heading tag.