

Studio Editor: Using Different Text Fonts
7 min
In this article
- Searching and filtering fonts
- Using your own fonts
- Changing font weights
- Adding fonts for non-English alphabets
- Using accented characters in your text
- Deleting uploaded fonts
- FAQs
Use your own fonts in Studio Editor sites. If the site you're working on is in a different language than English, you can upload fonts that work perfectly with that specific language.
Searching and filtering fonts
Want to apply a specific font to your text? Use the Fonts panel to easily search for it. You can also filter the options to quickly find fonts you've uploaded.
To search and filter fonts:
- Select the relevant text element in the editor.
- Click the Open Inspector icon
 at the top right of the editor.
- Scroll down to Design and click the Font drop-down.
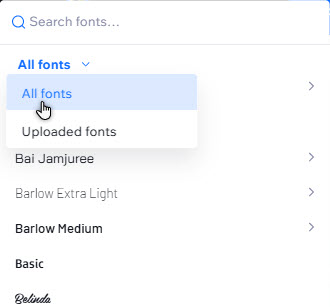
- Choose how you want to find a font:
- Search: Enter the font's name into the search bar to quickly locate it.
- Filter: Click the drop-down and select All fonts or Uploaded fonts.
Note:
This option is not yet available for all elements that use text in the Studio Editor.
Using your own fonts
Can't find what you want in our font library? Upload your own fonts to Studio Editor to use them in text elements, and anywhere else you can choose a font (e.g. buttons, form and menu).
Finding fonts to upload:
Search online font libraries like Adobe fonts and Google fonts. You can search specific font families, or font 'feels' (vintage, minimalist, etc.) to find the best typography for your client's branding.
Important:
Make sure that you have the rights to use the fonts you upload.
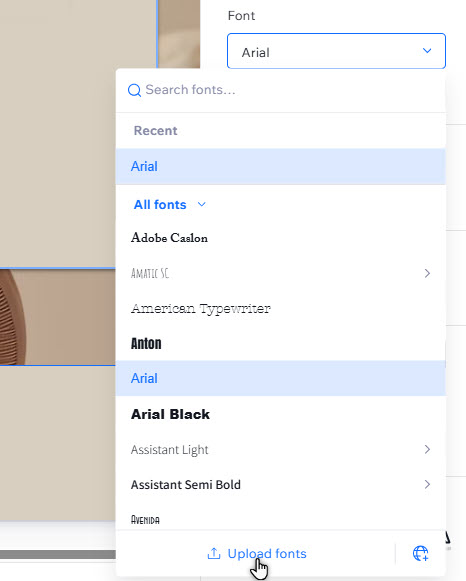
To upload a font to the editor:
- Select the relevant text element in the editor.
- Click the Open Inspector icon at the top right of the editor.
- Scroll down to Design and click the Font drop-down.
- Click Upload fonts at the bottom.
- (In the pop-up) Click Upload Fonts and select your font file (TTF, OTF, WOFF2 or WOFF).
- Click Close once the font has uploaded.
What's next?
Your font is now available to use across your client's site. You can find it in the Font drop-down, under Uploaded fonts.
Changing font weights
You can change the weight of some fonts (Regular, Bold, etc.). Using different weights of the same font can keep the design consistent, and ensure a cohesive experience for site visitors.
Notes:
- Weights are not available on all fonts.
- This option is not yet available on all elements that use text in the Studio Editor.
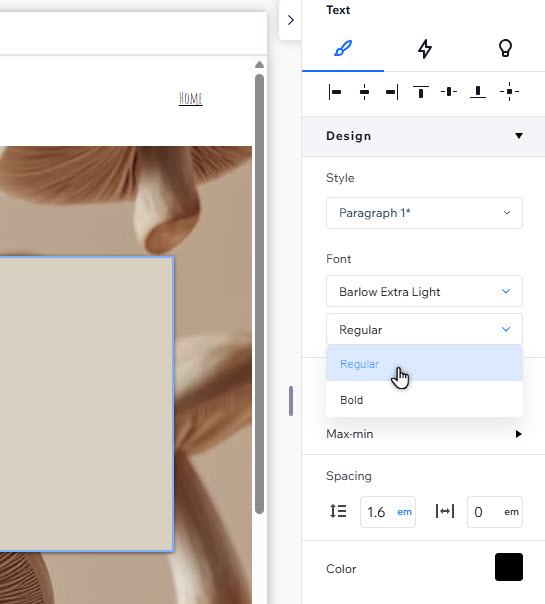
To change a font's weight:
- Select the relevant text element in the editor.
- Click the Open Inspector icon at the top right of the editor.
- Scroll down to Design.
- Click the second drop-down under Font, and select the weight you want.
Adding fonts for non-English alphabets
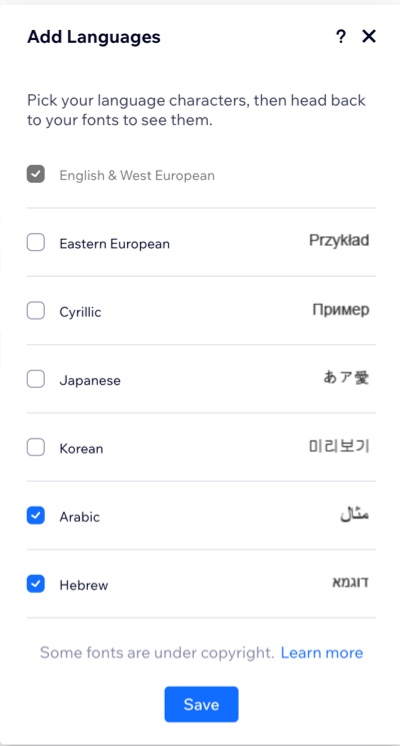
If your site is in a language with a non-English alphabet (e.g. Arabic, Cyrillic, Japanese), you can add compatible fonts with the characters you need.
To add language fonts:
- Select the relevant text element in your editor.
- Click the Open Inspector icon at the top right of the editor.
- Scroll down to Design and click the Font drop-down menu.
- Click the Add languages icon
 .
.
Note: Depending on the element, you may see Add Language instead of the icon. - Select the checkbox next to the relevant language(s).
- Click Save.
What's next?
The language fonts you select will be available in every font menu in Studio Editor. The Font drop-down is organized by language so you can choose one that's compatible.
Are there more languages you'd like to see?
Let us know by contacting Customer Care.
Using accented characters in your text
You can use accented characters in your text in the Studio Editor. The way to do that depends on your device:
- Using a PC: Copy and paste the characters into the text box from this link, or use the keyboard combinations listed here.
- Using a Mac: While entering the text, hold down the relevant letter on your keyboard and select the accent. Learn more about typing special characters in Mac.
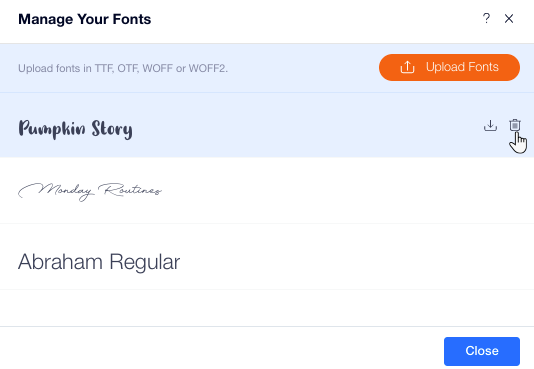
Deleting uploaded fonts
Keep your uploaded fonts organized by deleting the ones you no longer need.
To delete an uploaded font:
- Select the relevant text element in the editor.
- Click the Open Inspector icon at the top right of the editor.
- Scroll down to Design and click the Font drop-down menu.
- Click Upload fonts.
- Hover over the relevant font and click the Delete icon
 .
. - Click Delete to confirm.
Note:
The font file is deleted from your account. If it is being used in text elements, it will still appear.
FAQs
Click below to learn more about using your own fonts in the Studio Editor:
What font formats are supported?
I'm experiencing issues uploading a font to my editor
Are there areas that don't support using my uploaded fonts?
Important:
Wix has licenses for the fonts in the editor. They are available for digital use ONLY and within your Wix site. For more information, view the Wix Terms of Use. You cannot download the fonts to use, but you may find the open source versions and install them to your computer. Be careful with fonts found in external URLs. These are not owned by Wix so you need to contact the author for permission to use them.
