Fit by Wix: Selling Your Fitness Merchandise
9 min
In this article
- Step 1 | Add Wix Stores
- Step 2 | Add products
- Step 3 | Connect a payment method
- Step 4 | Set up shipping
- Step 5 | Setting up tax
- Step 6 | Setting up a point of sale
- Step 7 | Handling store orders
Adding an online store to your Fit by Wix app can boost your income while providing your members with the gear they need to train.
Step 1 | Add Wix Stores
If you haven't already added Wix Stores to your site, you can add it now.
To add Wix Stores:
- Go to your site in the Wix app.
- Tap Manage
 at the bottom.
 - Scroll down and tap Manage Apps.
- Tap Add next to Store.
- Go to your editor and add the pending app from the App Market.
Step 2 | Add products
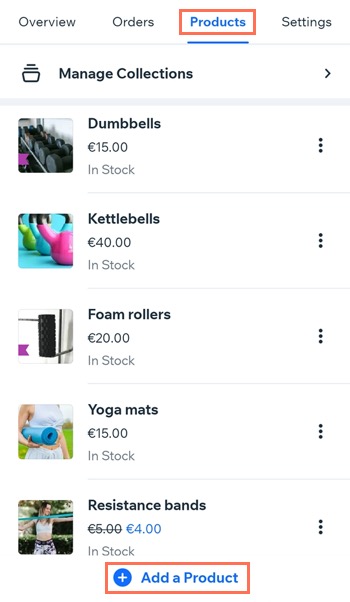
Start building your online store by creating products. For products that have different sizes, colors, or styles, you can add the options you need.
Tip:
Selling branded merchandise with your logo helps promote your business while giving members a sense of belonging to your fitness community.
To add products:
- Go to your site in the Wix app.
- Tap Manage at the bottom.
- Tap Store Products, or tap Catalog and select Store Products.
- Tap Add a Product to create your first product.
Tip: Alternatively, you can edit one of the sample products.
Step 3 | Connect a payment method
To accept payment from customers, you need to set up at least one payment method. These can include a payment provider for credit / debit cards, PayPal, or the manual (offline) method.
Important:
Some payment providers can only be connected through desktop. To manage, change or see a wider list of available providers, such as Wix Payments, go to the Accept Payments tab on your site's dashboard.
To connect a payment method:
- Go to your site in the Wix app.
- Tap the Manage icon .
- Tap Settings and select Accept Payments.
- Connect one or more payment methods.

Step 4 | Set up shipping
There are a variety of ways to get products to your customers. Choose from:
- Shipping options: Free shipping, flat rate shipping, shipping by weight, etc.
- Local delivery: Offer in-person delivery in your region
- Store pickup: Let customers pick up their order from your business location
To set up shipping:
- Go to your site in the Wix app.
- Tap Manage
 at the bottom.
 - Tap Sales.
- Tap Orders.
- Tap the Settings
 icon.
icon. - Select Set shipping.
- Tap + New Region.
- Enter a region name.
- Tap + Add Destination.
- Tap the destination(s) you want to add to this shipping rule.
- Tap Save.
- Choose what you want to do:
Set up free shipping
Set up flat rate shipping
Set up shipping rates by weight
Set up shipping rates by price
Set up store pickup


Step 5 | Setting up tax
Make sure you comply with local tax laws by setting up the correct tax rules for your store. Most merchants are required to collect taxes only from their own country, or only from their local state or province. There are, however, exceptions to this guideline. Learn more about tax collection.
Important:
Different tax rules apply in different regions. Consult with an accountant or with your local tax authority for specific information relevant for your store.
To set up tax:
- Go to your site in the Wix app.
- Tap Manage at the bottom.
- Tap Sales.
- Tap Orders.
- Tap the Settings icon .
- Tap Set tax.
- Select a country or region and set up tax collection.
Step 6 | Setting up a point of sale
By making your phone a point of sale (POS), you can sell and collect cash or credit card payments right on your mobile device - all without requiring your members to access your site or download Fit by Wix.
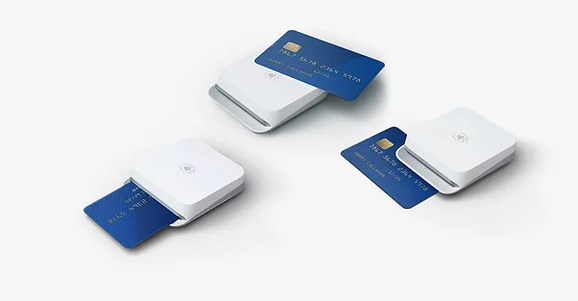
Once you have the Wix app, you can start accepting cash payments with no further setup. To accept credit / debit card payments you need to create a Wix Payments account and order a card reader.
To set up a point of sale:
- Create a Wix Payments account.
- Order a card reader.
- Connect the card reader:
- Go to your site in the Wix app.
- Tap Manage at the bottom.
- Tap Getting Paid and select Point of Sale.
- Tap the More Actions icon
 at the top right.
 - Select Connect Card Reader.
- Press the power button to turn on the card reader.
- Tap Connect in the app, next to the reader.
Tip:
Learn more about setting up a mobile point of sale.
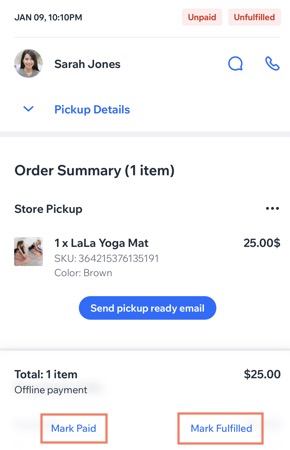
Step 7 | Handling store orders
After members start making purchases, it's time to handle the incoming store orders. This can include adding a tracking number, marking the order as paid and fulfilled, and shipping the order.
To handle store orders:
- Go to your site in the Wix app.
- Tap Sales.
- Tap Orders.
- Tap the relevant order.
- Handle the order.