Editor X: Using Lightboxes
6 min read
Editor X is transitioning to Wix Studio, our new platform for agencies and freelancers.Learn more about Wix Studio
Lightbox popups are a great tool when you need to grab your visitors' attention and drive them into action. Customize your lightbox for different breakpoints to make it effective on any screen size. Then, create an overlay around it so that visitors can focus on the message it promotes.

In this article, learn how to:
Adding a Lightbox
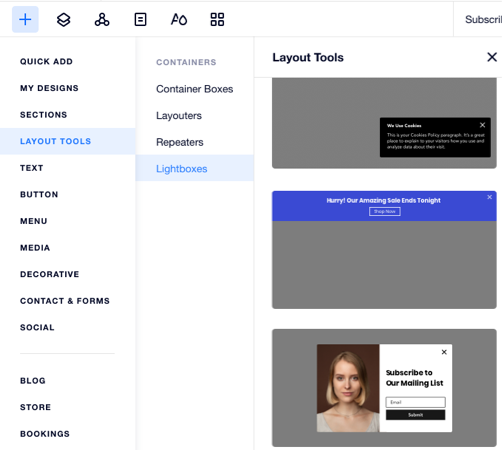
There are different types of lightboxes that you can choose from and add to your page:
- A center lightbox that appears in the middle of the page.
- A side bar lightbox that appears on the left or right of the page.
- A full-width banner at the top or bottom of the page.
To add a lightbox:
- Click the Add icon
 at the top left of the Editor.
 - Click Layout Tools.
- Click Lightboxes.
- Select the lightbox you need to add it to your page.
Editing a Lightbox
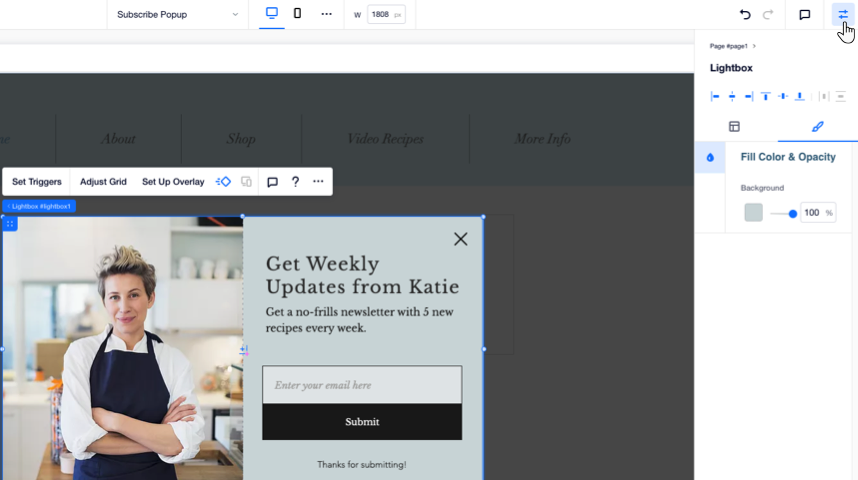
You can access your site's lightboxes from the Pages panel. Select the relevant lightbox to enter Editing mode, where you can set it up, design it and add more elements.
Customize your lightboxes per breakpoint:
Make sure that your lightbox looks great in every viewport by customizing the design per breakpoint.
To edit a lightbox:
- Click the Pages icon
 at the top of the Editor.
 - Select the relevant lightbox on the left.
- Edit your lightbox by doing the following:
- Add elements (e.g., text, image, button) from the Add panel.
- Click Set Triggers to customize the pages where it appears, the timing and other settings. Learn More
- Click Set Up Overlay to decide whether visitors can close the popup by clicking the overlay.
- Click Adjust Grid to choose a different grid layout for the lightbox.
- (From the Inspector panel
 ) Click the Design icon
  to change the background color and opacity.
- When ready, click Done at the bottom to exit Editing mode.
What's next?
Preview your site to see your lightbox in action.
Setting Triggers for a Lightbox
Set up your lightbox to make it behave exactly as you need it to. You can either make it appear automatically as visitors enter a page, or only when they click a certain link or button on your site.
Note:
Your lightbox is displayed once per visitor, on the first relevant page they see.
To set up a lightbox:
- Click the Pages icon
 at the top of the Editor.
 - Select the relevant lightbox on the left.
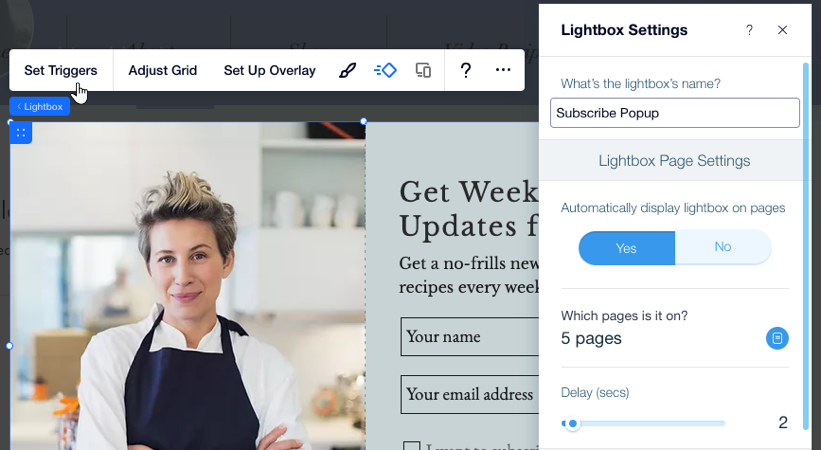
- Click Set Triggers.
- Enter a name to describe the lightbox.
- Select the relevant option under Automatically display lightbox on Pages:
- Yes: The lightbox automatically appears when visitors enter the relevant pages.
- Click the Which pages is it on? field and select the pages you want the lightbox to appear on.
- Drag the Delay slider to increase or decrease the time between the page loading and the lightbox appearing.
- No: The lightbox does not appear when visitors enter a page. Instead, it's triggered by a button or a link you choose.
- Yes: The lightbox automatically appears when visitors enter the relevant pages.
- When ready, click Done to exit Editing mode.
Note:
When choosing to display a Lightbox automatically on a page (see step 5), the Lightbox will appear again once visitors refresh their browser. It's currently not possible to set a Lightbox to appear only once. Click here to vote for this feature
Link Elements to a Lightbox
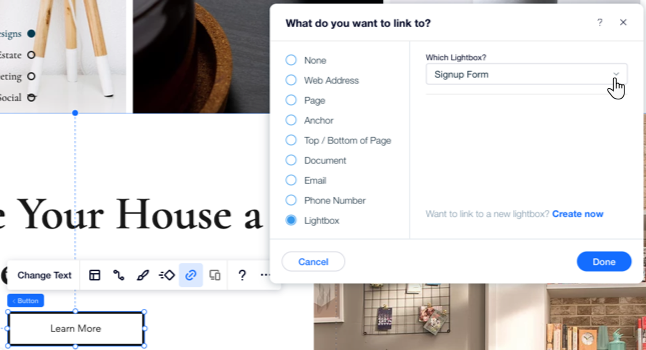
Link elements such as buttons, text or menu items to your lightboxes. When visitors click the element or menu item, the lightbox appears as a pop-up.
To link an element to a lightbox:
- Do one of the following:
- Select to the element that you want to link from and click the Link icon
 .
. - Access your menu and click the Link Items icon
 .
.
- Select to the element that you want to link from and click the Link icon
- Select Lightbox on the left.
- Click the Which Lightbox? drop-down menu and select the relevant lightbox.
- Click Done.
Managing Lightboxes
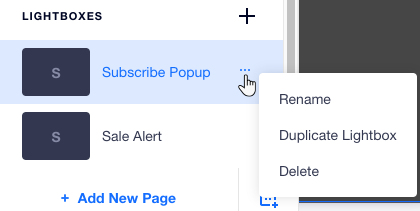
From the Pages panel, you can always access and manage your site's lightboxes. Give your lightbox a name that's easy to recognize, duplicate a lightbox to quickly create a new one or delete lightboxes that you no longer need.
To manage your lightboxes:
- Click the Pages icon
 at the top of the Editor.
 - Hover over the relevant lightbox and click the Show More icon
 .
. - Manage your lightbox by doing one of the following:
Rename a lightbox
Duplicate a lightbox
Delete a lightbox
