Editor X: Designing Across Breakpoints With the Cascading Rule
4 min read
In this article
- Cascading design
- Changes that apply to all breakpoints
- Creating overrides with breakpoints
- Applying an element's design to all breakpoints
- Reverting design overrides on a breakpoint
Editor X is transitioning to Wix Studio, our new platform for agencies and freelancers.Learn more about Wix Studio
With Editor X, you can design your site for different breakpoints (e.g., desktop, tablet, mobile). Breakpoints allow you to customize the design and layout of your elements for a particular range of screen sizes so they always look great.
While the structure and data of your site stay the same through all breakpoints, you can customize the design to look exactly how you want per breakpoint.
In this article, learn more about:
Cascading design
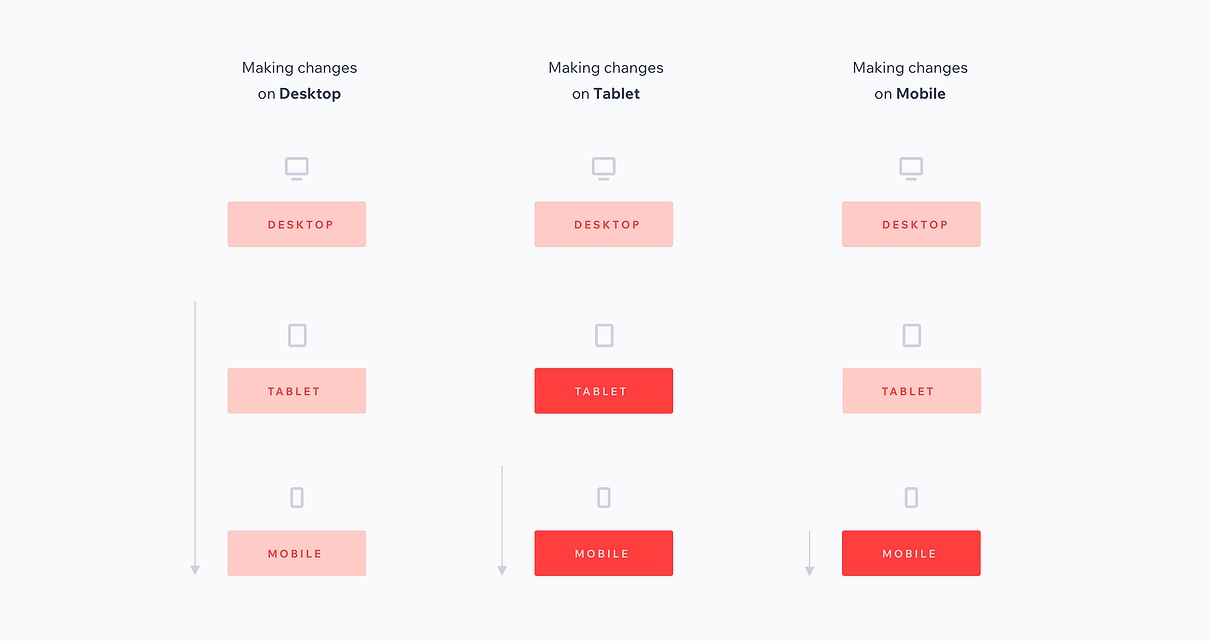
Editor X uses a cascading concept across breakpoints, which means that changes cascade down. Changes you make on the largest breakpoint trickle down to the smaller breakpoints, but changes to smaller breakpoints won’t affect the larger breakpoints.
For example, a button that is designed to be purple in the largest breakpoint, is automatically purple in the rest of the breakpoints.
This is a useful feature when building your site, as you would usually start by designing the largest breakpoint and then adjust the design for smaller breakpoints.
Note:
Some changes apply to all breakpoints – for example, when you replace or delete elements. Learn more about these changes in the section below.

Changes that apply to all breakpoints
The following changes automatically apply to all breakpoints and cannot be customized to a certain viewport:
Data changes
When editing the content of an element, you're effectively changing its data. For example, changing an element's link or the source of an image applies to all breakpoints.
Another example is when you replace or delete elements from the page – the element is automatically replaced / deleted on all breakpoints.
Did you know?
You can hide elements from specific breakpoints. Go to the relevant breakpoint, right-click the element and select Don't Display.
Structural changes
Changes to an element's place in the hierarchy of your page. For example, when you stack elements together or move an element to a different parent container, you're changing the page structure and it is reflected across all breakpoints.

Creating overrides with breakpoints
An override occurs when you make changes to an element's design on a specific breakpoint. Meaning, it no longer draws design values from the larger breakpoint above it. However, these overrides do trickle down to smaller breakpoints (see Cascading Design above).
There are several types of adjustments (i.e., overrides) that you can make to an element to make it look different in a specific viewport:
- Design: Changes to an element's properties, such as coloration, border, font and many others.
- Layout: Changes to an element's position and size within a page or a parent container. This includes docking, padding and margins as well.

Applying an element's design to all breakpoints
If you change the design or layout of an element, you can choose to apply the new design or layout to all breakpoints (including any larger breakpoints).
To apply an element's design to all breakpoints:
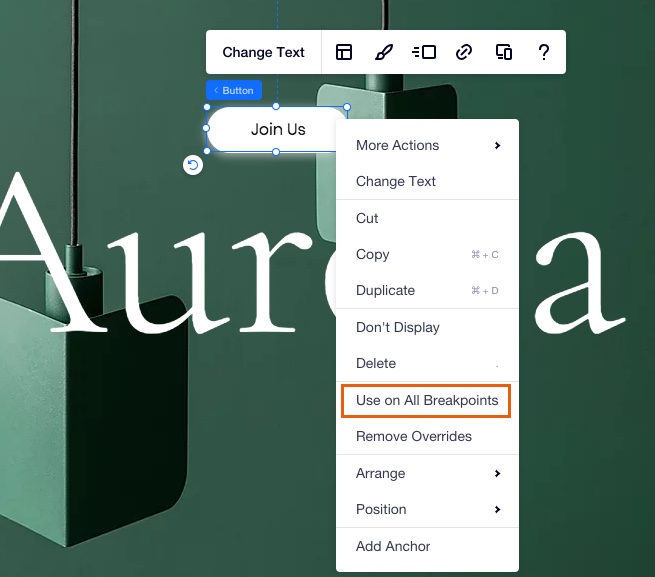
- Right-click the element that you designed.
- Click Use on All Breakpoints.

Reverting design overrides on a breakpoint
You can remove the override at any time and reset the design or layout properties of an element back to the properties of the largest breakpoint.
The properties of the element on smaller breakpoints are not affected, just the breakpoint that contains the element that you are reverting back.
To revert design changes:
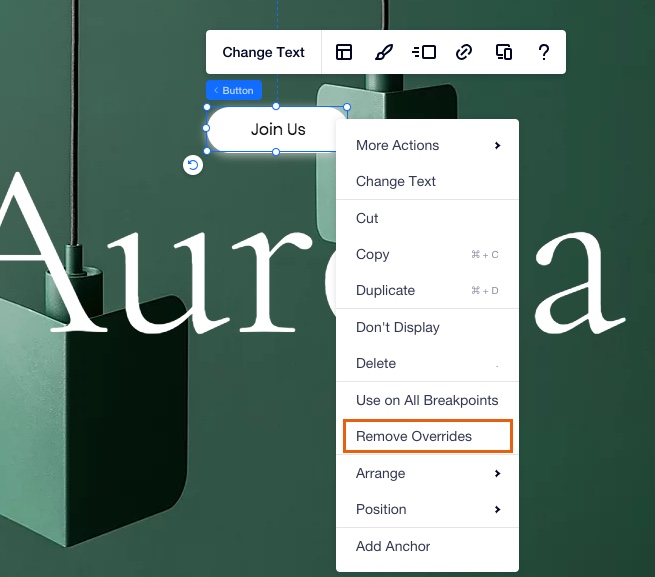
- Right-click the element that you want to remove the override from.
- Click Remove Override.

Want to learn more?
