Editor X: Adding Menus to Your Site
8 min read
In this article
- Adding a menu
- Adding items to a menu
- Managing menu items
- Choosing which pages a menu appears on
- Creating and managing multiple site menus
Editor X is transitioning to Wix Studio, our new platform for agencies and freelancers.Learn more about Wix Studio
In Editor X you can create and manage multiple menus on your site. Add as many menus as you want from the Add panel and customize them individually.
Choose the unique items that appear on each menu. Menu items can link to different pages, anchors, external websites and more. You can even choose exactly which pages to display each menu on for a truly unique experience.
In this article, learn more about:
Want to learn more?
Check out our lesson on menus in the Editor X academy.
Adding a menu
Add as many menus as you want to your site from the Add panel. There's several types of menus you can add to suit your needs.
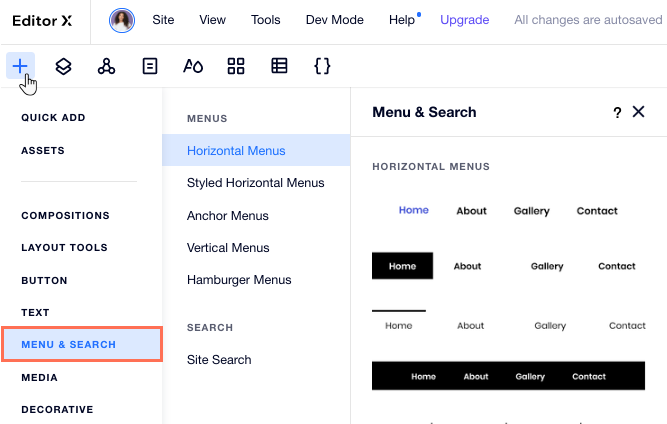
To add a menu:
- Click Add Elements
 on the top of Editor X.
 - Click Menu & Search.
- Click a menu type:
- Horizontal: Traditional horizontal site menu that usually appear in the header or footer of a website.
- Styled Horizontal: These advanced menus offer tons of unique customization options. You can tailor these menus to your exact needs, adjusting the layout and design of every single area.
- Vertical: Vertically arranged menus that look great on the right or left sides of websites.
- Hamburger: Minimalist, space-saving menus where the menu items are only displayed when visitors click the menu icon. The menu has an open and closed state.
- Anchor: Floating vertical menu that displays anchor links. These are useful for navigating between the different sections on a page, such as on a one-page site, or on long pages.
- Drag a menu onto your site.
Adding items to a menu
You can update your menu at any given point by adding new items. Add pages and links to important information, as well as submenus to keep your menu organized.
What types of links can I add?
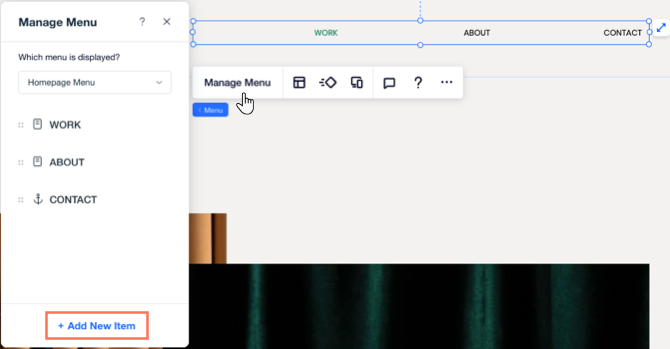
To add items to a menu:
- Click your menu in the Editor.
- Click Manage Menu.
- Click + Add New Item at the bottom.
- Choose which type of item you want to add:
Site page
Link
Submenu
 .
. 
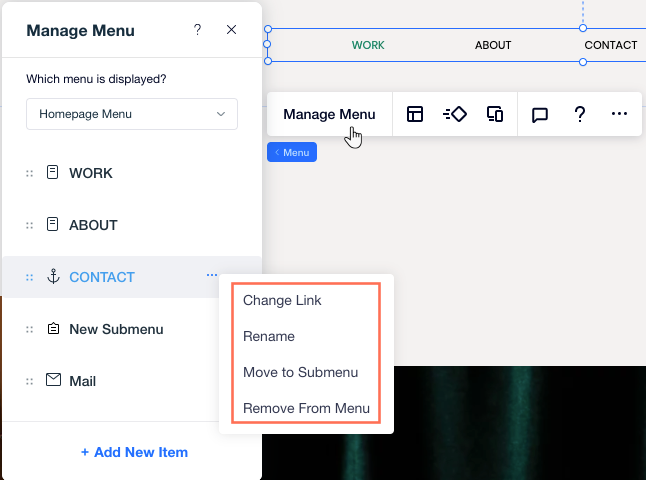
Managing menu items
From the Manage Menu panel, you can rename items on your menu, change their destination URL and remove items you no longer need.
To manage your existing menu items:
- Click your menu in the Editor.
- Click Manage Menu.
- Depending on what you want to do with your menu item, click below:
Remove an item from the menu
Rename an item
Change an item's link
Reorder menu items
 next to the page's name and drag it to the desired location:
Choosing which pages a menu appears on
Want your menu to appear on multiple pages? Attach it to a Master section and open the Masters panel, where you can choose which pages to show it on.
To choose which pages show the menu:
- Add the menu to a Master section (e.g., header, section, footer).
- Click the Masters icon
 on the top of Editor X.
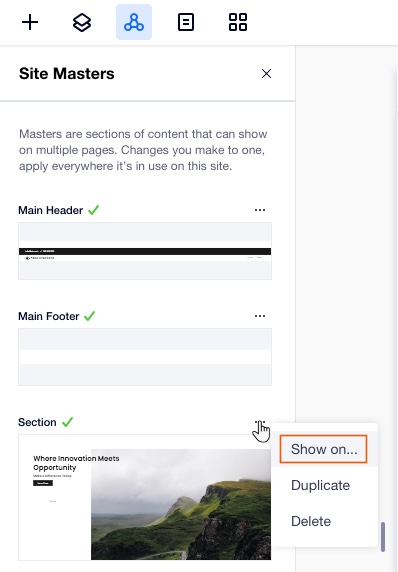
 - (From the Site Masters panel) Click the More Actions icon
 on the section that contains the menu.
 - Select Show on...
- Select the checkbox next to either:
- All Pages.
- The specific pages you want to show the section on.
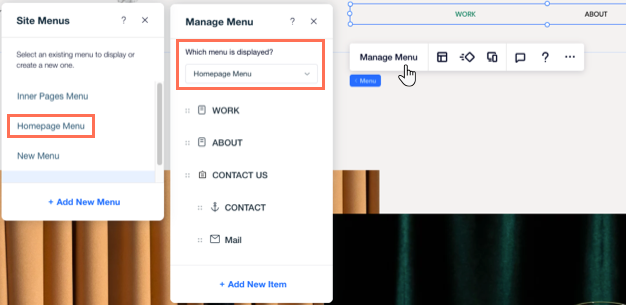
Creating and managing multiple site menus
Want to show personalized menus in different parts of your site? Editor X lets you add as many menus as you need and decide which items appear on each.
After adding a new menu element, you can choose which menu it should display: An existing menu that you saved, or a new one that you create on the spot. This means you can save menus and re-use them on various menu elements across your site.
Click below to learn how to:
Choose which menu is displayed

Save a new menu
 at the top right.
Showing your menus on a Master?
Changing the menu on a Master section automatically affects all other pages that display the section. It's not possible to show different menus on different site pages, if it's the same Master section.