

Studio Editor: Adding and Using Anchors
5 min
In this article
- Adding an anchor
- Adding an anchor menu
- Managing and customizing an anchor menu
- Linking an element to an anchor
- Adding an anchor to a site menu
- Frequently asked questions (FAQs)
Anchors allow you to link directly to an element, making it even easier to highlight and direct visitors to important content on your client's site. When you add an anchor, you can link to it in a few ways:
- Link elements: Link elements (e.g. buttons, text, etc.) to an anchor. When visitors click the element, they're directed to the anchor.
- Display them in an anchor menu: Display anchors in a dedicated menu to let visitors navigate around a page.
- Display them in a regular site menu: Add anchor links as items to the site menu, so visitors can access them from any page.
Adding an anchor
Add an anchor to sections, containers, and elements. We recommend giving your anchor a unique name so it's easy for you to find in your editor.
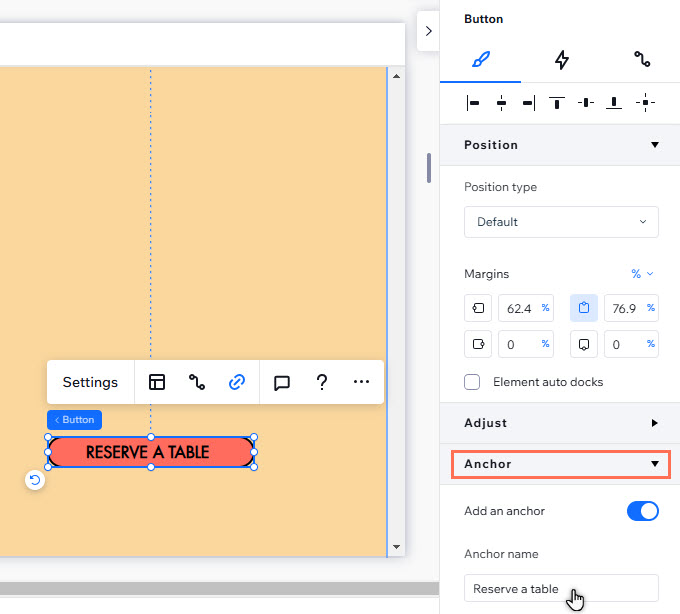
To add an anchor:
- Click the element you want to add an anchor to.
- Click the Open Inspector icon
 at the top right of the editor.
- Click the Anchor drop-down.
- Enable the Add an anchor toggle.
- Enter the anchor name into the field.
Note:
It is not possible to add an anchor to global sections, or elements attached to global sections.
Adding an anchor menu
Display anchors in a floating menu that is always visible - even when visitors scroll. Anchor menus give site visitors the option to access the content they need, no matter where they are on the page.
Good to know:
Anchor menus are particularly useful on one-page sites that are very long, with several sections.
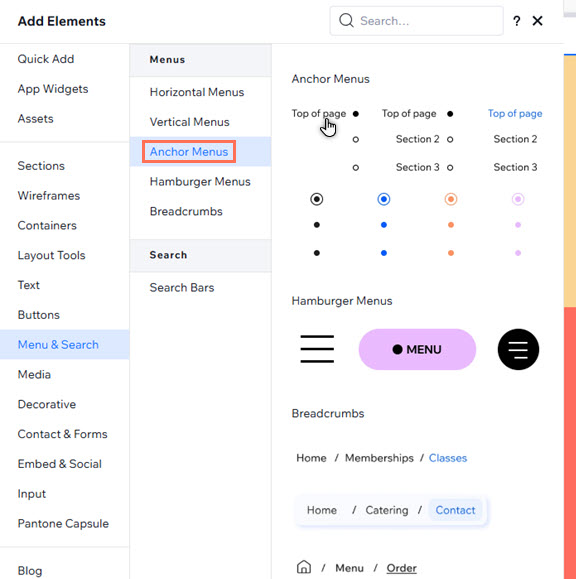
To add an anchor menu:
- Click Add Elements
 on the left side of the editor.
 - Select Menu & Search.
- Click Anchor Menus.
- Click the menu you want to add it, or drag it to the relevant location on the page.
Have a multi-page site?
Add your anchor menu to a global section to display it on multiple / all site pages.
Managing and customizing an anchor menu
Manage the anchor menu to display the items you want. You can also customize the menu's design to complement the site's look and branding.
To manage and customize an anchor menu:
- Click the anchor menu in your editor.
- Choose what you want to do:
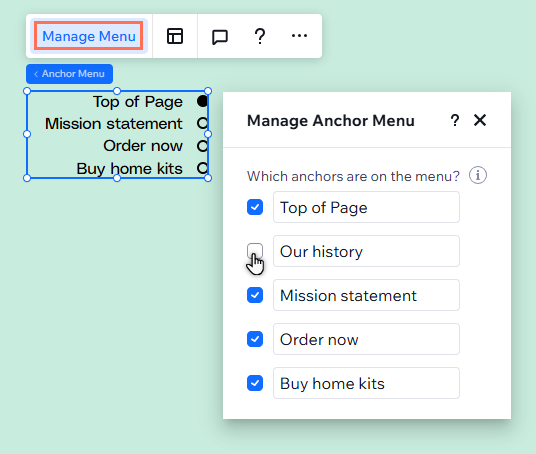
- Manage the anchor menu: Select Manage Menu and make the changes you want:
- Add and remove anchors: Select / unselect the checkboxes to choose which anchors are displayed in the menu.
- Rename items: Click the relevant anchor in the panel, and enter the new name.
- Customize the menu:
- Click the Open Inspector icon at the top right of the editor.

- Scroll down to Design.
- Select a design, and customize the menu's text, colors, and spacing. Learn more about designing anchor menus.
- Click the Open Inspector icon
Linking an element to an anchor
Linking specific elements (e.g. images, buttons, and text) to anchors is a great way to direct visitors to content relevant to where they are on the site. When a visitor clicks the element, they're brought directly to the anchor.
To link an element to an anchor:
- Click the element you want to link from.
- Click the Link icon
 .
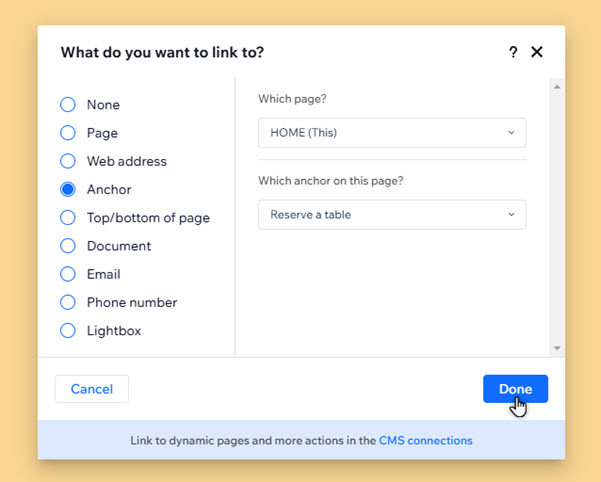
. - Select Anchor.
- Click the Which page? drop-down, and select the page that contains the anchor.
- Click the Which anchor on this page? drop-down, and select the relevant anchor.
- Click Done.
Adding an anchor to a site menu
Only have 1 or 2 anchors on the site? You can display them as items in a regular site menu. Site menus are usually displayed on all pages, so this is a great way to make sure that visitors can always access important content.
To add an anchor to a site menu:
- Go to your editor.
- Select the menu in your editor.
- Click Manage Menu.
- Click + Add Item at the bottom.
- Select Link or anchor.
- Click Anchor from the options on the left.
- Click the Which page? drop-down, and select the page that contains the anchor.
- Click the Which anchor on this page? drop-down, and select the relevant anchor.
- Click Done.

Frequently asked questions (FAQs)
Select a question to learn more about working with anchors.
Do viewports affect anchors?
Can section positions impact anchors?
Why does my anchor menu show different items on different pages?
Can I link the same element to different anchors on different breakpoints?
