Editor X: Using Styled Horizontal Menus
5 min read
In this article
- Adding a Styled Horizontal Menu
- Designing a Styled Horizontal Menu
- Adjusting the layout of a Styled Horizontal Menu
Editor X is transitioning to Wix Studio, our new platform for agencies and freelancers.Learn more about Wix Studio
Styled Horizontal Menu is an advanced navigation element offered by Editor X, with tons of unique customization options. You can tailor this menu to your exact needs, adjusting the layout and design of every single area.

In this article, learn how to:
Adding a Styled Horizontal Menu
Choose a Styled Horizontal Menu that matches your desired look. You can personalize the design to make it more accurate to your needs, and choose which menu to show on this element – it can be an existing menu displayed elsewhere on your site, or a custom one just for this context.
To add a Styled Horizontal Menu:
- Click Add
 at the top of Editor X.
 - Click Menu & Search.
- Click Styled Horizontal Menus.
- Drag and drop the relevant menu to the desired location on your page.
- (Optional) Create a new menu with custom pages:
- Click Manage Menu.
- Click the drop-down under Which menu is displayed?.
- Click Manage Site Menus.
- Click + Add New Menu at the bottom to create the custom menu.

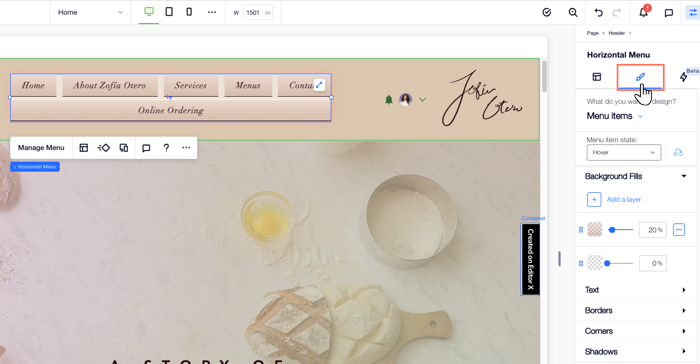
Designing a Styled Horizontal Menu
From the Inspector panel, you can design every part of your Styled Horizontal Menu - the menu and submenu container, as well as the menu and submenu items.
To design the menu:
- Click your Styled Horizontal Menu.
- Click the Inspector icon
 at the top of Editor X.
 - Click the Design tab
 .
. - Select an option under What do you want to design?:
- Menu container
- Menu items
- Submenu container
- Submenu items
- Use the available options to design your menu. You can:
- Add layers of background fills and adjust the opacity of each layer.
- Format and style the text.
- Add borders to make that area of your menu stand out.
- Round the corners of your menu / submenu.
- Add shadow to accentuate the menu or its items.
- Adjust the padding around the menu or its items.
Tip:
You can design the menu and submenu items for different states - Regular, Hover or Current page (i.e. when the visitor is on a page they see in the menu or submenu).
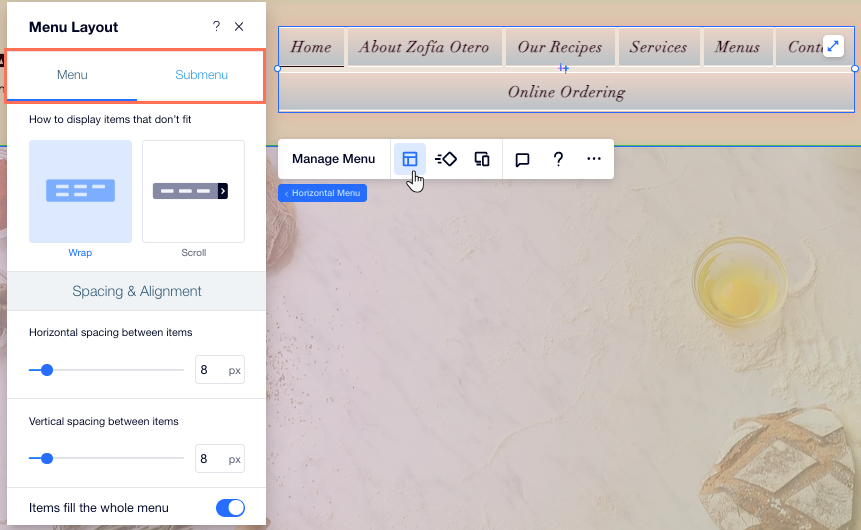
Adjusting the layout of a Styled Horizontal Menu
Adjust the layout of your menu and submenu so they look exactly as you want. You can choose how to display menu items that don't fit (Wrap or Scroll) and the way your submenu opens (Flyout or Columns). You can also control the spacing, padding and much more.
To adjust the menu's layout:
- Click your Styled Horizontal Menu.
- Click the Layout icon
 .
. - Choose which area you want to work on: Menu or Submenu.
- Adjust the layout of the menu and submenu to your needs. Click below to learn more about the available options:
Menu layout options
Submenu layout options