

Customizing the Cart Page
13 min
In this article
- Accessing the Cart page settings
- Customizing the settings of your Cart page
- Designing your Cart page
- Editing your Cart page text
- Customizing the Cart page on mobile
- FAQs
Important:
- This article is relevant for Wix Stores, Wix Bookings, and Wix Restaurants Orders.
- The Cart page is not available with Wix Donations or Pricing Plans.
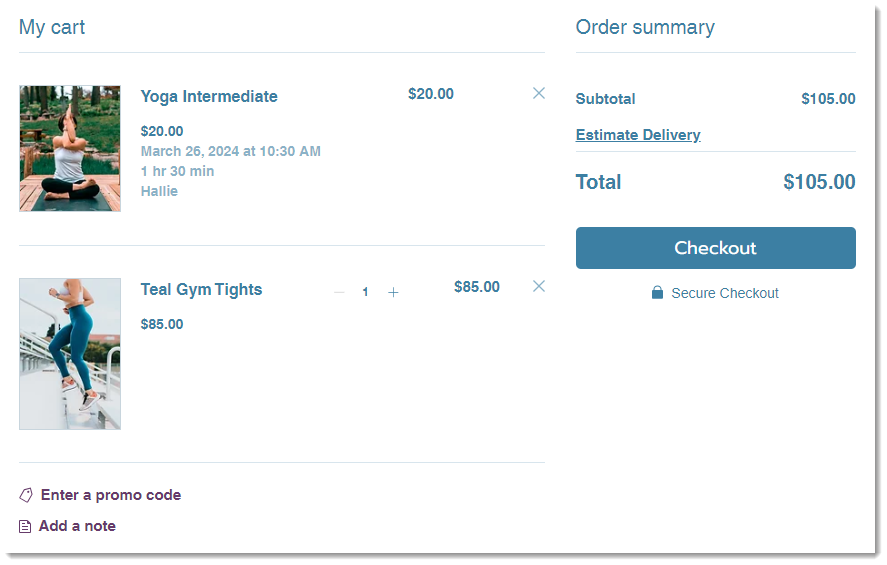
Similar to a shopping cart in a supermarket, your Cart page is where customers place items they are interested in buying. When they're done browsing, they can proceed to checkout and complete the order.
Accessing the Cart page settings
Access to the Cart page varies according to which business solution or solutions you use.
Tips:
- If you're using Wix Restaurant Orders, access to the Cart page is always through Cart & Thank You.
- Wix Restaurant Orders is not yet available in the Wix Harmony editor.
Wix Editor
Studio Editor
Wix Harmony
- Go to your editor.
- Go to your Cart page:
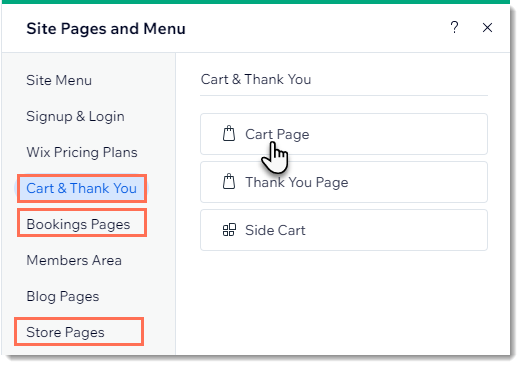
- Click Pages & Menu
 on the left side of the editor.
 - Select an option:
- You have only 1 business solution (e.g. only Wix Stores or Wix Bookings):
- Click your business solution (e.g. Wix Stores).
- Click Cart Page.
- My site has 2 or more business solutions:
- Click Cart & Thank You.
- Click Cart Page.
- You have only 1 business solution (e.g. only Wix Stores or Wix Bookings):
- Click Pages & Menu
- Click the Cart page element on your page.
- Click Settings.
Customizing the settings of your Cart page
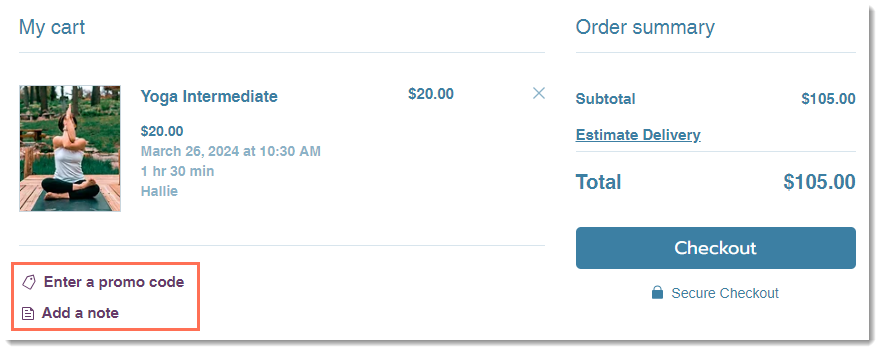
Choose what you want to display on the Cart page. For example, you can choose to hide the 'Enter a promo code' link if you don't offer coupons.
Wix Editor
Studio Editor
Wix Harmony Editor
- Go to the Cart page in your editor.
- Click the Cart page element.
- Click Settings.
- Click the Settings tab.
- Select the relevant checkbox(es) according to the information you'd like to display:
- Shipping & delivery rates: Displays delivery info relevant to the customer's location.
Tip: If you use only Wix Bookings, we recommend unchecking this option. - Tax Costs: Displays the relevant tax estimation based on your customer's location.
Note: Estimated taxes aren't displayed when you include tax in the product price. - Promo code link: Allows customers to enter coupon codes.
Note: If selected, the promo code link appears on the Checkout page, as well.
- Shipping & delivery rates: Displays delivery info relevant to the customer's location.
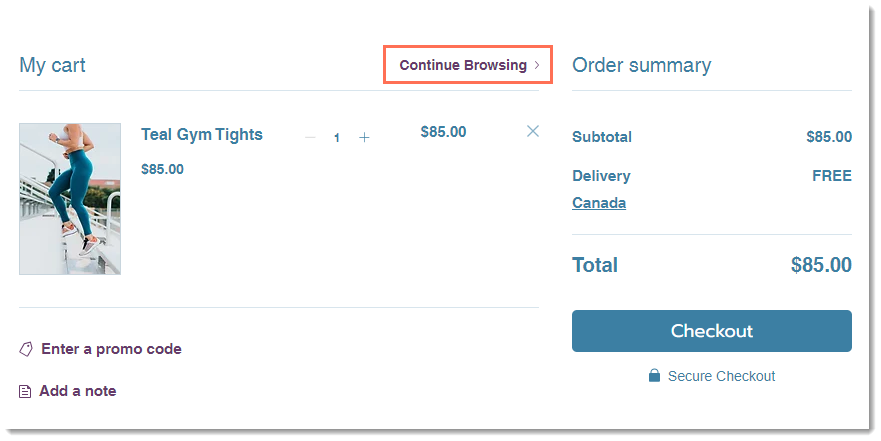
- Customize the Continue Browsing link:
- Click Show link under Continue Browsing Link to show or hide the link.
- If enabled, click Link icon
 to select where the link directs to.
- Click the Show buttons toggle under Express Checkout to show or hide them:
- Enabled: If you set up an express checkout payment provider (e.g. PayPal), an extra checkout button (e.g. PayPal button) is displayed. This directs customers to complete checkout there. Learn more
- Disabled: Only the "Checkout" button is displayed.
Tips:
- If you use Wix Restaurant Orders, you need to disable the Express Checkout option.
- When the cart is empty, it always displays the 'Continue Browsing' link.
Designing your Cart page
Customize the design of the Cart page so it matches your site's overall look and feel. You have full control of the way this page looks, including the colors, fonts, buttons, links, and more.
Wix Editor
Studio Editor
Wix Harmony Editor
- Go to the Cart page in your editor.
- Click the Cart page element.
- Click Settings.
- Click the Design tab.
- (Optional) Click the Stretch to full width toggle to enable it.
- Customize the design settings of the following areas:
- Background and Borders: Change the color of the page's background and dividers.
- Text Font & Color: Change the color and font of the page's title, body, and links.
- Buttons: Change the color, style, and appearance of buttons on the Cart page.
- Payment methods: Design the express checkout buttons (e.g. PayPal).
Tips:
- To optimize the way the cart displays on mobile, make sure that the mobile page background color and cart background color are the same.
- If you go to the mobile editor and change the page background, it doesn't affect the background color on desktop.
Editing your Cart page text
Adjust the text that appears on your Cart page so it has the same tone and voice as the rest of your site. You can edit titles and buttons on the page.
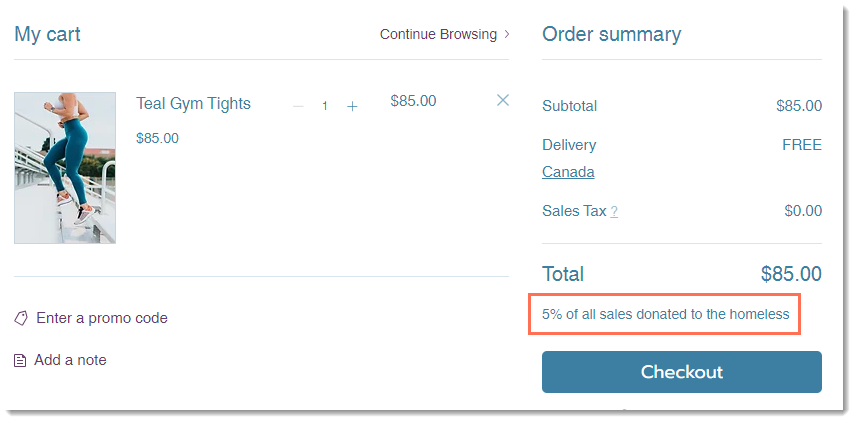
You can also add a short message that appears between the total and your checkout button.
Wix Editor
Studio Editor
Wix Harmony Editor
- Go to the Cart page in your editor.
- Click the Cart page element.
- Click Settings.
- Click the Text tab.
- Edit any of the text options.
- (Optional) Add a disclaimer: Enter a short message (max. 90 characters).
Tip: This message appears under the total in the order summary.
Customizing the Cart page on mobile
Make sure the Cart page looks great when viewed on a mobile device.
Wix Editor
Studio Editor
Wix Harmony Editor
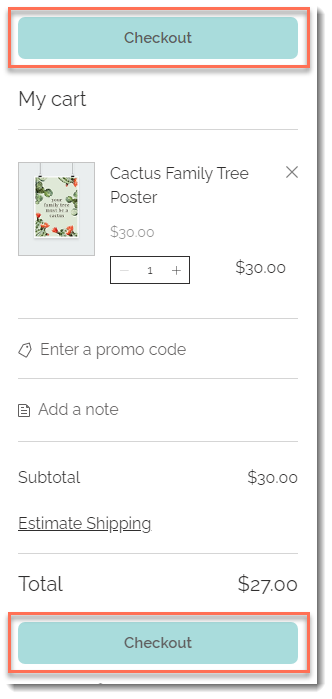
Decide where you want to display the checkout button for customers viewing your site on mobile. Choose from just displaying it only at the bottom of the page or display it at both the top and the bottom.
To access the mobile customizations:
- Click the Switch to mobile icon
 at the top of the editor.
 - Click the Cart page in the mobile Editor.
- Click Settings.
- Select a placement option for the checkout button.
FAQs
Click a question below to learn more about the Cart page.
How can I view the cart with items in it so I can see what I'm designing?
What will customers see if I enable express checkout?


Can customers add different types of items to the cart (store products, bookings services, restaurant items)?
How can my Wix Stores customers go straight to checkout, bypassing the Cart Icon and Cart page altogether?

I use Wix Bookings. How can I enable the side cart, Cart page, and cart icon?
