

Wix Bookings: Adding and Customizing a Cart
12 min
In this article
- Adding a cart to your site
- Customizing your Cart Page
- Customizing your cart icon
- Customizing your side cart
- FAQs
Offer clients a better booking experience by adding a cart to your site. Clients can add multiple services to their cart before checking out, saving them time and helping you keep a full schedule.
If you also sell merchandise or other products, your clients can also add these to their cart before completing checkout.
Notes:
- To allow clients to add products as well as services to their cart, add Wix Stores to your site.
- Currently, it is not possible to add Pricing Plans to the cart. When clients attempt to buy a plan-only service, they purchase the plan before returning to their cart to complete checkout.
Adding a cart to your site
Make it easier for clients to book multiple services in a single checkout by adding a cart to your site.
With the cart installed, the booking form is automatically filled out with the details for each additional service clients add to the cart. They can choose to enter different details for each booking using custom fields in the booking form. Or you can create a custom form for each of your services if you require more specific information.
To add a cart to your site:
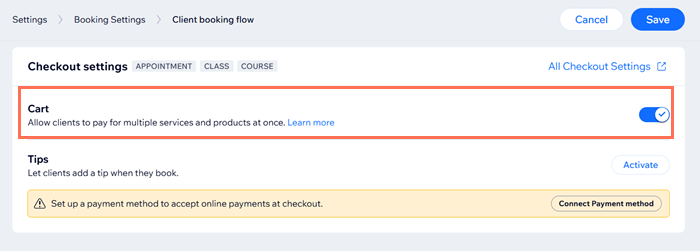
- Go to Booking Settings in your site's dashboard.
- Click Client booking flow under Online Bookings.
- Scroll down to the Checkout settings section and enable the Cart toggle.
- Click Save.
Note: This adds a cart icon to your site. View detailed instructions for setting up the cart in this article's other sections.
Tip:
With cart checkout, you and your clients receive order confirmation emails after purchases. You can edit or deactivate these emails in your eCommerce settings.
Customizing your Cart Page
Customize the page that shows the services your clients add to their cart so it fits your site's style and branding.
To customize your Cart Page:
Wix Editor
Studio Editor
Wix Harmony Editor
- Go to your editor.
- Go to your Cart page:
- Click Pages & Menu
 on the left side of the editor.
 - Click Cart & Thank You.
- Click Cart Page.

- Click Pages & Menu
- Click the Cart Page element on your page.
- Click Settings.
- Choose what you want to do:
Customize the settings
 to select the site page it directs to.
Customize the design

Customize the text

Customizing your cart icon
Choose the right cart icon for your brand and business. You can then customize the design so it fits perfectly with your site.
To customize your cart icon:
Wix Editor
Studio Editor
Wix Harmony Editor
- Click the Cart icon
 in your editor.
 - Click Settings.
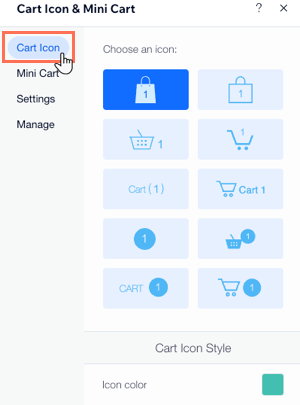
- Click the Cart Icon tab.
- Choose how to customize your cart icon:
- Select a new look for your icon.
- Customize the icon's colors, font, or text. Tip: Available options vary based on the icon you select.
Customizing your side cart
The side cart is a preview of the Cart page, which opens on the side of your site pages. Customers can get to the side cart by clicking the cart icon or the 'Add to Cart' button.
This is where clients view the services they've already added to the cart. They can then choose if they want to continue shopping, or go to the Cart page and check out.
This is where clients view the services they've already added to the cart. They can then choose if they want to continue shopping, or go to the Cart page and check out.
You can customize when the side cart opens, as well as its text and design, so that it reflects your brand's look and feel.
FAQs
We are here to help with all your questions. Click a question below to learn more.
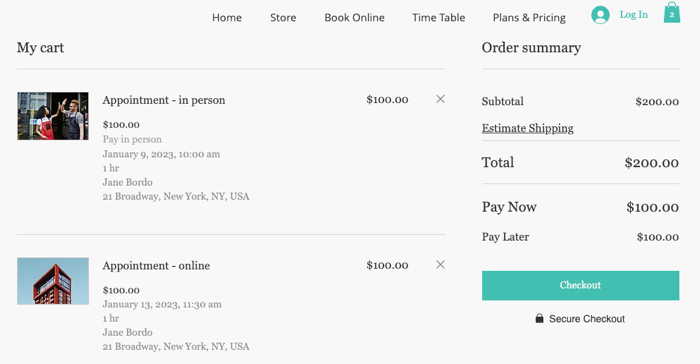
What does the cart look like for my clients?


Can I deactivate cart checkout?
What happens when clients try to add a plan-only service to their cart?


Is the cart available on the Wix Member apps?
Can my clients skip the cart?

