

Front Desk Agent: Customizing the Front Desk Agent Settings
9 min
In this article
- Setting the tone & voice
- Creating and managing training rules
- Managing priority guidelines
- FAQs
Customize your Front Desk Agent settings to improve how Juno engages with customers and handles queries. Set your communication style, add business knowledge for information not found on your site, and define guidelines for urgent conversations.
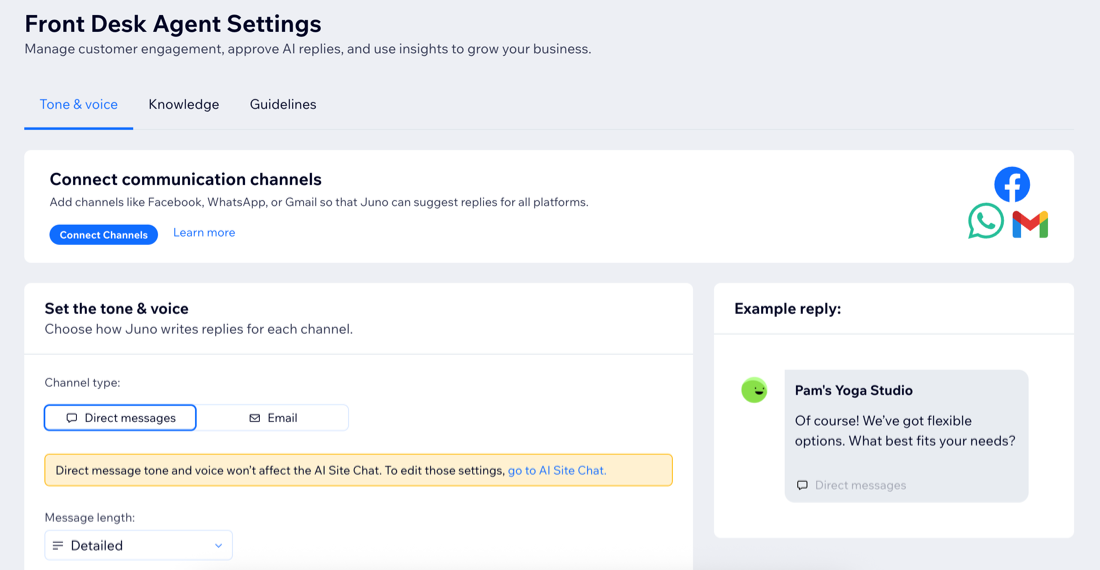
Setting the tone & voice
Adapt Juno's suggested replies to your brand by adjusting the tone and message style for each channel type. For example, you can make direct messages sound short and informal while having emails longer and formal.
Note:
Direct message tone and voice settings do not affect the Smart Chat's response style. Learn how to edit these settings for the Smart Chat.
To set the tone & voice:
Dashboard
Wix app
- Go to the Front Desk Agent in your site's dashboard.
- Click the More Actions drop-down at the top right and click Settings.
- Choose which channel type to customize: Direct messages, Email, or SMS.
Tip: Check which channels are included in each type and learn how to connect communication channels. - Click the Message length drop-down to set the generated response's length: Concise, Neutral, or Detailed.
- Click the Message style drop-down to set the generated response's style: Casual, Balanced, or Formal.

Tip:
Preview how your changes impact the response style on the right.
Creating and managing training rules
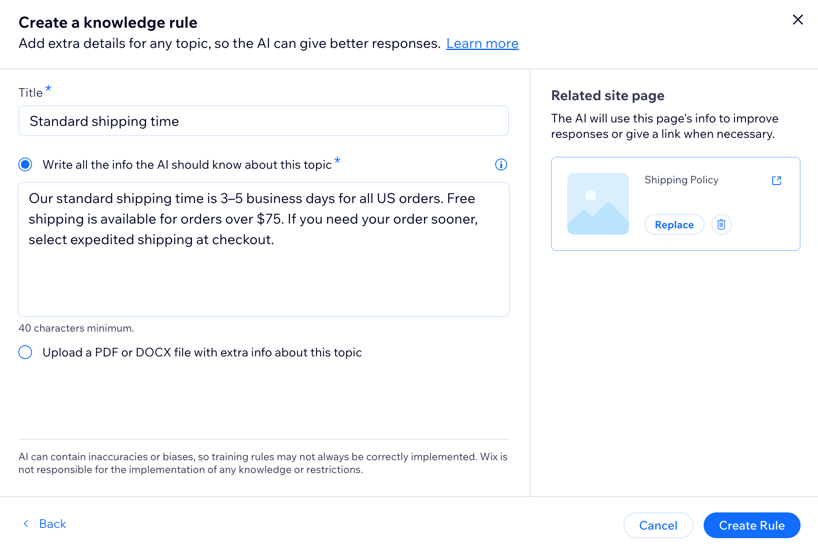
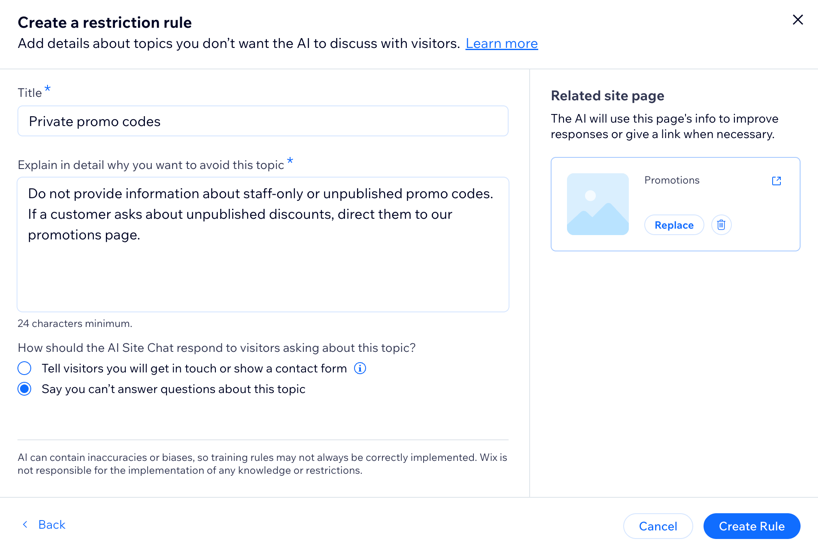
Teach the agent and improve its accuracy by adding business knowledge that isn't public on your site, such as product details, store policies, or support for your customers.
Add knowledge rules to help your agent give informed, accurate answers and restriction rules to make sure it never shares information on topics you want to keep private. This way, every customer gets the right response and you spend less time editing replies.
View an example
Note:
Training rules are currently accessible from your desktop browser only.
To create and manage rules:
- Go to the Front Desk Agent in your site's dashboard.
- Click the More Actions drop-down at the top right and click Settings.
- Click the Knowledge tab.
- Choose what you want to do:
Create a knowledge rule
Create a restriction rule
Edit a rule

Delete a rule
 .
.
Tip:
See how many times a rule was used by the agent in the Times used column.
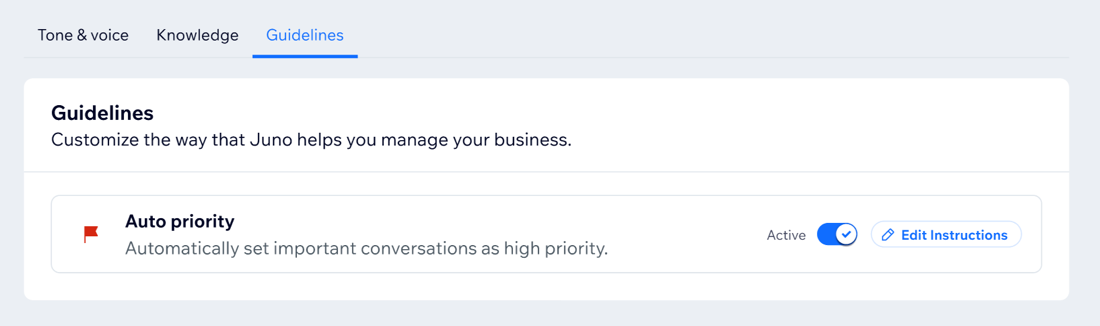
Managing priority guidelines
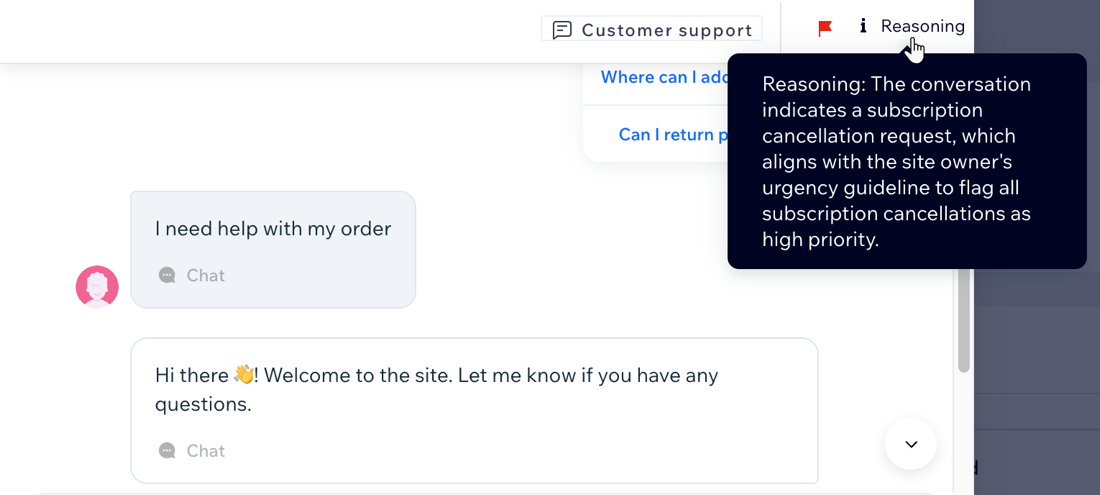
Juno automatically analyzes your site and past conversations to flag messages that need urgent attention and marks them as 'high priority'. You can add more guidelines to explain which types of conversations are most important to escalate.
Whenever Juno flags a conversation as 'high priority', it also provides a reason for it. Mark the conversation with a thumbs up or thumbs down to give feedback and help the agent improve when to flag. If a conversation is flagged incorrectly, review the agent’s reasoning and refine your guidelines in the settings.
To manage auto priority:
Dashboard
Wix app
- Go to the Front Desk Agent in your site's dashboard.
- Click the More Actions drop-down at the top right and click Settings.
- Select the Guidelines tab.
- Choose what you want to do:
Add instructions
Edit instructions
Enable or disable auto priority
FAQs
Click a question below to learn more.
Wix Smart Chat also has training rules, what's the difference?
Will the agent still prepare responses even if I didn't add any knowledge rules or restriction rules?
Why should I add a related site page?
Can I deactivate the Front Desk Agent?
