

Wix AI Site Chat: Training Your AI
7 min
In this article
- Creating knowledge rules
- Creating restriction rules
- Editing or deleting training rules
- FAQs
Important:
Wix AI Site Chat is no longer available to install on new sites. Wix Smart Chat is replacing it as the new AI and manual chat solution. Learn more about Wix Smart Chat.
By creating training rules for your AI, it can use the knowledge of your business to improve its responses. The AI will learn this information and use it to provide more accurate and informed responses. You can also restrict the AI from providing information on certain topics.
Along with the public information on your site, you have a lot of personal knowledge which can be vital when providing the best possible service to your site visitors. Usually this information is about products for sale, services your business provides, or support for your customers.
Note:
Adding rules does not change the AI’s tone of voice. To adjust the tone and other interaction elements, go to the AI response style tab. Learn how to customize the AI's response style.
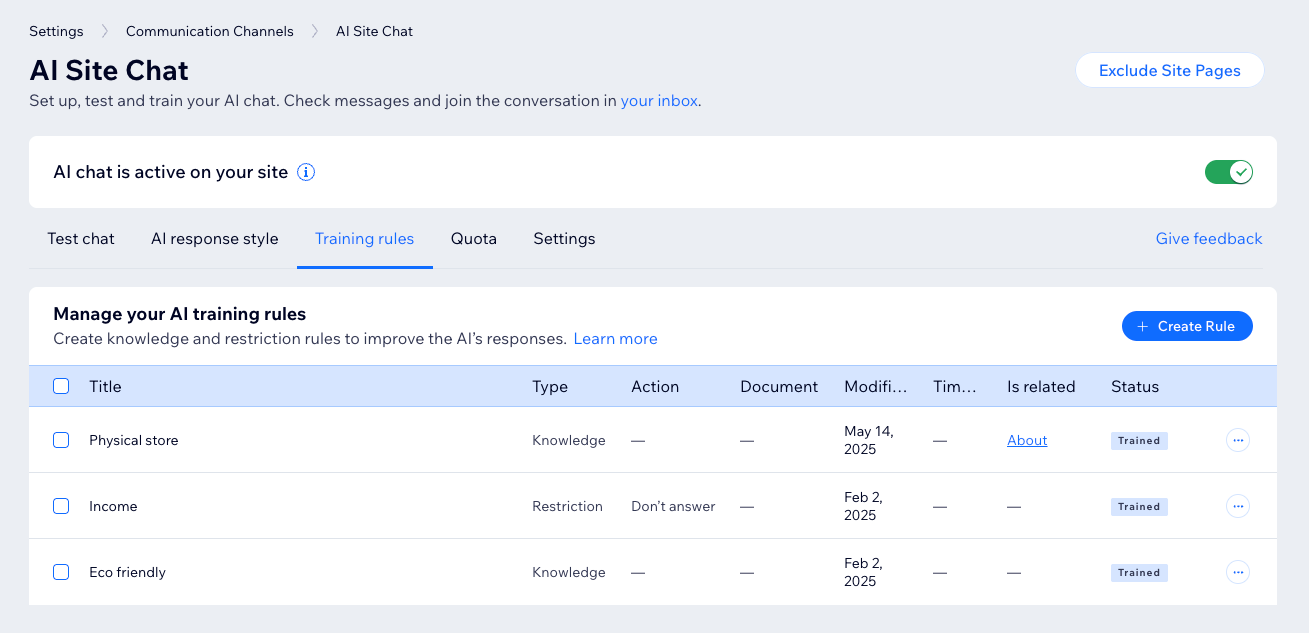
Creating knowledge rules
Creating knowledge rules to your AI Site Chat enables it to give your site visitors accurate and satisfactory answers. The more knowledge rules you add, the faster and more reliable its responses will be.
View an example from an online clothing store

View an example from an eco-friendly business

To create a knowledge rule:
- Go to AI Site Chat in your site's dashboard.
- Click the Training rules tab.
- Click Create New Rule / + Create Rule.
- Click Next on the Add knowledge option.
- Give the knowledge rule a clear title that you'll recognize later.
- Choose how to provide AI with the information:
- Write all the info the AI should know about this topic: Enter all of the information in the text field.
- Upload PDF/DOCX file with extra info about this topic: Upload a file from your computer containing the information. Click Add File to attach the document.
- (Optional) Link the rule to a specific page or product (e.g. link a rule about your return policy to the dedicated policy page):
- Click Select Page on the right.
- Select a page from your site.
- Click Create Rule.

Tip:
If you add knowledge rules with information for time-sensitive events, such as business hours during holidays, remember to delete those rules afterwards.
Creating restriction rules
Restricting the AI from providing visitors with information on topics gives you more control over the way it communicates. By adding topics that it shouldn't answer questions about, such as income or your days off, you can define the boundaries of your business.
View an example from a personal training business

View an example from a financial services site

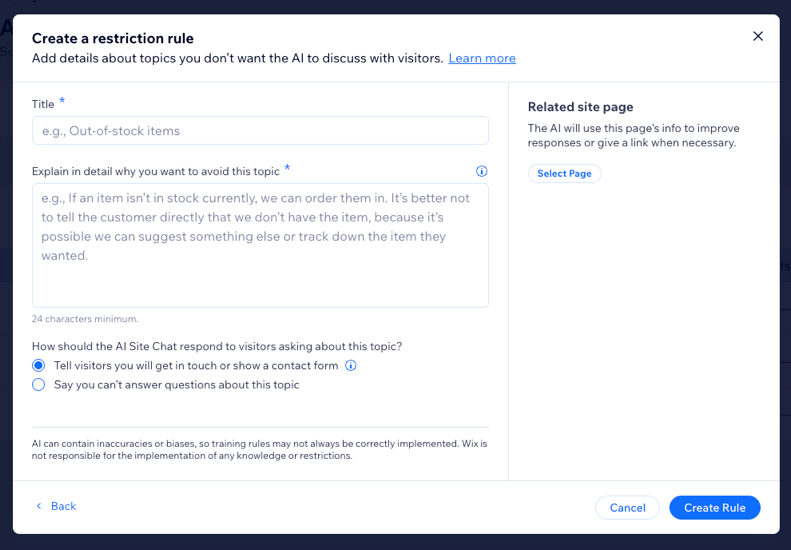
To create a restriction rule:
- Go to AI Site Chat in your site's dashboard.
- Click the Training rules tab.
- Click Create New Rule / + Create Rule.
- Click Next on the Restrict responses option.
- Give the restriction rule a clear title that you'll recognize later.
- Enter your description in the text field.
- Choose an option:
- Tell visitors you will get in touch or show a contact form: The visitor's message about this topic will be forwarded to your Inbox.
Tip: Set up a contact form so you can respond later. - Say you can't answer questions about this topic: The AI will send an automatic message saying it can't answer the visitor's question on that topic.
- Tell visitors you will get in touch or show a contact form: The visitor's message about this topic will be forwarded to your Inbox.
- (Optional) Add a related site page: Link the rule to a specific page or product on your site. For example, link a restriction rule about avoiding legal topics to your site's Terms & Conditions page.
- Click Select Page on the right.
- Select a page from your site.
- Click Create Rule.
Editing or deleting training rules
You can edit or delete any information you enter in a knowledge or restriction rule.
To edit/delete a training rule:
- Go to AI Site Chat in your site's dashboard.
- Click the Training rules tab.
- Hover over the rule you want to edit or remove.
- Choose an option:
Edit

Remove
 .
.
Note:
It is not possible to edit knowledge rules that you added by uploading a PDF/DOCX file. However, you can remove the original knowledge rule and add a new one with the updated file.
FAQs
Click a question below to learn more about enhancing the AI.
Will the AI still work if I didn't add any knowledge rules or restriction rules?
Why should I add a related site page?
Can I include images in the file I upload when adding a knowledge rule?
Is there a limit to the number of knowledge rules or restriction rules I can add?
Can I keep track of how many times a knowledge rule or restriction rule has been used in a chat with a customer?
