

Wix Forms: Adding and Setting Up a Standalone Form
10 min
In this article
- Step 1 | Create a form
- Step 2 | Add a form title
- Step 3 | Add form fields
- Step 4 | Add a confirmation message
- Step 5 | View your live form and share it
- FAQs
Standalone forms help you collect information from anyone through a shareable link, without embedding a form directly on your site. Whether you use the classic old standalone forms or the upgraded new ones, you can ask for feedback, collect waivers, and keep submissions organized in your dashboard.
How do I know if I am using new or old standalone forms?
This article will help you understand the differences between old and new standalone forms.
Step 1 | Create a form
You can build a standalone form right from your site's dashboard, either starting from scratch or a template. The new form experience offers AI-powered setup and modern, ready-made design themes, while the classic version follows a familiar template flow.
To create a standalone form:
New standalone
Old standalone
- Go to Forms & Submissions in your site's dashboard.
- Click Create Form at the top right.
- Select Standalone form from the drop-down menu.
- In the form builder, you can:
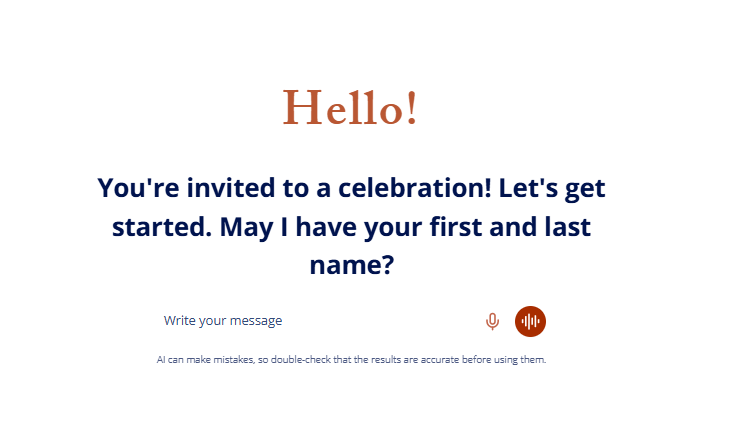
- Type what type of form you want in the AI Forms Assistant panel (e.g. "Event RSVP form").
- Add fields manually by clicking the Add icon
 and then dragging and dropping form fields onto the form.
Tip:
To quickly start, you can ask the AI to create a form for you or choose a Theme  and start customizing.
and start customizing.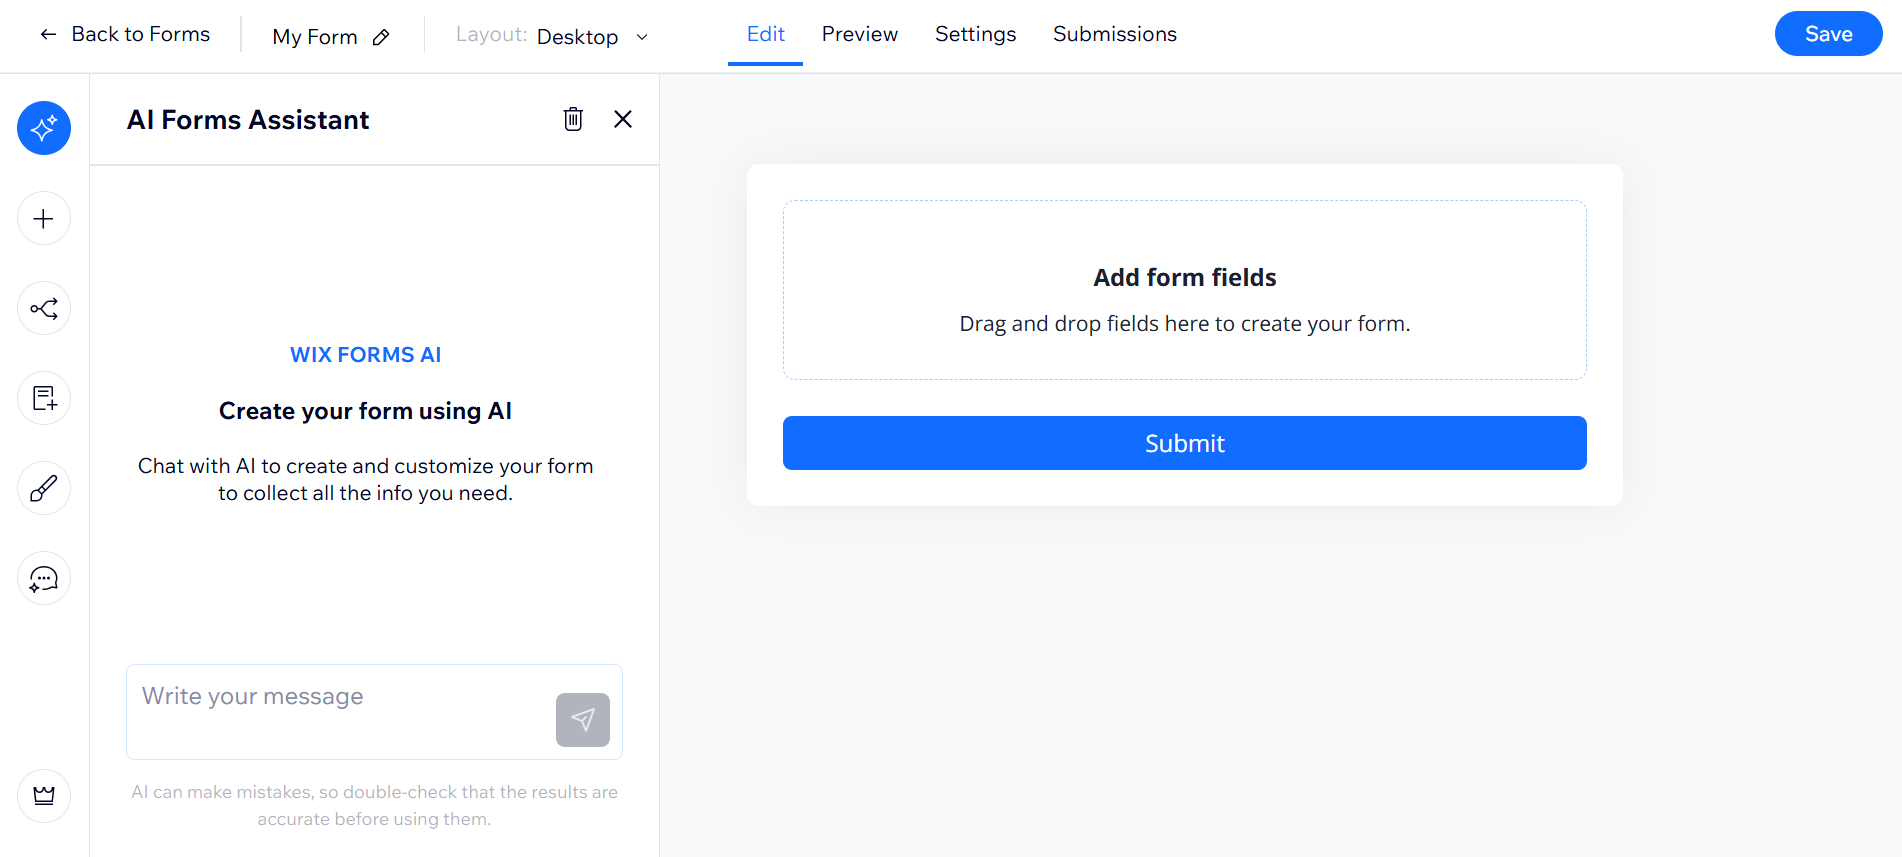
Step 2 | Add a form title
Add a title so your visitors know exactly what they’re filling out. The title appears at the top of your standalone form. You can also add an informative description to make sure visitors are submitting the form correctly.
To add a form title:
New standalone
Old standalone
- Click the Edit tab at the top of the form builder.
- Click the title or description text box on your form.
- Click Edit text.
- Type your new title or description.
- Use the toolbar to format your text (e.g., Heading, Paragraph, bold, italic).
- Click outside the text box to save your changes.

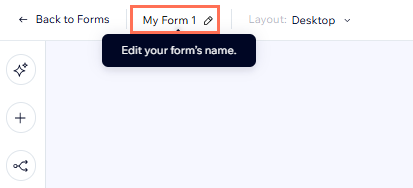
Want to change your form name?
Keep your list of forms organized by giving each one a name. At the top of the form builder, click your form’s current name (e.g., My Form 1) to change it.
Step 3 | Add form fields
Customize your form using a mix of contact and custom fields. Rearrange, duplicate, or require questions as you go. The new forms let you chat to AI to quickly add or modify fields for a faster, more dynamic building experience.
To add form fields and manage your form:
New standalone
Old standalone
- Click the Edit tab at the top of the form builder.
- Choose how to add new fields:
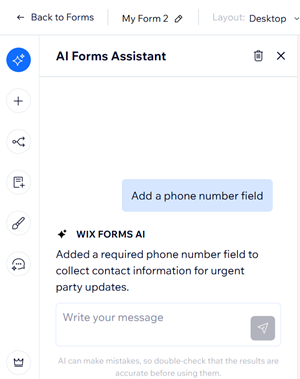
- Chat to the AI Forms Assistant – it adds the fields for you (e.g., "Add a phone number field").
- Click the Add icon to open the fields panel. Drag fields onto your form, or click to add.
- Click the new field and choose what to do next:
- Click Field Settings to edit the field title, make it a required field, enter placeholder text and more.
- Drag and drop the field to move it within the form.
- Click the Duplicate icon
 to add another similar field.
Note: This option is only available for specific fields.
- (Optional) Add more text elements and section headers to explain parts of your form.
Important:
The upload file field and signature field require upgrading Wix Forms.
Step 4 | Add a confirmation message
Personalize your submit button text and thank you message, so visitors get a warm confirmation after submitting their info. Save your changes to update your form.
To add a confirmation message:
New standalone
Old standalone
- Click the Settings tab at the top of the form builder.
- Go to the Confirmation message section.
- Select Show a message under When a form is submitted.
- Enter your preferred confirmation message in the text box (e.g., “Thanks, we received your submission.”).
Tip: Use the formatting options above the box to style your message if needed. - (Optional) Update the submit button text:
- Go back to the Edit tab.
- Click on the submit button at the bottom of your form.
- Enter your new button text (up to 28 characters) and click outside the button to save.
- Click Save at the top right to apply your changes.
Tip:
You can also ask the AI Forms Assistant to change the button text for you by typing your request (e.g., "Change the submit button text to Let's Party!").

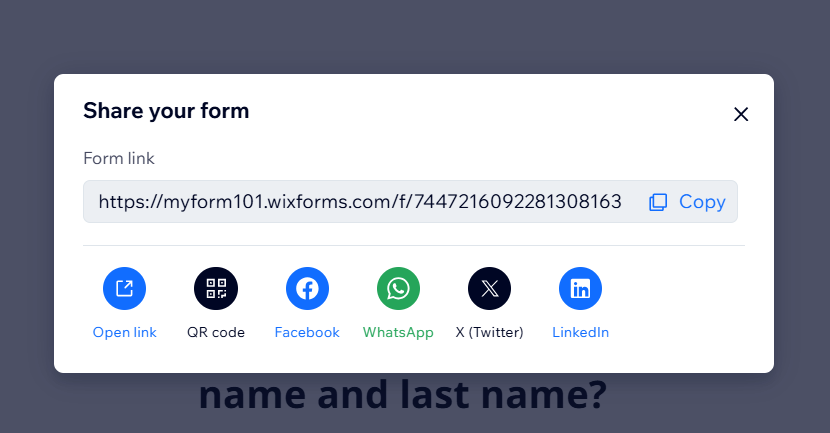
Step 5 | View your live form and share it
Once your form is ready, preview it and copy your unique URL to share by email, social, or anywhere you want to collect responses.
To view and share your form:
New standalone
Old standalone
- Click the Preview tab at the top of the builder.
- Click Share at the top right.
- Click Copy to copy your form link, or select a sharing option like Facebook, WhatsApp, X (Twitter), or LinkedIn.
Note:
The prefix is automatically taken from your account settings under the Site URL prefix.
Tip:
You can always manage your standalone forms, add fields, make edits and adjust the form as you need.
FAQs
Click a question below to learn more.
Can I automate follow-ups or emails after someone submits the form?
Are people who submit the form added to my site's contact list?
Can I customize who receives notifications when someone submits a form?
Can I export my form submissions?
Can I manage my forms using the Wix mobile app?
