Wix Forms: Creating Automated Email Responses for Form Submissions
4 min
In this article
- Sending an automated email after form submission
- Frequently asked questions (FAQs)
Create automations for each form submission on your site. When a visitor submits a form, it can be helpful to automatically send an email to thank them, or an email to inform your team about it.
For example, welcome new site subscribers by sending them a "thank you" email, or send a "next steps" email when a job application form has been submitted.
Tip:
Wix Forms automatically comes with recommended automations you can activate or customize to fit your needs. For example, instead of sending an email you can create a new task for yourself or a team member, send a chat message and much more.

Sending an automated email after form submission
Send automated emails whenever a visitor submits a form on your site. Streamline your communication and ensure that your visitors and team members are promptly notified without manual effort.
Important:
For automations to be sent successfully, your form must contain a field that matches the action you wish to automate. For example, if you want to send an automated email, your form needs to have an email field.
To send an automated email:
- Go to Automations in your site's dashboard.
- Click + Create Automation at the top right.
- Click + Start from Scratch.
- Give your automation a title.
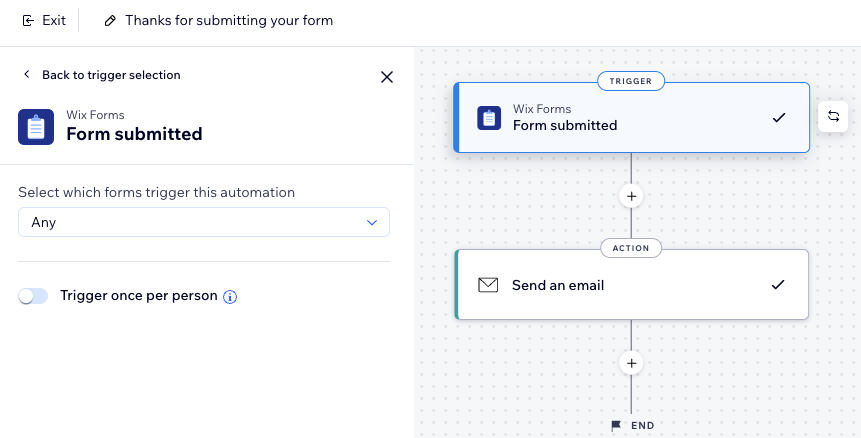
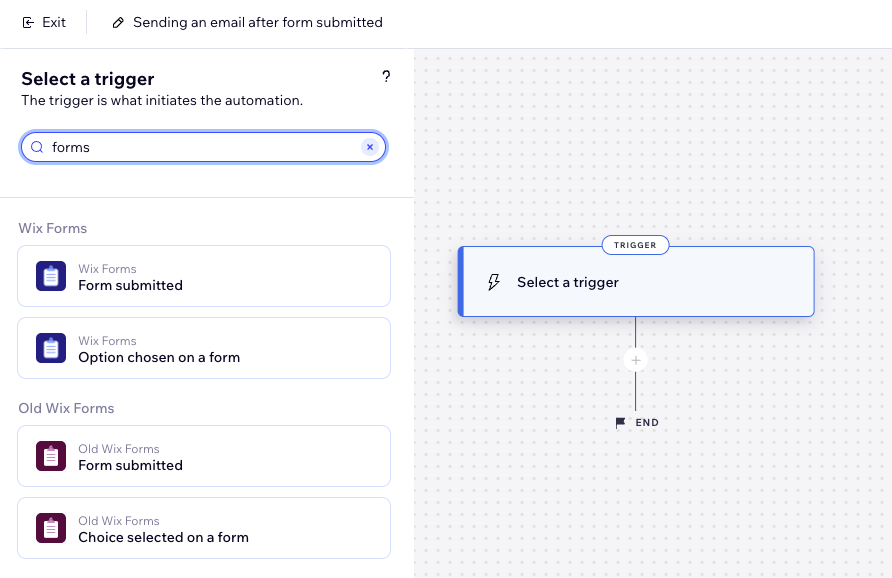
- Select Form submitted as your trigger.
Note: When creating or editing an automation, you'll have two options for Wix Forms triggers. The blue icon sets a trigger for new Wix Forms and the red icon for old Wix Forms. Learn about old and new Wix Forms

- Click the drop-down menu to select which forms trigger this automation:
- Any: Any form submitted will trigger this automation.
- Specific: Select a specific form that will trigger this automation when submitted.
- (Optional) Enable the Trigger once per person toggle to limit trigger frequency:
- Select the person from the trigger data: Decide how often the automation can be triggered for the same person (e.g. Contact ID, Post Author Contact ID, Visitor ID etc.).
Tip: This option is useful for triggers that might occur repeatedly. - Trigger once per person every: Select this checkbox if you want to set a specific amount of time that should pass before the automation can be triggered again for the same person.
- Select the person from the trigger data: Decide how often the automation can be triggered for the same person (e.g. Contact ID, Post Author Contact ID, Visitor ID etc.).
- Click Apply at the bottom.
- (Optional) Click + to add to your automation:
- A delay between a trigger and its action, to have the action occur after a certain amount of time passes.
- A condition to make the automation occur when certain conditions are met.
- Set up the automated email:
- Click + to add a step.
- Click Action.
- Select Send an email and choose who you want to send the email to:
Your form submitters
You or your site collaborators
Frequently asked questions (FAQs)
Click a question below to learn more about this.
Can I email both my form submitters and my site collaborators in the same automation?
Why are my forms not appearing in the automation options?
What else can I automate when someone submits a form?
Can I access automations directly from my form's settings?
What is personalized content?


