

Wixel: Adding and Setting Up an Online RSVP Page
17 min
In this article
- Step 1 | Create an invitation with an RSVP page
- Step 2 | Add and customize an RSVP button
- Step 3 | Customize your RSVP settings
- Step 4 | Publish and share your invitation
- FAQs
This article refers to the new Wixel, released in December 2025. If you're unsure whether you’re using the new or previous Wixel, view more information here.
Bring your event to life with a beautiful online invitation, complete with an RSVP page, designed and managed entirely in Wixel. Generate an invitation with AI, customize the look, add interactive features, and manage guest responses with ease.
Note:
Actions that involve generating and editing an invitation with AI use AI credits.
Step 1 | Create an invitation with an RSVP page
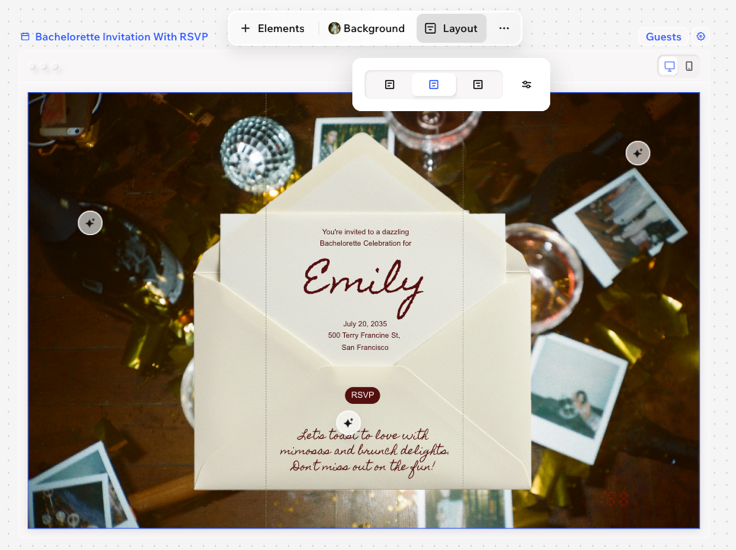
Start by creating an event invitation with your RSVP page. You can build your page from scratch, choose a professional template, or use Aria - your AI design agent - to generate a unique design that matches your event’s feel and your brand.
To create an invitation with an RSVP page:
Desktop browser
Wixel app
- Go to your project in Wixel.
- Choose how to create an RSVP page:
- Describe with AI: Describe the look, theme, or details you want. Aria will suggest a layout with text and images. For example, “Create an RSVP invitation for a birthday party. Make it modern, with gold decorations".
- From a template: Browse our library of event invitations. Click Add Design and select a template in the Invitations tab.
Important: Make sure to choose a template that has a 'with RSVP' tag so that it adds a functional RSVP page. - From scratch: Add a blank invitation and add your own design elements. Click Add Design and then click Invite with RSVP in the Blank Frames tab.
- (Optional) Change the layout of your invitation page to control how it looks on mobile and desktop. Tip: The dotted line on the invitation marks the mobile cutout, showing the part of the page guests will see on their phones, while the full page displays on desktop.
- Click Layout on the action bar.
- Select a layout option (e.g. Left, Center, Right) or drag the slider to move the mobile cutout.
Tip:
Switch between the desktop and mobile views above the invitation to perfect the design on both views.
Step 2 | Add and customize an RSVP button
To turn your invitation into an online RSVP page, you must add an RSVP button. This button connects your invitation to a live RSVP page where your guests can send their response.
If you started from a template or generated an invitation with an RSVP page, you'll likely already have an RSVP button so you can continue customize it to your liking.
To add and customize an event button:
Desktop browser
Wixel app
- (If the design doesn't have an RSVP button) Add a button to the invitation:
- Click + Elements on the action bar.
- Select a button under Event buttons.
- Select the RSVP button in the invitation.
- Customize the RSVP button:
Design the button
 : Define the borders of the button so that it stands out. Change the color, opacity, size, and border style.
 : Drag the slider to make the corners of your element more square or round.
 to design each corner separately.
 : Customize the button text's font, size, color, and style.
 : Drag the slider to add or remove space above and below the text.
 : Drag the slider to add or remove space between the letters.
 : Change the placement of the text in the button.
 : Add a shadow to give the element a 3D effect. When selecting a shadow, customize the color & opacity, distance, blur, and angle.
Choose where the button links to
 on the action bar.
Animate the button
 on the action bar.
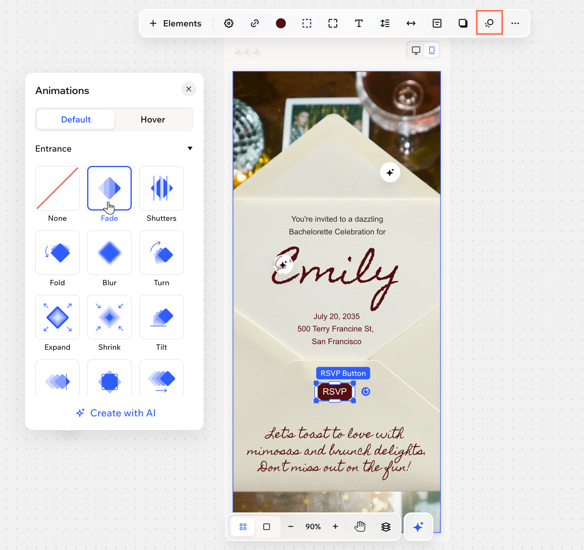
Edit the button settings
 on the action bar.
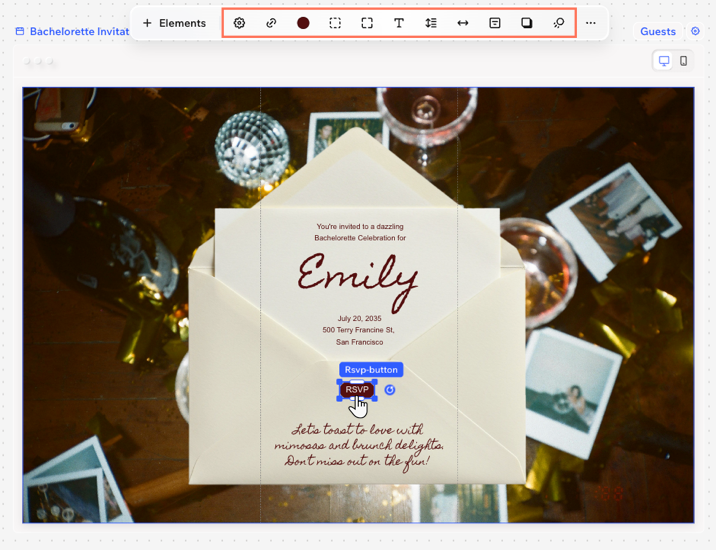
Step 3 | Customize your RSVP settings
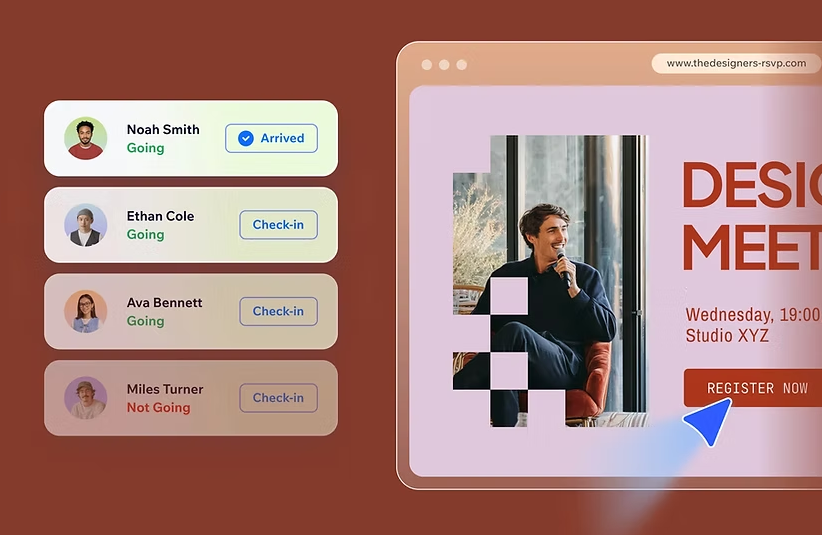
Set up your RSVP process and the details attached to your event. Set the guest limit and update event details for the form and calendar invites.
Note:
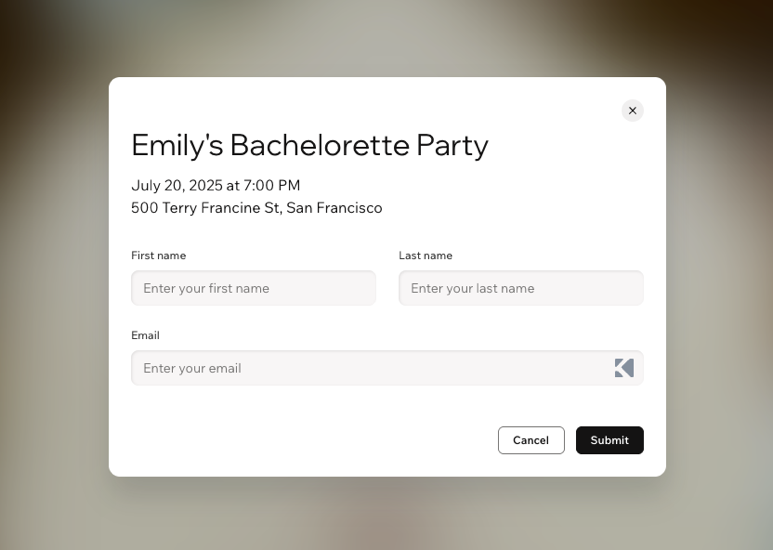
The RSVP page fields always includes first name, last name, and email. These fields can’t be changed.
To customize your RSVP settings:
Desktop browser
Wixel app
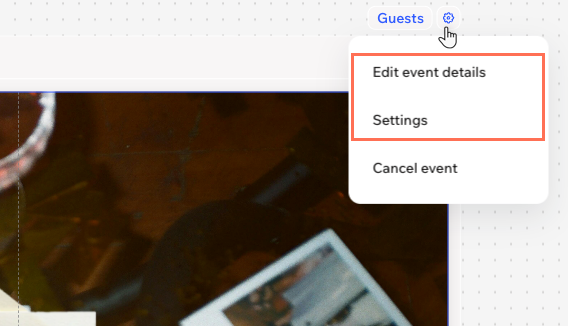
- Click the Settings icon
 next to Guests.
 - Choose what to customize:
Event details
Settings
Step 4 | Publish and share your invitation
Your invitation is now ready to go. Publish the invitation and share the link anywhere you like - by email, social, or messaging apps. Any changes you make to your invitation will automatically update on the live page, so guests always see the most up-to-date information.
To publish the invitation:
Desktop browser
Wixel app
- Click Download & Share at the top right.
- Click the Select design drop-down and choose the relevant design.
- Click Publish.
Note: The link will be live once the invitation is published. - (Optional) Copy the link by clicking the Copy icon
 next to the URL.
Tip:
To un-publish, click the More Actions icon  and click Unpublish. Click Unpublish Link to confirm.
and click Unpublish. Click Unpublish Link to confirm.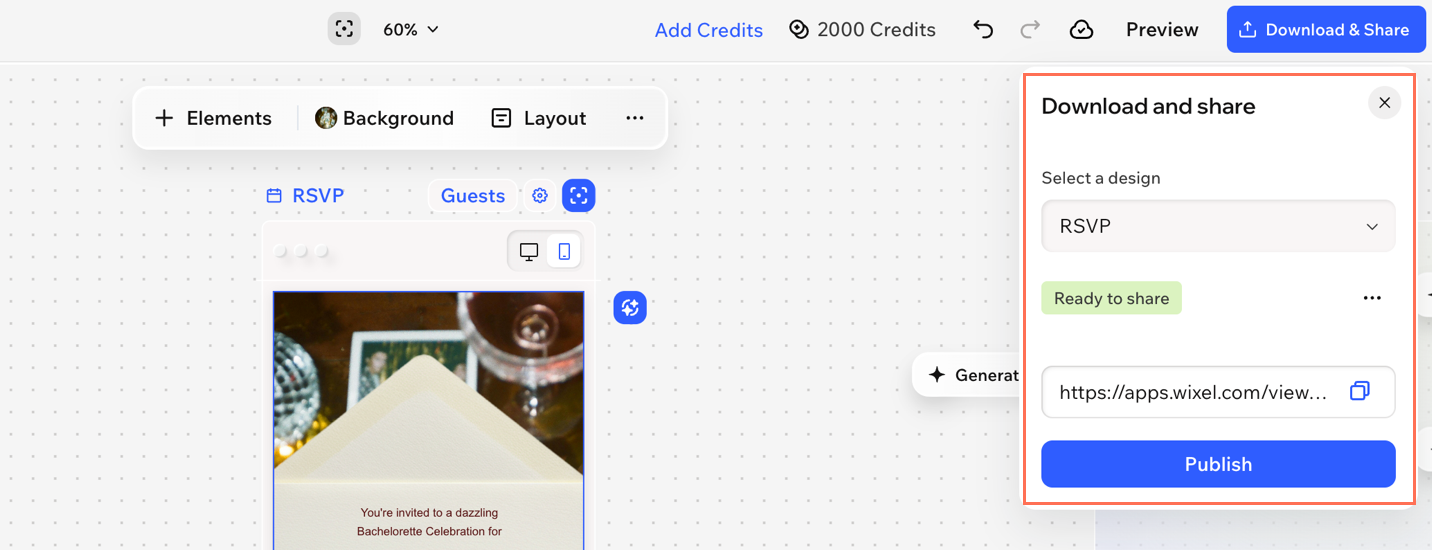
What's next?
FAQs
Click a question below to learn more about this.
What’s the difference between an RSVP invitation and a regular invitation?
Can I change the questions or add fields to the RSVP page?
Can I use Aria for all parts of the invitation and RSVP page?
