Wixel: Adding and Customizing Animations
4 min
In this article
- Adding and customizing animations in a video
- Adding and customizing animations for an RSVP button
This article refers to the new Wixel, released in December 2025. If you're unsure whether you’re using the new or previous Wixel, view more information here.
Bring your videos and event experiences to life with customizable animations in Wixel. Whether you’re telling a story with an AI-generated video or building excitement for an event, Wixel gives you creative ways to animate visual elements, buttons, and more.
Did you know?
You can apply different animations to the same element for unique effects.
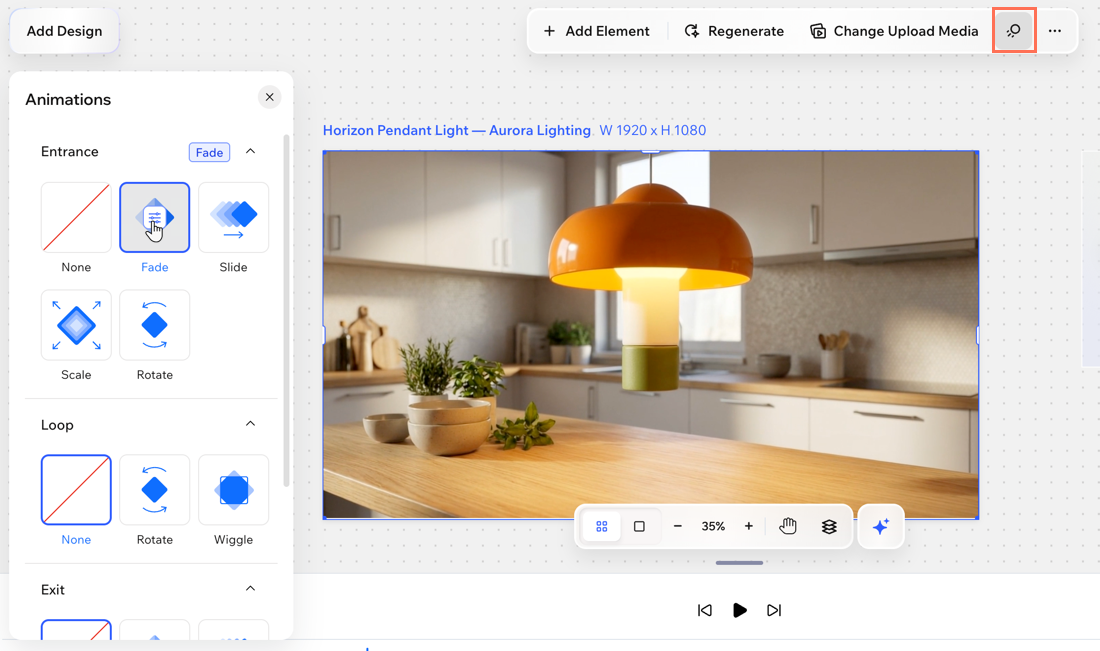
Adding and customizing animations in a video
Add movement or transition effects to any element in your video. Animations can create smooth entrances, highlight key details, and guide your viewers’ attention where you want it.
To add and customize an animation:
- Go to your project in Wixel.
- Select the relevant element in your video.
- Click the Animation icon
 on the action bar.
 - Select an animation from the available options.
- Entrance: The animation introduces an element to the screen - it only plays once, when the element first appears.
- Loop: The animation plays in a continuous loop.
- Exit: The animation plays as the element disappears from the screen.
- (Optional) Customize the animation to match the video's look and feel. Hover over the selected animation and click the Customize icon
 .
.
Note: The available customization options depend on the animation you choose.
Tip:
You can combine multiple animations for the same element. For example, make an image fade in and rotate while it's onscreen.
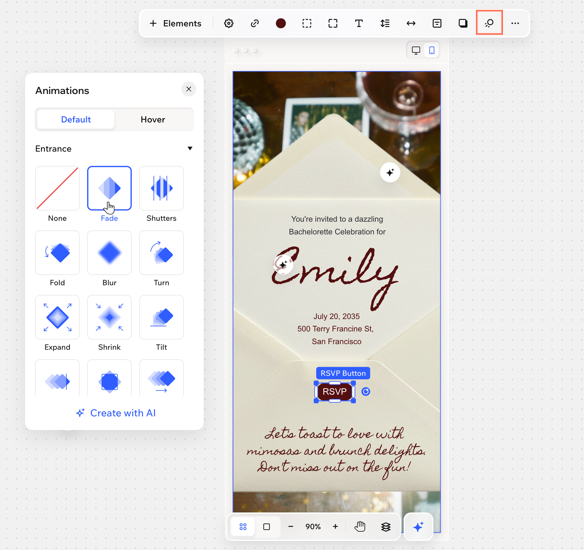
Adding and customizing animations for an RSVP button
Animated RSVP buttons help guide your invited guests through the invitation and increase response rates. Add dynamic effects to your call-to-action so your audience never misses the next step.
To add and customize an RSVP button animation:
Desktop browser
Mobile browser
- Go to your project in Wixel.
- Select the relevant button in your invitation.
- Click the Animations icon on the action bar.
- Select which state to add an animation for (Default or Hover):
- Default: How your animation appears as soon as someone lands on the page.
- Hover: The animation starts moving when the visitor's cursor hovers over the button.
- Select an animation from the available options.
- Entrance: The animation introduces an element to the screen - it only plays once, when the element first appears.
- Loop: The animation plays in a continuous loop.
- Create with AI: Create a custom animation for your button by describing what you want to see happen. For example, "Make the button burst into gold sparkles when hovered over".