

Wix Studio: Sending Monthly Analytics Reports to Your Clients
4 min
In this article
- Sending client reports
- Customizing the report template
- FAQs
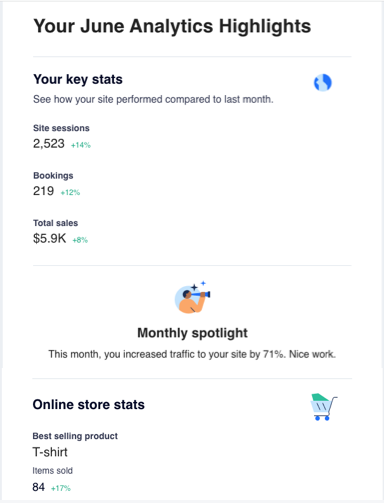
With Wix Studio, effortlessly send your clients monthly personalized email reports featuring their site analytics, insights and tips. Your clients will appreciate receiving the reports and exploring their site insights independently. This powerful tool also enables you to establish regular communication with your clients, expand your services, and boost your business value.
The best part? Once you've set it up, you don't have to lift a finger. The reports are automatically generated with relevant data for your clients with your logo.
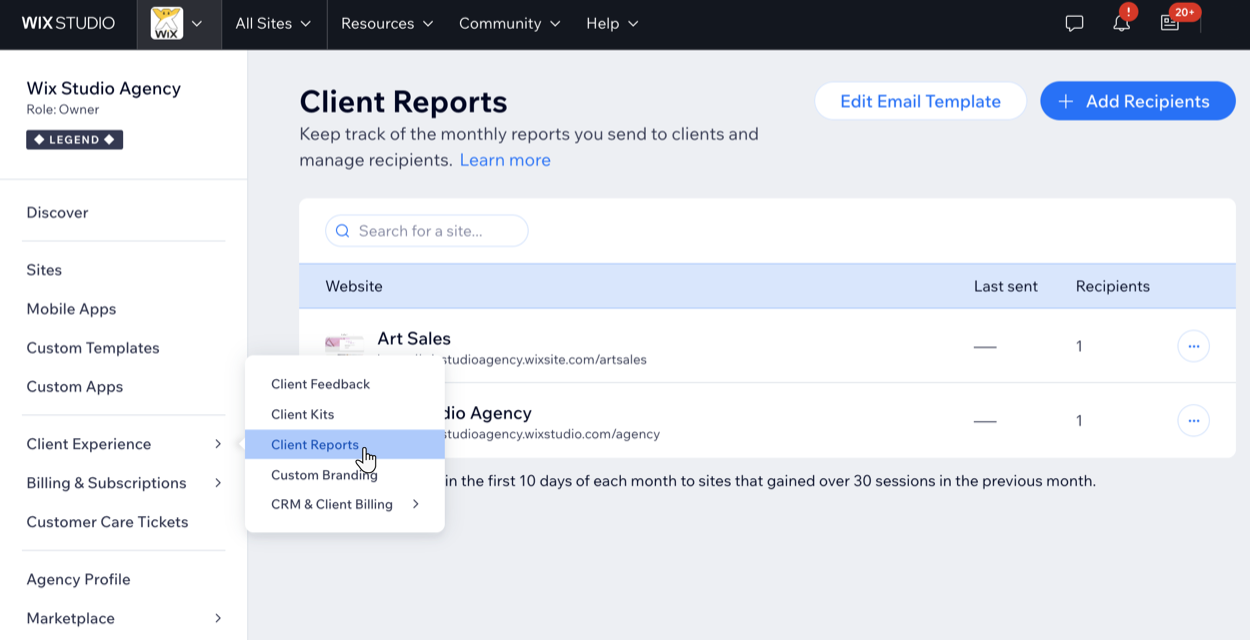
Sending client reports
Select which clients you want to send the report to and then once a month they will receive a customized report that is automatically filled with data relevant to their site. For example, if a client's site has a store and a blog, the report will automatically contain insight sections for the store and blog. You can also view examples of the reports for the different types of sites before you send them.
Important:
- Only sites with a Premium plan are eligible to receive the report.
- Reports are sent at the beginning of each month to sites that had at least 30 monthly sessions.
To choose which clients you want to send the report to:
- Go to Client Reports in your Wix Studio workspace.
- Click Get Started.
- (Optional) Click on a site type to view an example, e.g. stores, bookings.
- Click Next.
- Click Add next to the sites you want to generate the report for and then select the specific contact(s) you want to receive it.
- Click Apply.
- Click Next.
- Click Done.
Customizing the report template
Customize the appearance and messaging of your reports to align perfectly with your business and client needs. With just a few clicks, you can infuse your brand colors, create an impactful opening or closing message, and modify the text to suit your preferences. These changes will be applied to all of your client reports.
Important:
Don't edit the dynamic values in the template. They appear as "placeholders", but display the relevant information to each recipient based on their data.
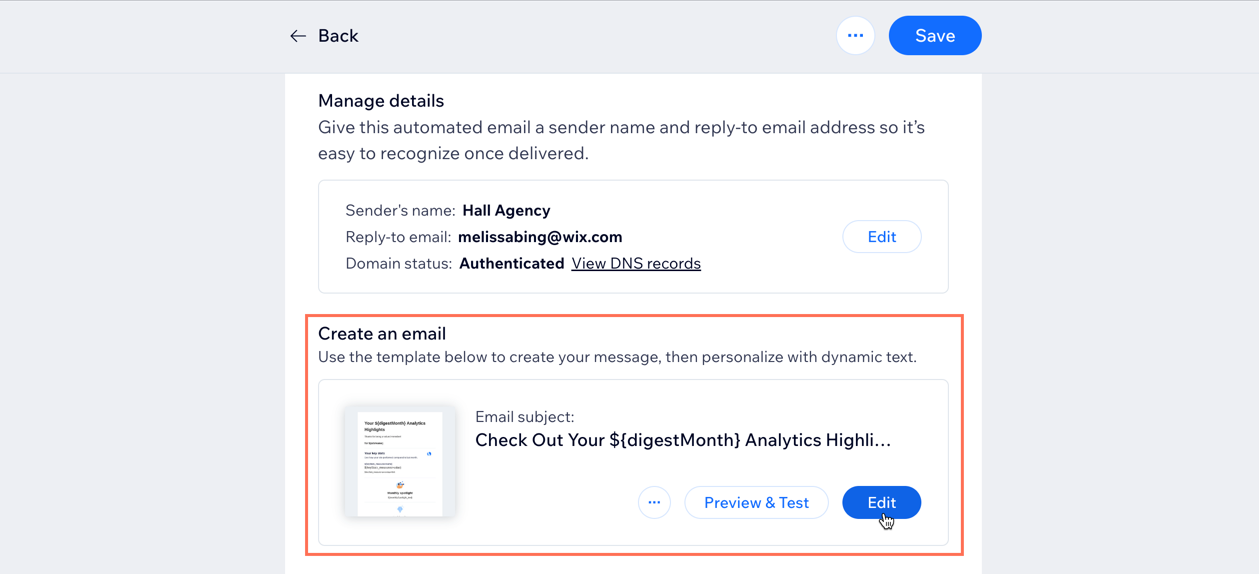
To edit the template:
- Go to Client Reports in your Wix Studio workspace.
- Click Edit Email Template.
- Click Edit under Create an email.
- Customize the email template.
- Click Save & Continue at the top right.
- Click Save at the top right.
FAQs
Click a question below to learn more about sending client reports.
Who receives the reports?
How much data is needed for a report to generate?
Can I preview what a report looks like?

I'd like to select my client as a recipient for a report, but I can't find them. Why?
Is there a limit to the number of reports I can send?
I want to add a site to client reports, but I can't find it. Why?
Do the reports affect my Automations email quota?
How do I upload my logo?
