

Wix Studio: Inviting a Client to Join a Site
5 min
In this article
- Inviting a client to join your site
- Checking the status of an invitation
- Resending an invitation
- Allowing clients to use the editor
- FAQs
Once your client’s site is good to go, it’s time to bring them in. With Wix Studio, you can invite your client as a collaborator and fine-tune their access—whether it’s editing the site or managing specific parts of the dashboard.
Ready to hand over a site?
Take it a step further by creating a personalized client kit. It’s a great way to streamline the handover process, giving your client everything they need to take the reins while you stay in control of the details that matter.
Inviting a client to join your site
Invite clients to collaborate and assign them a predefined or custom role that fits their needs. You can easily adjust their role or revoke access whenever necessary.
Note:
Clients can't duplicate a Studio Editor site unless they also use Wix Studio.
To send an invitation to a client:
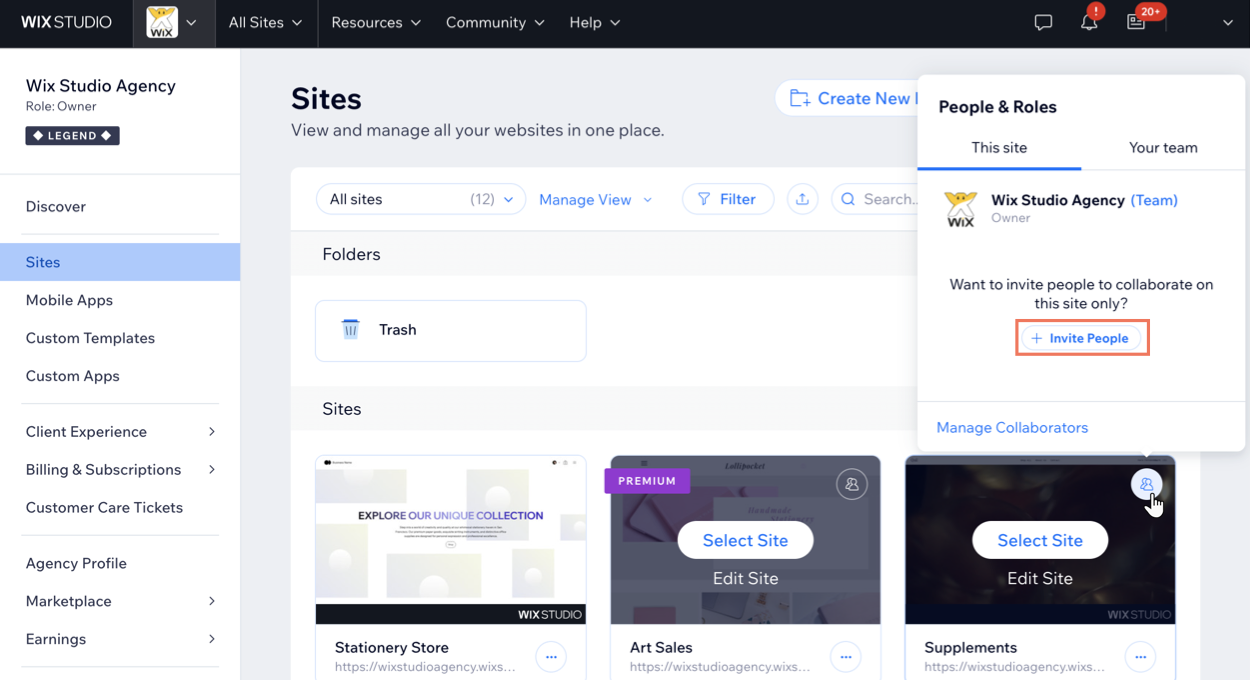
- Go to Sites in your Wix Studio workspace.
- Hover over the Collaborators icon on the relevant site.
- Click Invite People.
- Enter your client’s email address.
- Select the checkbox next to the relevant role(s).
- Click Send Invite.
- In the pop-up, select Client and click Done. They'll be marked as CLIENT in Roles & Permissions, and their invite email and landing page will be tailored to the client experience.
Checking the status of an invitation
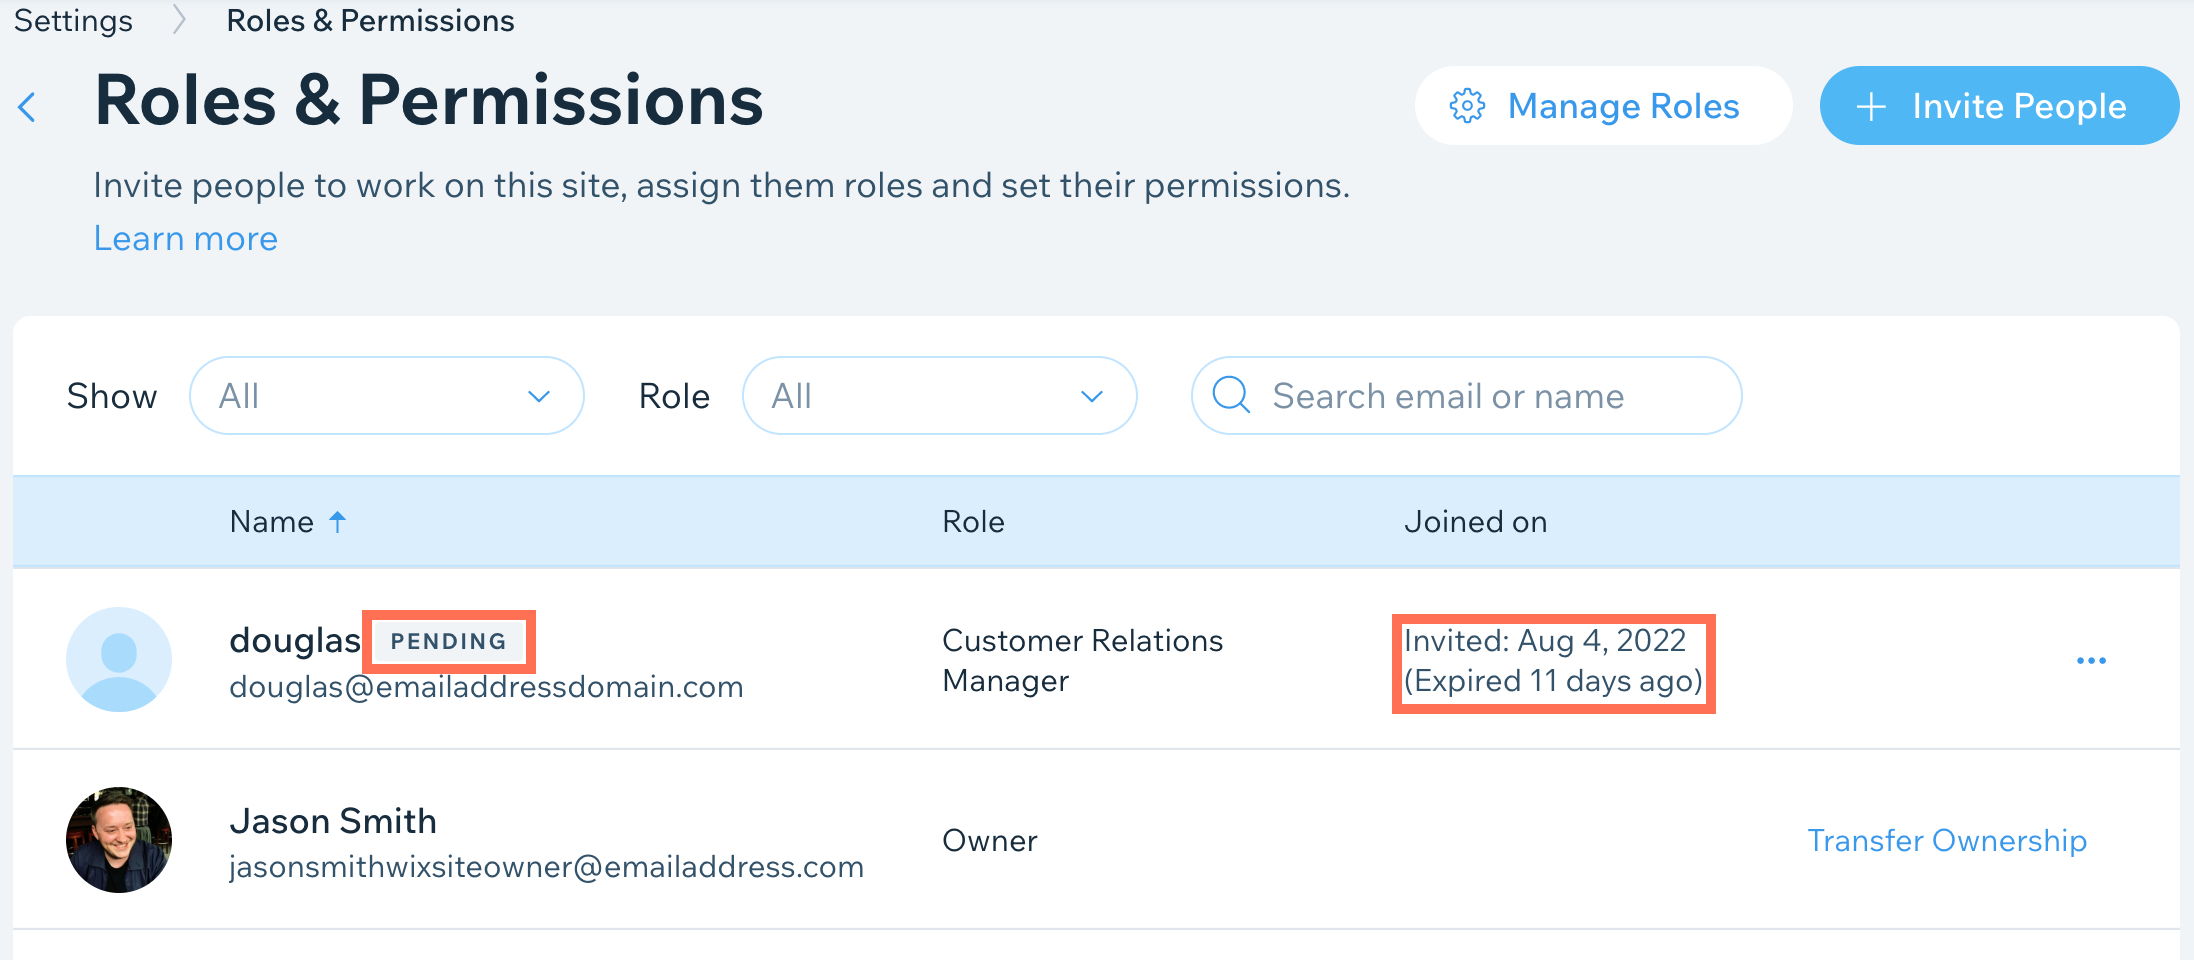
Check the Roles & Permissions in the site's dashboard. A 'PENDING' label means the invite hasn’t been accepted yet.
The Joined on column shows when the invite was sent and how many days remain before it expires. Invitation emails are valid for 30 days.
Resending an invitation
Resend a client invitation anytime via email or by sharing an invite link.
To resend an invitation:
- Go to Sites in your Wix Studio workspace.
- Hover over the Collaborators icon on the relevant site.
- Click Manage Collaborators.
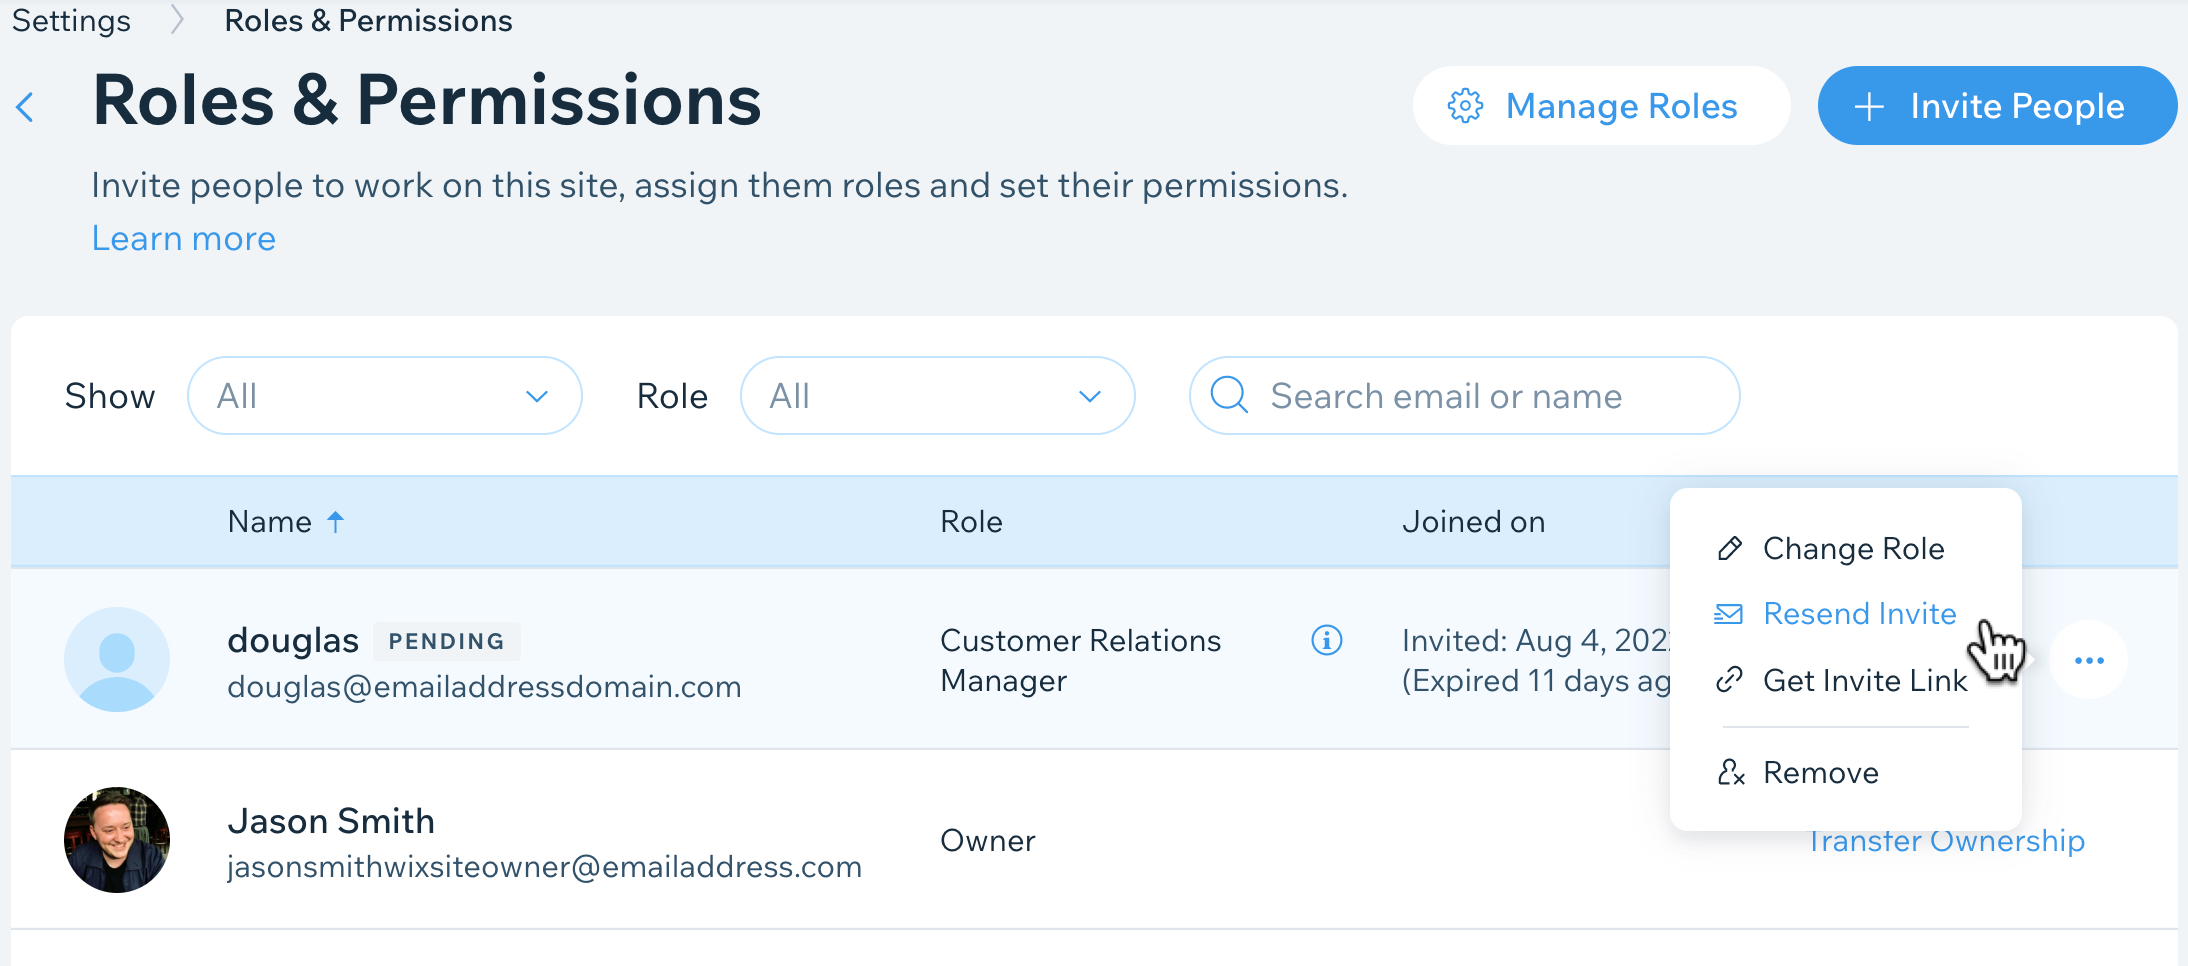
- Hover over the relevant person and click the More Actions
 icon.
icon. - Choose how you want to resend the invitation:
- Send it through Wix: Click Resend Invite. Wix will resend the invitation to the email address that you entered.
Tip: If your client doesn’t see the invite, ask them to check their spam folder. - Send it yourself: Click Get Invite Link. The link is automatically copied to your clipboard. Paste it in an email or chat message to your client.
Note: This feature is currently not available in Safari.
- Send it through Wix: Click Resend Invite. Wix will resend the invitation to the email address that you entered.
Allowing clients to use the editor
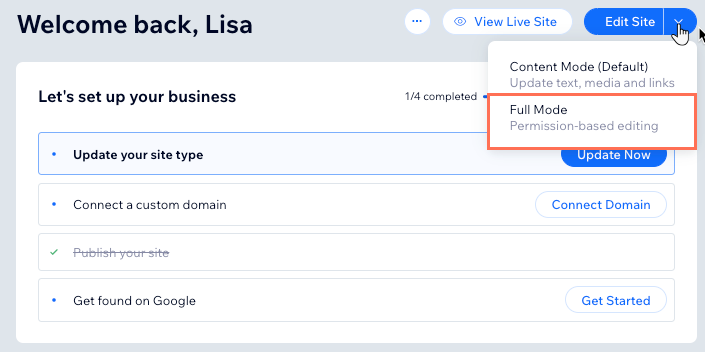
Once accepted, clients can access their site in the Studio Editor. In content mode, they can update text and images but can’t modify your design. If their role only includes Edit Content, this is the only mode they can access.

If your client has a role with more permissions, like Co-Owner, they can also access the Full Mode. This mode lets them open the Studio Editor, the same way you see it. However, the actions they're allowed to perform still depend on the role you assign.
Learn more about how clients can use the Studio Editor.
FAQs
Click a question below to learn more about inviting clients.
What do clients see when they're invited to collaborate on a site?

What role should I give my client?
Can clients invite other people to work on my site?
Who can collaborate on sites in Wix Studio?
I sent an invitation to the incorrect email address, what should I do?
