

Wix Photo Albums: Editing Your Album's Cover Information
2 min
In this article
- Editing your photo album cover
- FAQs
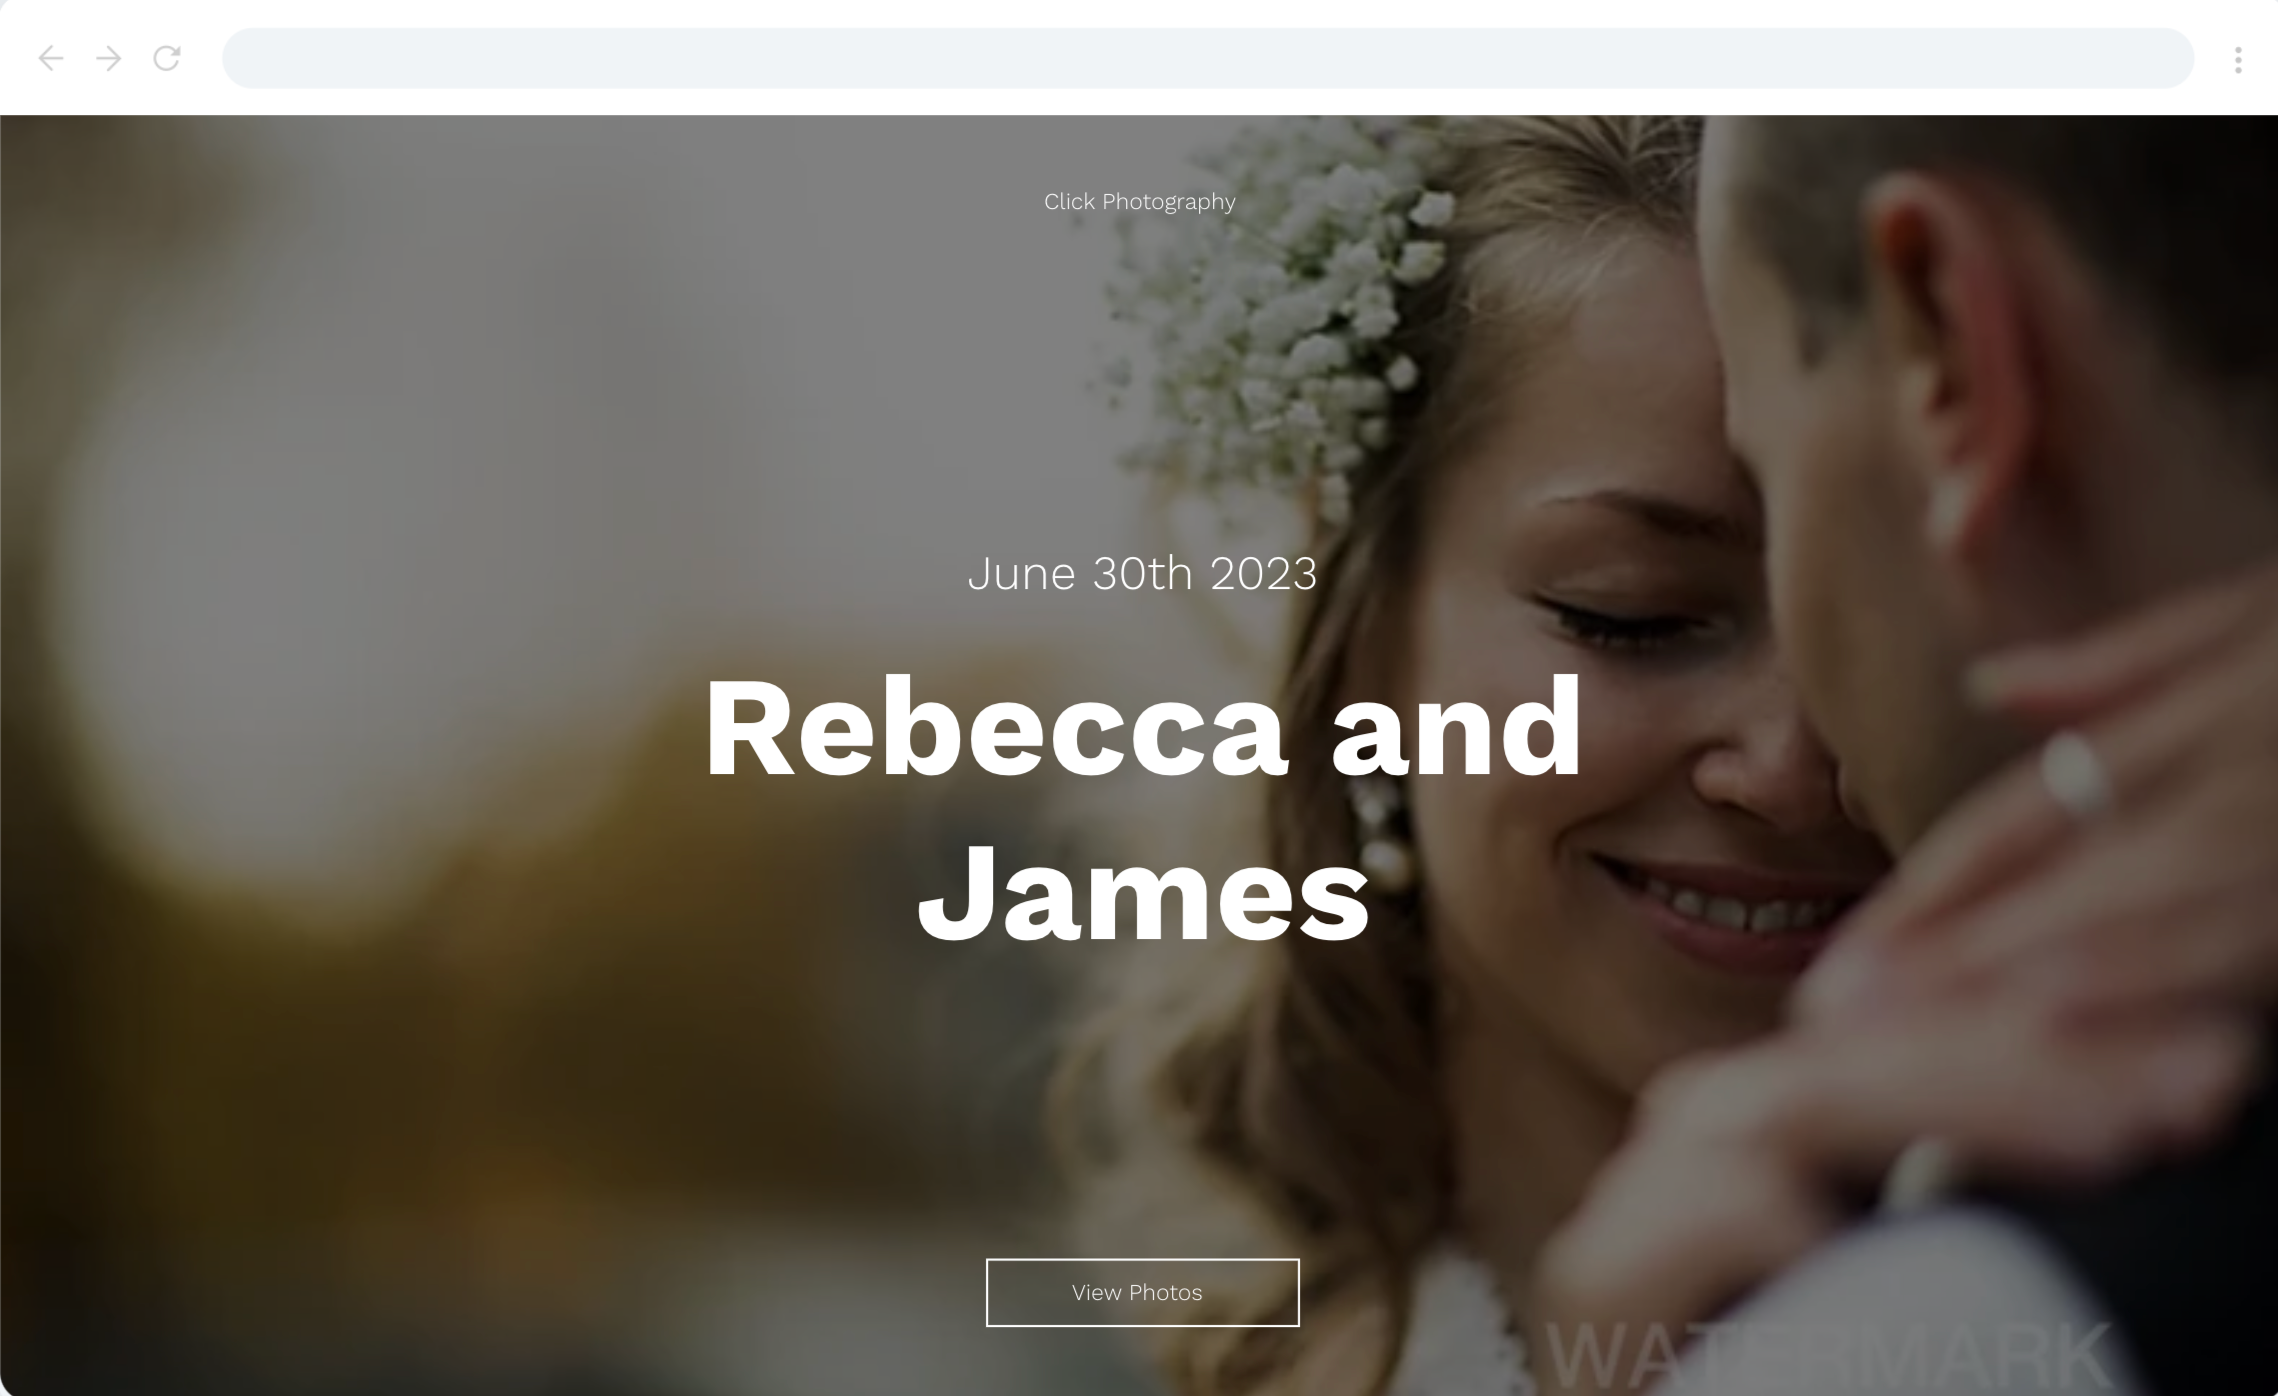
Change the information appearing on your album cover at any time. This includes your album's name, your business name, logo and more.
In this article, learn more about:
Editing your photo album cover
You can customize the information that appears on the cover of your photo album by changing the title and button text. You can also choose to add additional information to your cover, such as a wedding date, or venue name etc.
To edit your album's cover:
- Go to Photo Albums in your site's dashboard.
- Click Manage Album next to the relevant album.
- Click Edit at the top right.
- Click Media on the left.
- Hover over the album cover and click Change Photo.
- Upload the relevant image.
- Click Text.
- Click the Cover tab.
- Edit your cover information:
- Album title: Click the text box to add or change the title of your album.
- Button text: Click the text box to add or change the text of the button that appears on your album cover.
- More info: Click the toggle to add additional information, e.g, wedding date.
- Business info: Click the toggle to add your business name or logo.
Note: The logo should be 300 x 100 px. We recommend it to be in PNG format.
- Click Design on the left.
- Click Layouts.
- Click the Cover tab.
- Select a layout for your cover.
- Click Back to design.
- Click Colors.
- Click the Cover tab.
- Customize the colors for your text and background.
- Click Publish Now at the top right.
Note:
Animations do not apply to cover images.
FAQs
Click a question below to learn more about editing your album cover.
How can I change my font style and color?
If I make a change, is it saved automatically?
Why do I have a Wix Promo banner on my album?
Is the name of the album important?
