Wix Groups: Creating Subscription Based Posts
5 min
In this article
- Creating subscription based posts
- Converting an existing post to a subscription-based post
- FAQs
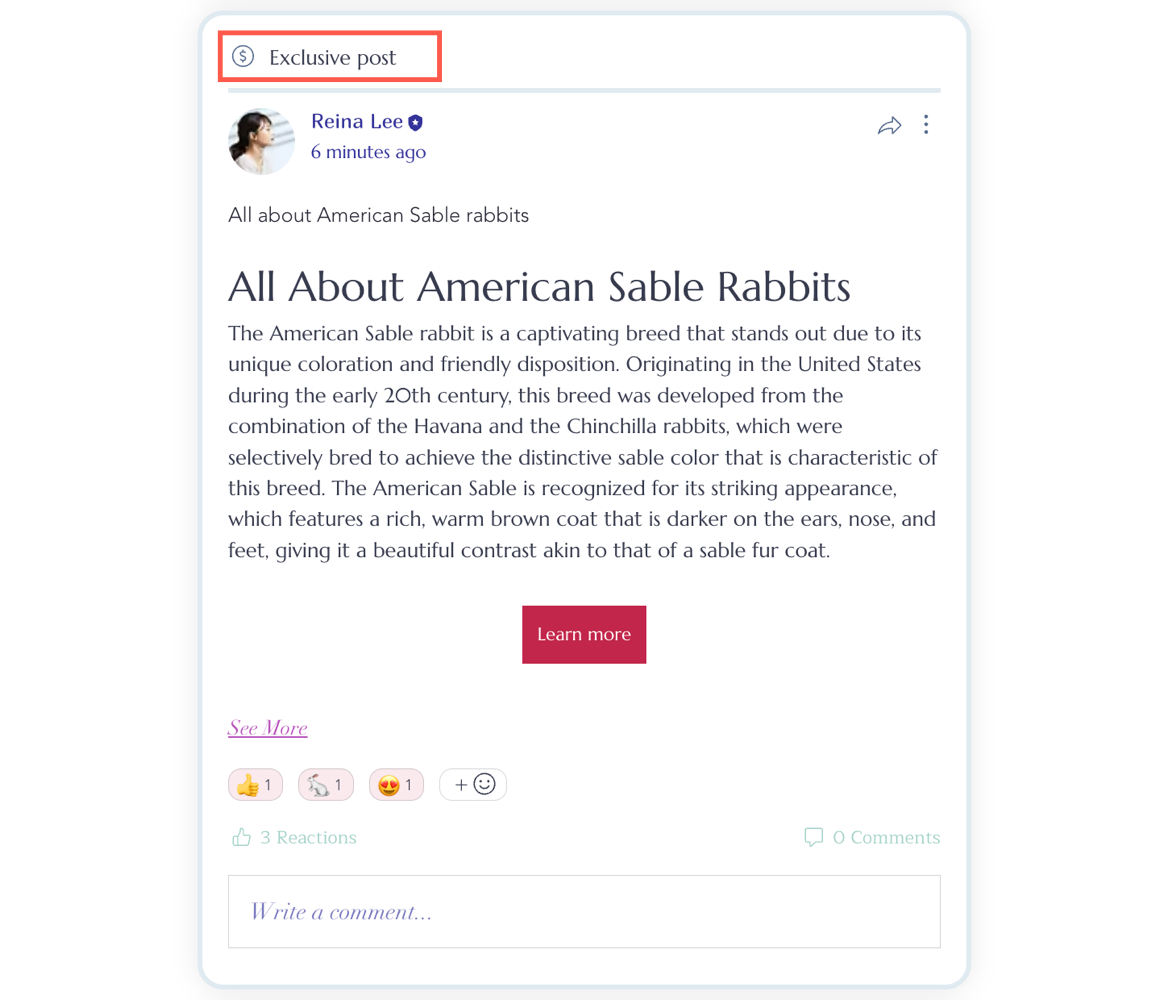
Monetize your group by creating exclusive content for members with active pricing plans. For example, offer a series of post-based tutorials that are visible only to paying members. When people see one of these exclusive posts, they'll see an 'Exclusive Post' label at the top. People who are members and have that specific pricing plan will be able to read it. If they're not members, they'll see a 'Subscribe Now' button.
Before you begin:
- Make sure to add Wix Pricing Plans to your site.
- Connect a payment method to get paid for your subscription plans.

Creating subscription based posts
Want to create exclusive content that's only available to paying members? Give extra value to paying group members by composing subscription-based posts. Write posts that contain high-quality, unique content your audience will find beneficial. For example, tutorials, exclusive videos, downloadable resources, and more.
Dashboard
Wix app
- Go to Groups in your site's dashboard.
- Click the relevant group.
- Click Posts.
- Click Create Post.
- Write your post.
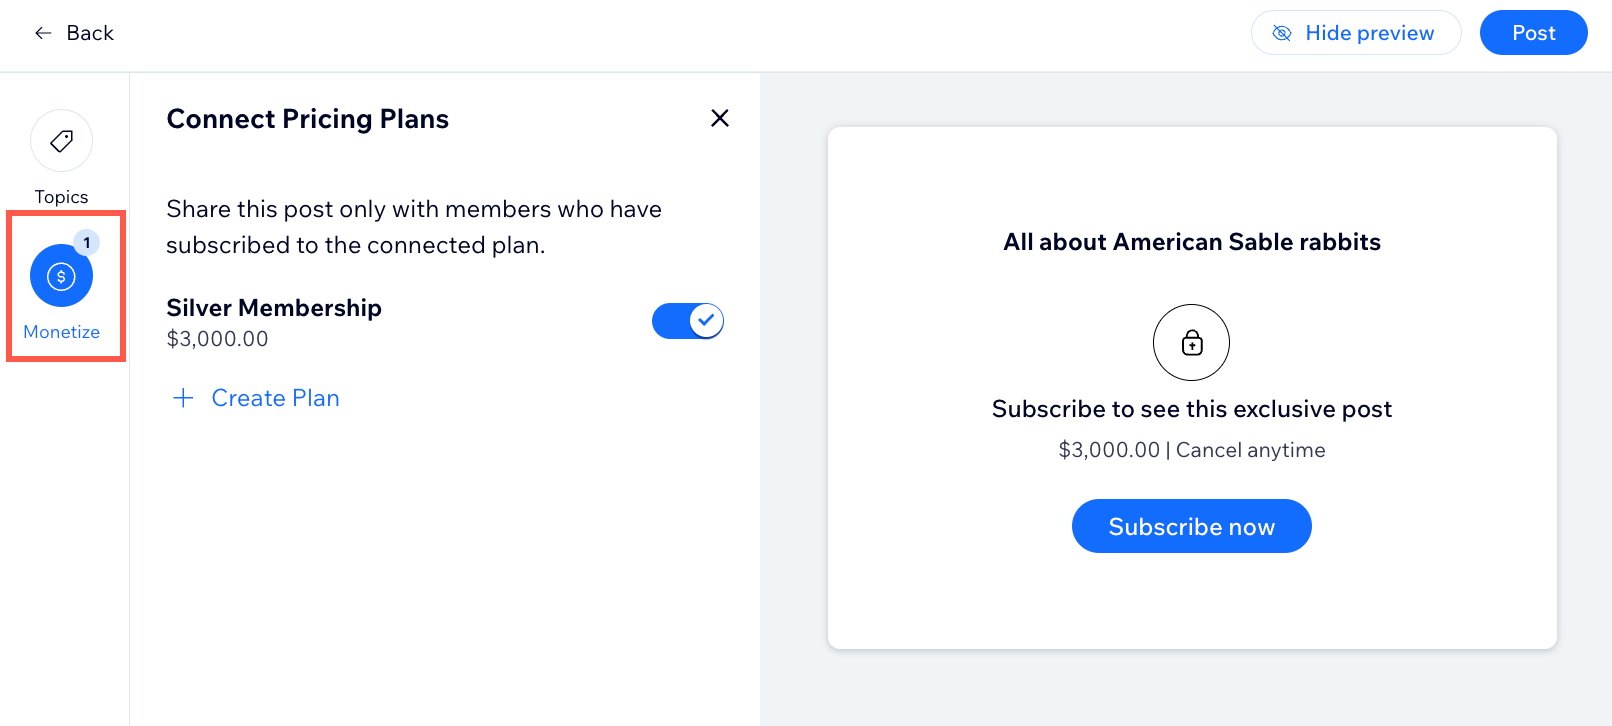
- Click Monetize on the left.

- Choose the relevant option:
- Create a new pricing plan: Click +Create Plan and set up your new plan.
- Connect an existing plan: Enable the toggle next to the relevant plan.
- Click Post at the top right.
Converting an existing post to a subscription-based post
If you already have a post that you'd like to make exclusive, you can turn it into a subscription post. Non-subscribers will see the subscription pricing required to access the exclusive content. They can also view reactions, comments, and the content type (e.g. images, videos, files).
Dashboard
Wix app
- Go to Groups in your site's dashboard.
- Click the relevant group.
- Click Posts.
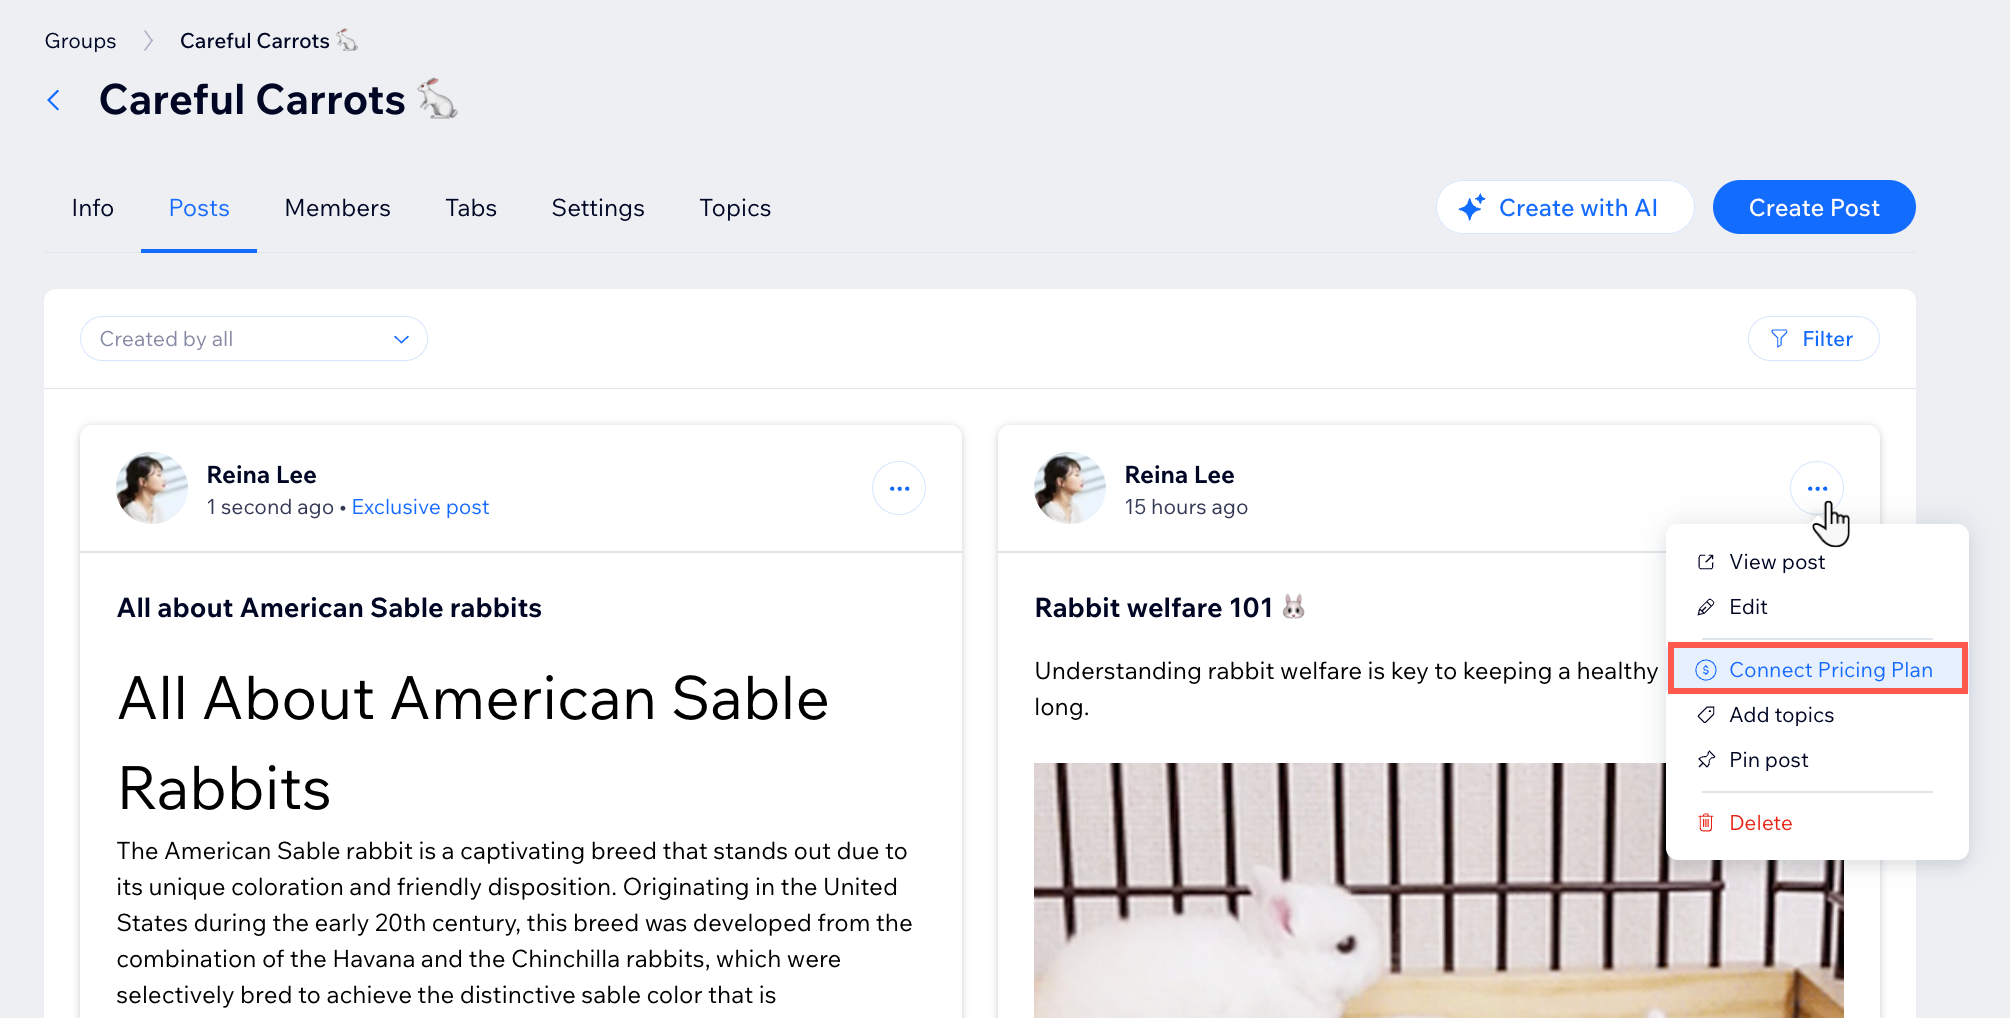
- Click the More Actions icon
 next to the relevant post.

- Click Connect Pricing Plan.
- Choose the relevant option:
- Create a new pricing plan: Click + Create New Plan and set up your new plan.
- Connect an existing pricing plan: Enable the toggle next to the relevant plan.
- Click Done.
FAQs
Click a question below to learn more about subscription-based posts.
Can I connect multiple pricing plans to one subscription post?
Can members create subscription-based posts?
How can I manage my pricing plans?
Can I track which members have subscribed to my exclusive content?
Can I see analytics for my exclusive posts?


