

Wix Events: Managing Your Guest List
10 min
In this article
- Editing guest information
- Viewing responses to registration form questions
- Viewing your waitlist
- Resending or downloading tickets
- Removing guests from the guest list
- FAQs
The guest list allows you to view all individuals attending your event. You can review the information guests provided on their registration forms, add or remove guests, and resend tickets.
When managing RSVP events, you can track guest attendance status. For ticketed events, you can see additional details such as ticket prices and seat assignments, when a seating map is used.
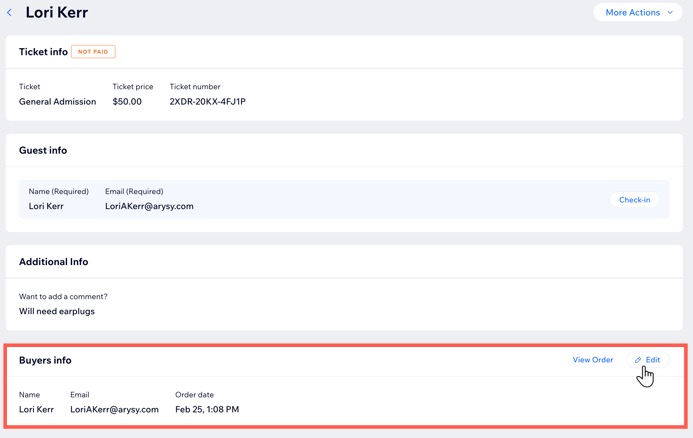
Editing guest information
Edit a guest's information for ticketed and RSVP events, including contact details, email address, RSVP status, and other relevant details. Keeping guest information updated helps maintain an accurate and organized event list.
Note:
Currently, editing guest's info is only available from desktop.
To edit guest info:
- Go to Events in your site's dashboard.
- Click Manage next to the relevant event.
- Click the Guests tab at the top.
- Select the relevant guest.
- Edit the guest's details based on the event type:
- Ticketed events: Click Edit next to Buyers info / Guest Details.
- RSVP events: Click Edit Guest Details.
- Edit the relevant information.
- Click Save.
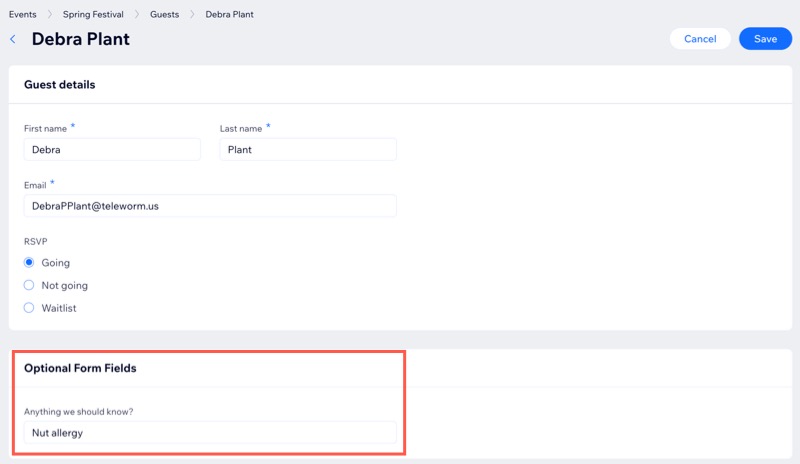
Viewing responses to registration form questions
When guests register for an event, they complete your registration form. In the guest list, you can view and manage their responses to make accommodations, such as noting any allergies or special requests.
Tip:
You can export the guest list to view a table with all your guests' responses.
To view registration form responses:
Dashboard
Wix app
Wix Studio app
- Go to Events in your site's dashboard.
- Click Manage next to the relevant event.
- Click the Guests tab at the top.
- Click the relevant guest to view their details and responses.
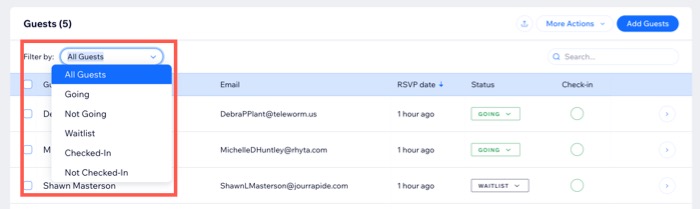
Viewing your waitlist
If your RSVP event has a waitlist, you can view the guests on it and update their status as needed.
To view the waitlist:
Dashboard
Wix app
Wix Studio app
- Go to Events in your site's dashboard.
- Click Manage next to the relevant event.
- Click the Guests tab at the top.
- Click the Filter by drop-down and select Waitlist.
- (Optional) Click the Status drop-down next to a guest and update the status.
Resending or downloading tickets
If your guests lose their tickets or don’t receive them, you can easily resend the tickets via email. Additionally, you have the option to download a ticket directly to your computer or mobile device.
To resend or download tickets:
Dashboard
Wix app
Wix Studio app
- Go to Events in your site's dashboard.
- Click Manage next to the relevant event.
- Click the Guests tab at the top.
- Click the relevant guest.
- Click More Actions drop-down.
- Select an option:
- Resend ticket: Select Resend Ticket and then Resend to confirm.
Note: The ticket is emailed to the email address the guest entered when registering. - Download ticket: The ticket downloads to your computer.
- Resend ticket: Select Resend Ticket and then Resend to confirm.
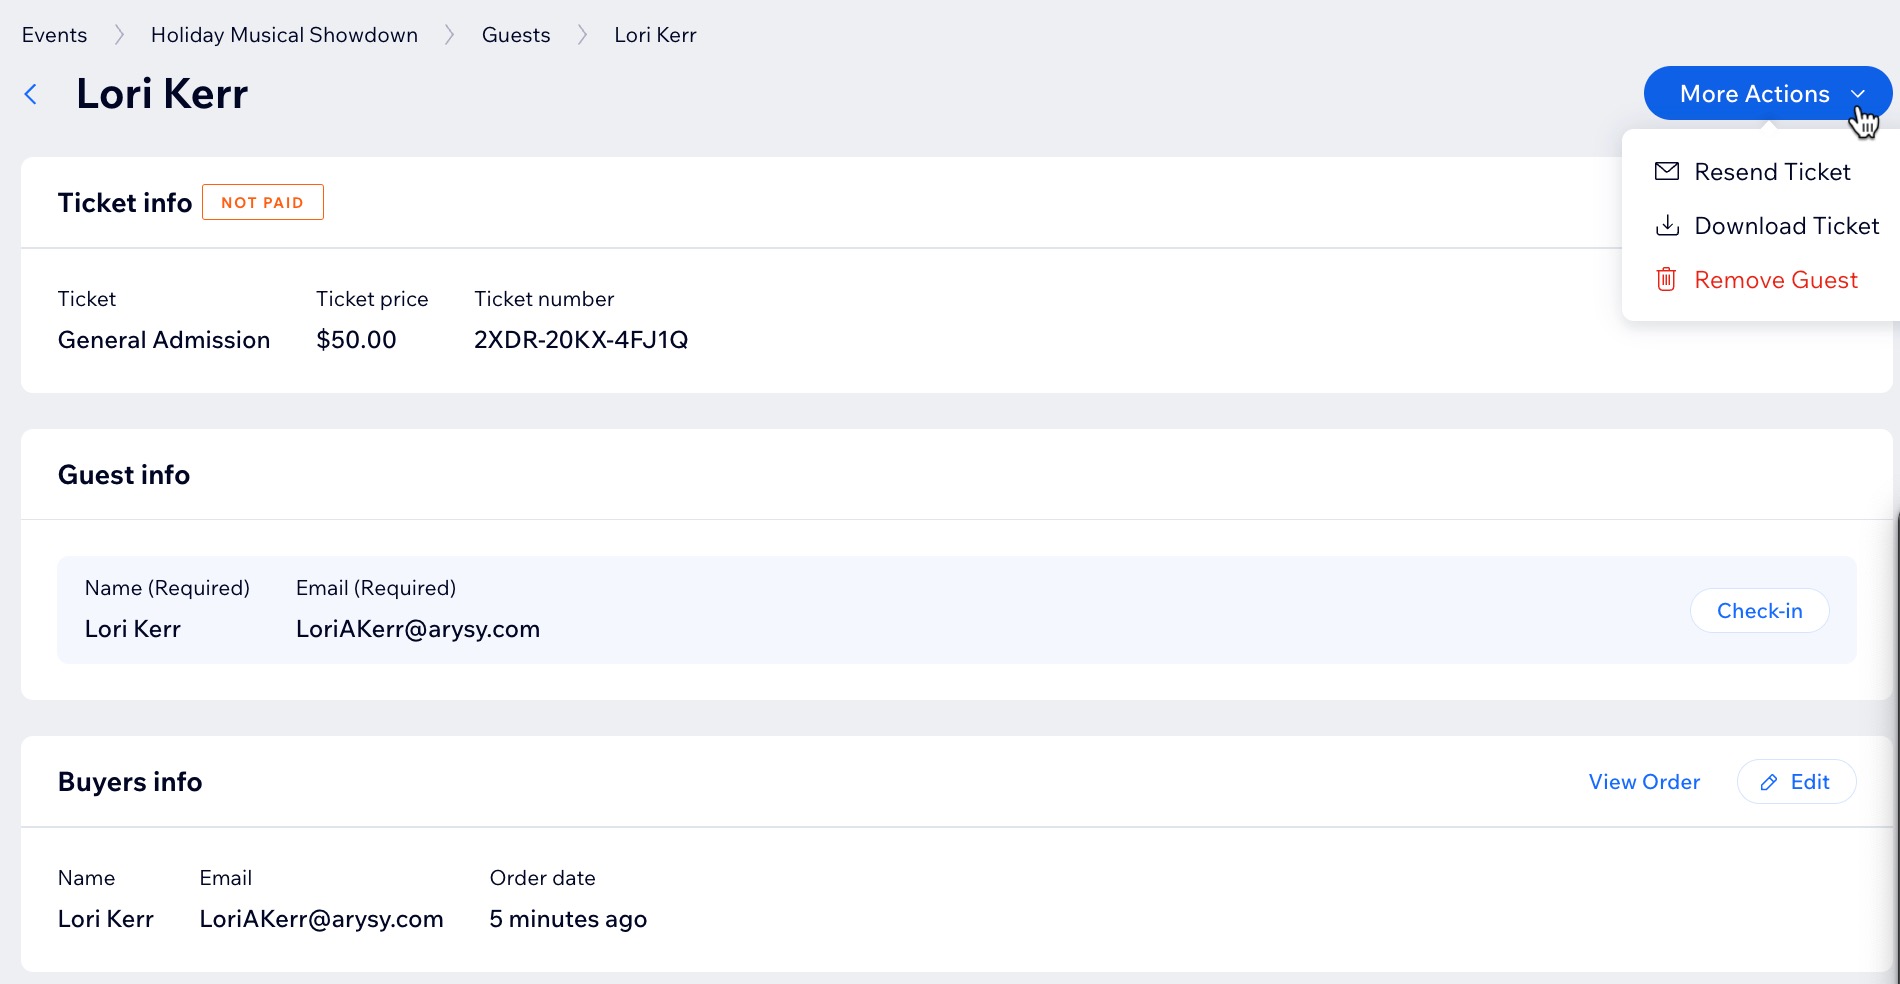
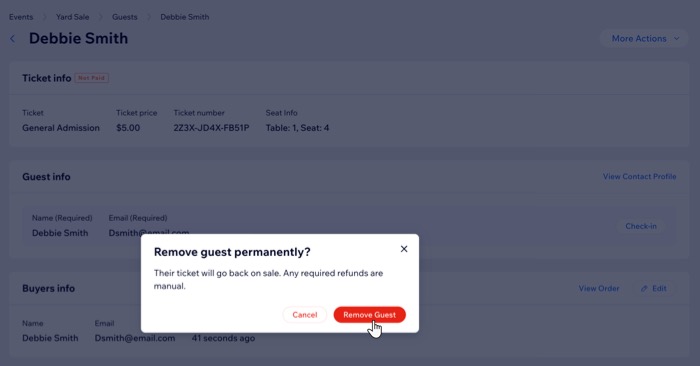
Removing guests from the guest list
You can remove any guests who have indicated they will not be attending your event, helping you keep your guest list up to date.
Note:
Removing a guest permanently deletes their registration. For ticketed events, their ticket goes back on sale.
To remove a guest:
Dashboard
Wix app
Wix Studio app
- Go to Events in your site's dashboard.
- Click Manage next to the relevant event.
- Click the Guests tab at the top.
- Click the relevant guest.
- Remove the guest based on the event type:
- Ticketed events: Click More Actions drop-down and select Remove Guest. Then click Remove Guest to confirm.
Tip: Learn more about removing and refunding an order. - RSVP events: Click Remove Guest then click Delete Guest to confirm.
- Ticketed events: Click More Actions drop-down and select Remove Guest. Then click Remove Guest to confirm.
FAQs
Click a question below to learn more.
How can I add a guest to the list?
Can I update the payment status from unpaid to paid in the guest list?

Can I edit the number or type of ticket a guest purchased?
Can I hide the guest list from my live site?
What happens to tickets when I remove a guest?
Where can I view removed guests?
