

Wix Editor: Generating Page Sections with AI
2 min
In this article
- Generating new sections with AI
- Adjusting your section content
Add sections generated by AI (Artificial Intelligence) to optimize your site building experience. The generator takes your site information into account, and creates content that you can adjust to your liking.
Did you know?
You can harness the power of our AI Website builder to create a one-of-a-kind site, tailored to your business needs.
Generating new sections with AI
Organize and display content by adding AI-generated sections. Any sections you add are fully customizable, so you can change the design and content as needed.
To add an AI-generated section:
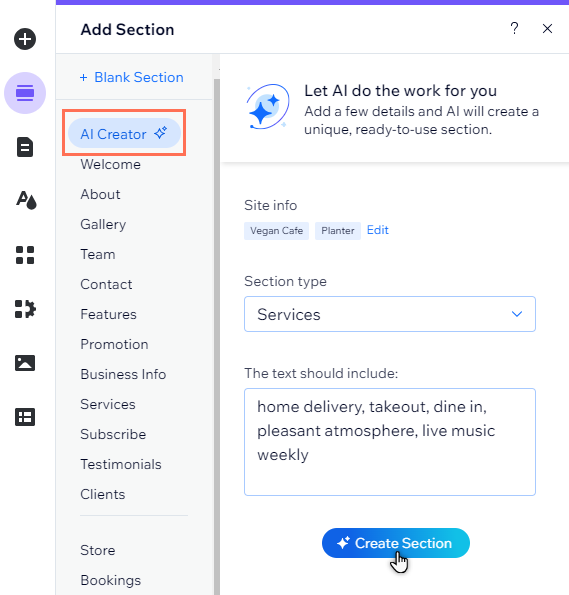
- Select Add Section
in the left editor menu.
- Select AI Creator.
- Add / edit your site information and desired section content:
- Site info: This includes your site type and name. If you want to update it, select Edit and make the necessary changes.
- Section type: Choose the type of section you want from the drop-down menu.
- Text details: Enter text details into the field, such as keywords and important information.
- Select Create Section.
- Click and drag the section you want to add it to your page.
Adjusting your section content
After you add an AI-generated section to your site, you can manually change the text and / or images to suit your brand aesthetic.
Important:
You need to check and edit the text where necessary before you publish the changes to ensure that it aligns with the Wix Terms of Use, and that you have all the necessary rights and licenses to use and publish this content.
To adjust your section content:
- Click the section in your editor.
- Click the content you want to change or adjust:
- Text:
- Select the text box.
- Click Edit Text.
- Make the text changes as needed.
- (Optional) Use the panel to change the text font, size, color, and more.
- Image:
- Select the image.
- Click Change Image.
- Select from a range of stock photos or site files, or upload your own.
- Click Choose Image.
- (Optional) Click the icons to crop your image, add a frame, and more.
- Text:

What's next?
- Customize your sections to complement your pages and brand.
- Learn about everything you can do with Wix's AI features.
