Wix Editor: Customizing Your Sections
4 min
In this article
- Adding elements to your section
- Changing the background of your section
- Adjusting the size of your section
- Adding a scroll effect to your section
- Adding a shape divider
Page sections are the building blocks of your site pages. Use them divide your page content, and create a clear, structured layout for your visitors.
Once you've added and set up your sections, use the options to customize them to your liking. You can add additional elements, change the background and size, and much more.
Adding elements to your section
Add elements to your sections to display important information, such as opening hours, products, or services, or to decorate your site with visuals.
To add elements to your section:
- Go to your editor.
- Click Add Elements
 on the left side of the editor.
 - Click a category.
- Drag an element on to the section.

Changing the background of your section
Change the background of your section to suit your site's look and feel. Keep it simple with a block of color, or add media to make your pages fun and dynamic.
To change your section background:
- Go to your editor.
- Click the section.
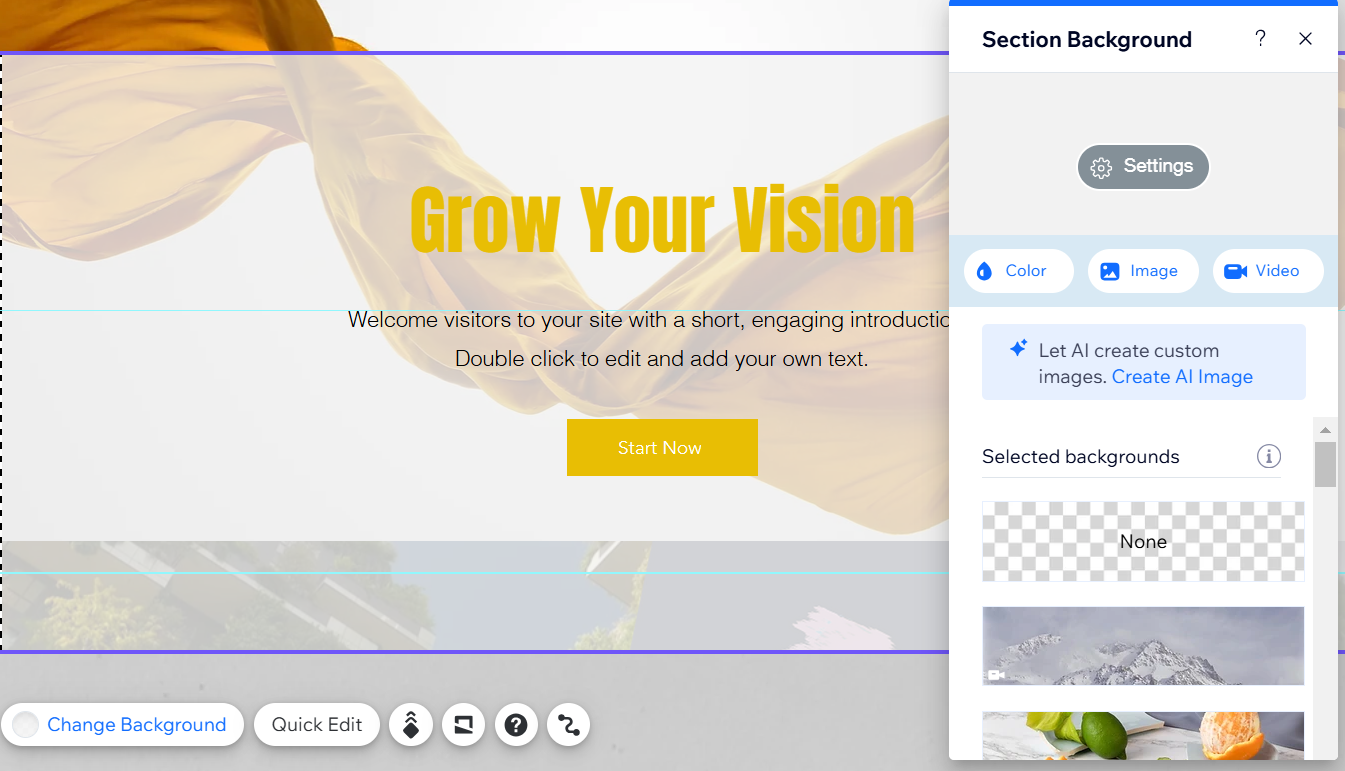
- Click Change Background and choose from the following options:
- Color / Gradient: Select a color from the picker. You can choose one from your site's theme, or add a custom color to make it pop. You can also click Gradient or Fluid Gradient from the top of the panel to add a unique gradient background.
- Image: Choose from a range of free images from Wix and Unsplash, purchase an image from Shutterstock, or upload your own for a unique touch.
- Video: Select a stunning, high-quality video from Wix or Shutterstock, or upload and add your own video to the background.

Chosen a video background?
Site visitors can pause / play the video background on the live site by clicking it.
Adjusting the size of your section
You can make your section bigger to fit more elements and content, or smaller for a more minimalist look.
To adjust the size of your section:
- Go to your editor.
- Click the section.
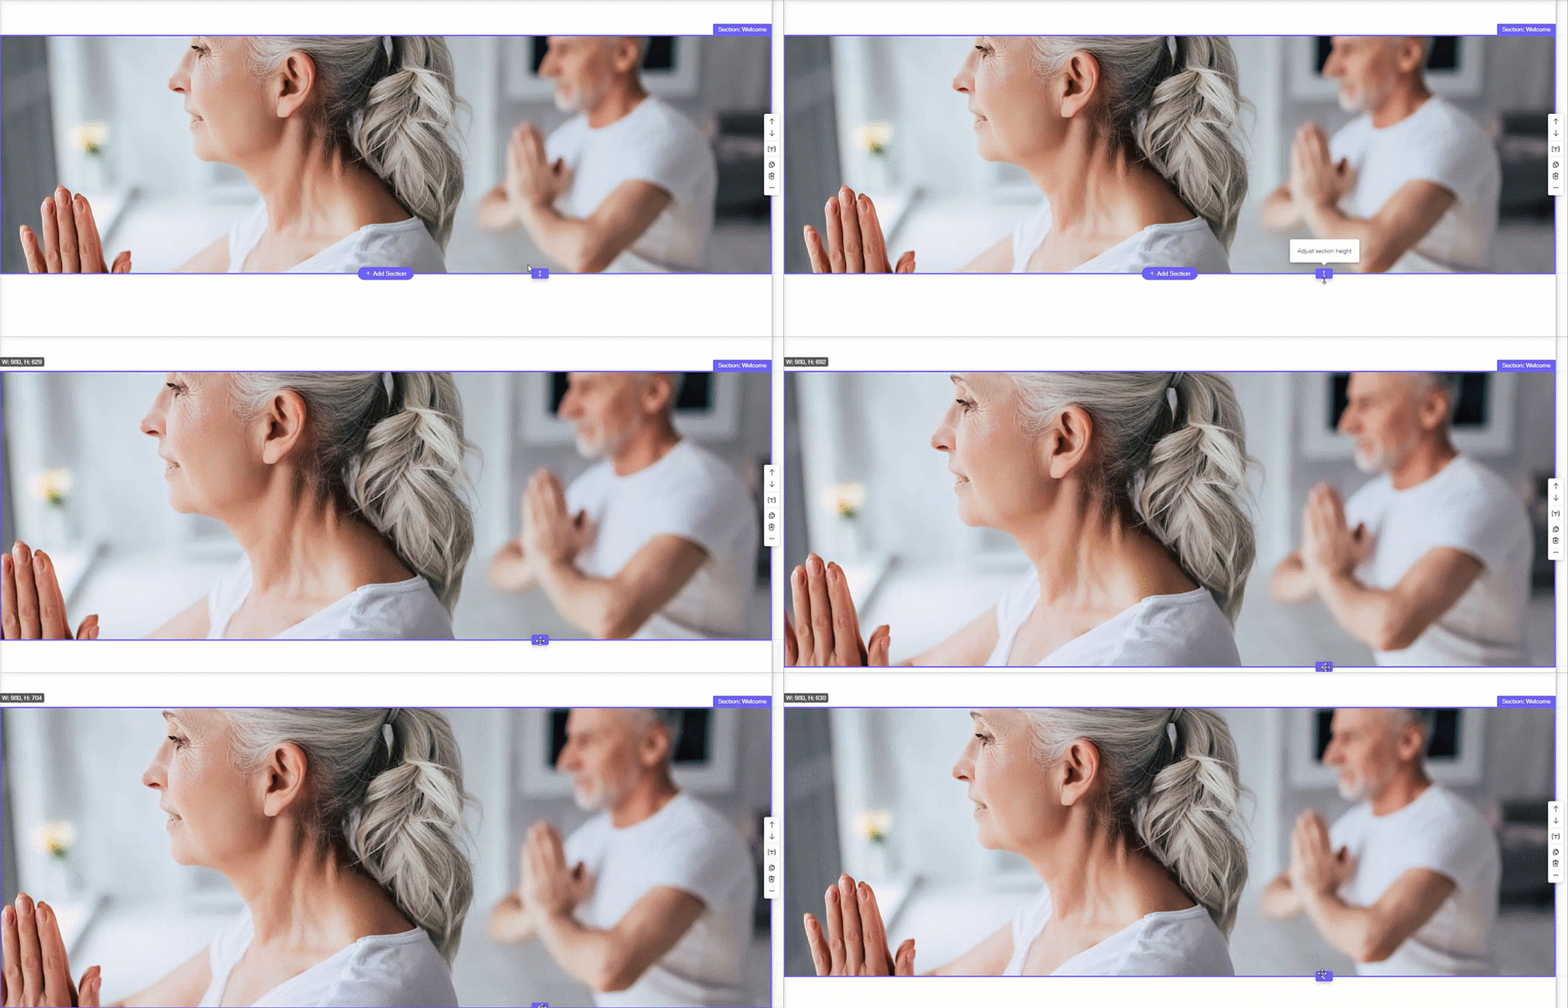
- Click and drag the Adjust section height handle
 at the bottom of the section to make it taller or shorter.

Note:
The smallest size you can make your section is 40px.
Adding a scroll effect to your section
Scroll effects give your sections that extra touch, and create an eye-catching experience on your site. Select an effect that works for your needs, and further personalizes your site and brand.
To add a scroll effect:
- Go to your editor.
- Right-click the section.
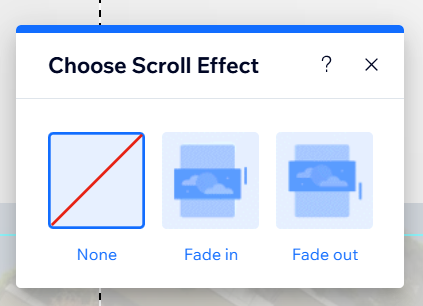
- Click Background Scroll Effects.
- Select an effect from the options.

Adding a shape divider
Shape dividers are graphic shapes you can use to create eye-catching structure between section content, or sections themselves.
There are a range of design options available from Wix, or upload your own to add a personal touch. You can even apply a shape divider to the top and / or bottom of a section to fit your layout needs.
To add a shape divider:
- Go to your editor.
- Double-click the section.
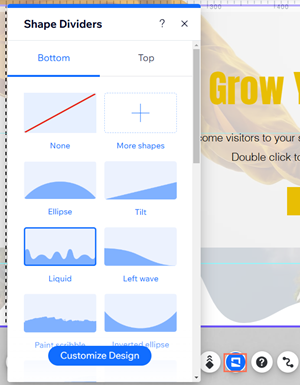
- Click the Shape Dividers icon
.
- Click the Bottom or Top tab to choose where to add the divider.
- Select a divider to add to your section:
- Suggested designs: Click one of the styles available in the panel.
- Additional designs offered by Wix:
- Click + More Shapes.
- (In the Media Manager) Select a design from the Media from Wix tab.
- Click Choose Files to apply it to your section.
- Your own shape divider:
- Click + More Shapes.
- (In the Media Manager) Select the shape you want to use from the Site Files tab, or upload a new one.
- Click Choose Files to apply it to your section.

Want to know more?
You can customize a shape divider's design to complement your section's look and theme.


