Wix Editor: Attaching Elements to Strips and Columns
2 min
In this article
- Attaching elements to a strip
- Attaching elements to a column
Strips are an excellent way to build a site. You can divide them by into sections by adding columns, and attach any element to them including images, text, videos and galleries.
Tips:
- When attaching elements to a strip or column, the layers of the editor may cause them to be hidden behind the strip / column. To view and select hidden elements, right-click the area and use the Overlapping Items feature.
- You might need to move your strip or column backward, and your elements forward for them to attach to the strip / column.
Attaching elements to a strip
Once you have added elements to your strip, they become attached to it and you can move the strip around with the elements.
Before you begin:
Make sure the element fits within the strip (resize it if needed).
To attach elements to strip:
- Click and drag the element over the strip.
- Drop the element when you see Attach to Strip.
Note: Make sure to attach elements within the vertical gridlines of the strip so they display on smaller screens.

Tip:
To detach an element from a strip, click and drag the element completely out of the strip. If you want to delete a strip without deleting the elements inside, drag them outside of the strip before deleting it.
Attaching elements to a column
Splitting a strip into columns allows you to apply different designs and show different content in each column. Once you've added columns to your strip, you can attach elements to the columns.
Before you begin:
Make sure the element fits within the column (resize it if needed).
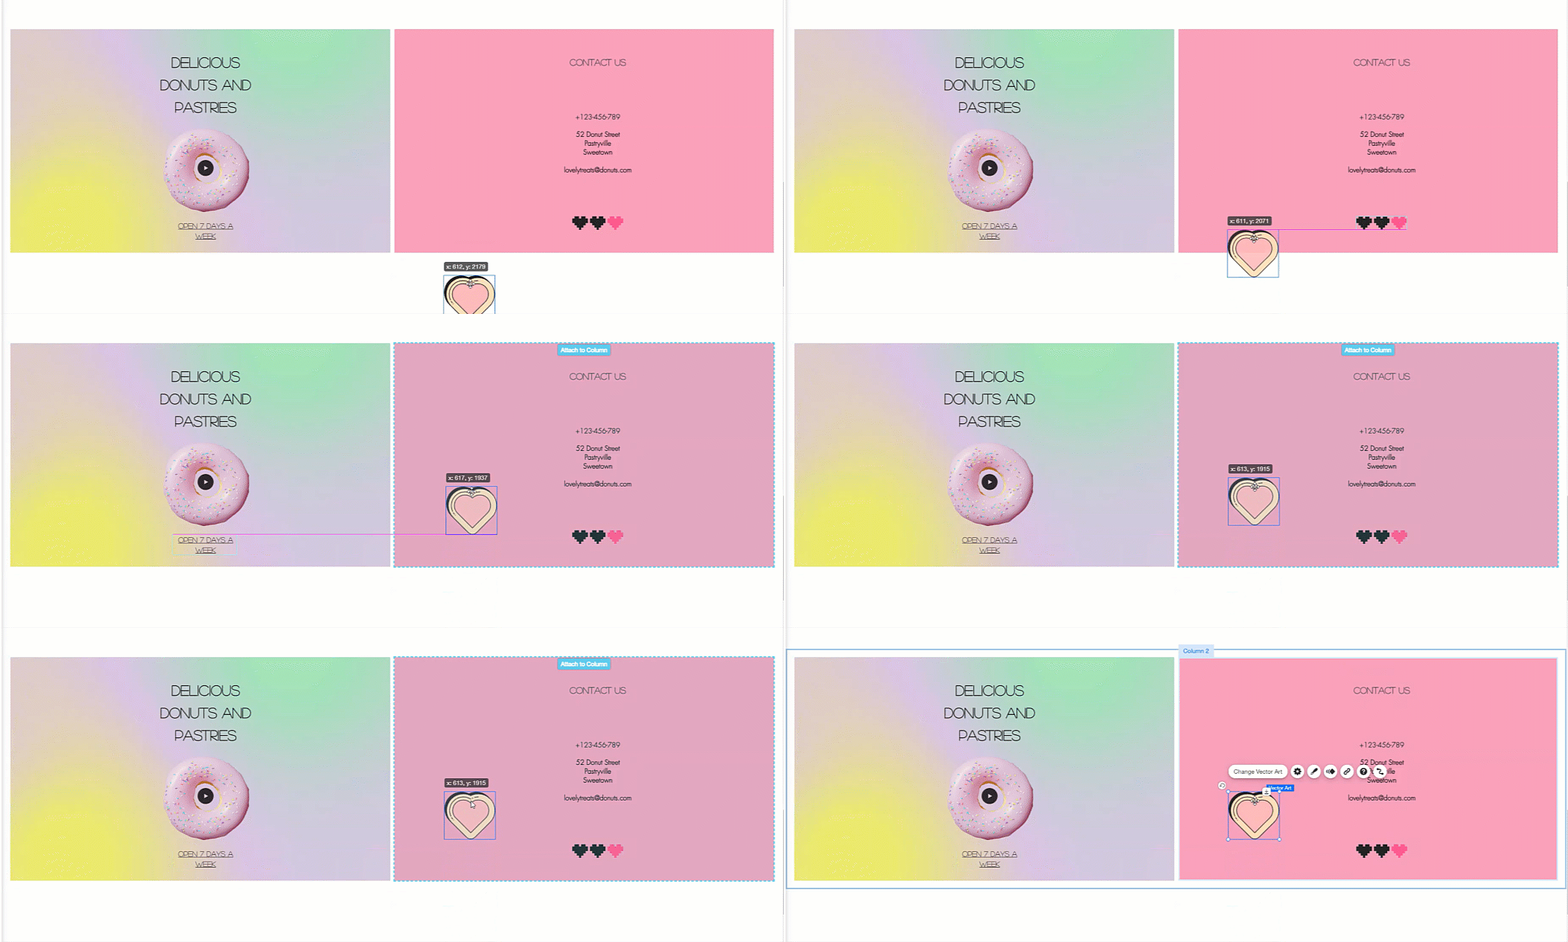
To attach elements to a column:
- Split a strip into columns.
- Click and drag the element over the column.
- Drop the element when you see Attach to Column.

Tip:
To detach an element from a column, click and drag the element completely out of the column. If you want to delete a column without deleting the elements inside, drag them outside of the strip before deleting it.


