

Wix Bookings: Setting Up a Waiver with the Intake Forms App
11 min
In this article
- Step 1 | Create an intake form
- Step 2 | Add your intake form to your booking policy
- FAQs
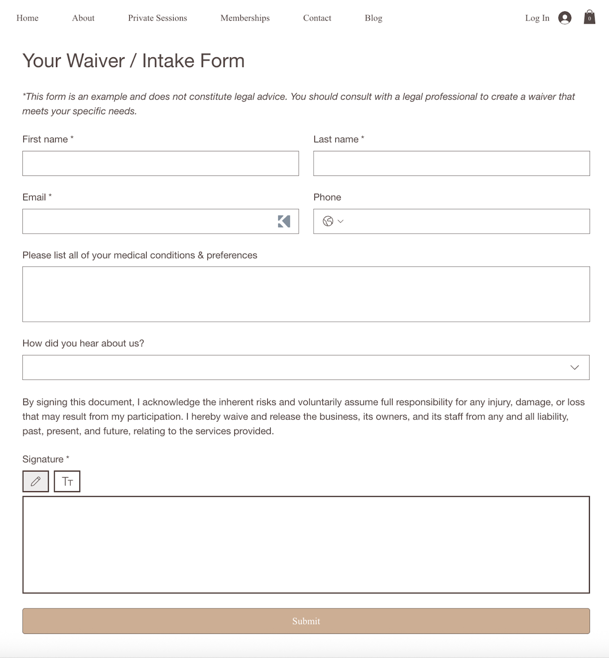
Collect key information and protect your business by adding an intake form to your site with the Intake Forms app. Intake forms, such as health waivers, help confirm that clients are fit to participate and understand any risks involved. Clients can review and sign your form online before their session, so you have everything you need to keep everyone safe and informed.
Important:
- You can download the Intake Forms app on any site. To get a shareable form link, you’ll need a Business or Business Elite Premium plan if you use the Wix Editor, or a Plus or Elite Studio plan if you use the Studio Editor. Learn more about upgrading your site.
- By using the Intake Forms app, you acknowledge that Wix is not responsible for any damages or losses arising from its use. You are solely responsible for verifying the app’s accuracy before use. Take the time to understand how the app works, including how waivers are assigned and tracked, and always manually check submissions before serving clients to prevent missing or incorrect forms.
Step 1 | Create an intake form
Create an intake form directly from your site's dashboard. You can customize the form to gather specific information that you need by adding a variety of field types.
To create an intake form:
- (First time only) Add the Intake Forms app to your site:
- Go to the Intake Forms app in the Wix App Market and click Add to Site.
- Click Get Started.
- Go to Manage Apps in your site's dashboard and click Open Dashboard next to Intake Forms.
- Click + Create New Form.
- Customize your form:
- Edit the form title: Click the title at the top of the form, enter a new name (e.g. 'Health Waiver Agreement') and click the checkmark to save.
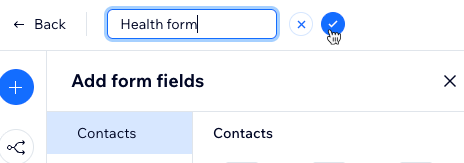
- Add form fields: Click the Add icon
 on the left. You can choose which fields are required to make sure you collect the key information you need. Select the type of field you want to add:
- Contacts: Add fields for client details like address or birthday.
Note: The 'First Name' and 'Email' fields are always included and can’t be removed. - General: Collect open-ended information with short/long answers, numbers, digital signatures, file uploads, or star ratings.
- Choices: Offer clear selections with checkboxes, single or multi-choice options, tag pickers, dropdown menus, and date/time pickers.
- Layout elements: Use layout elements like header and text to organize your waiver or intake form. For example, you can create a simple waiver with just your legal text and an approval checkbox or signature. Add more headers and text fields if you need to collect extra details from clients.
Tip: The form is flexible, so you can keep it straightforward or make it as detailed as needed.
- Contacts: Add fields for client details like address or birthday.
- (Optional) Add conditional rules: Click the Rules icon
 on the left to show or hide fields based on client responses:
- Click + Add Rule.
Note: To enable rules, your form must have a minimum of 2 fields. - Set up your rules:
- If: Select the field and condition (e.g. is empty, is filled).
- (Optional) Click + Add Condition to add more conditions.
- Choose And (all conditions must be met) or Or (any condition must be met).
- Then: Select the field(s) and the action (e.g. shown, hidden, required, optional).
Tip: You can apply the same result to multiple fields by selecting more than one field.
- If: Select the field and condition (e.g. is empty, is filled).
- (Optional) Click + Add Rule to add another rule.
- Click Save Rule.
- Click + Add Rule.
- Edit the form title: Click the title at the top of the form, enter a new name (e.g. 'Health Waiver Agreement') and click the checkmark to save.
- Click Save.
Step 2 | Add your intake form to your booking policy
Once you finish creating your intake form, you can add it to your booking policy.
Important:
If you edited these automations before October 8th, 2025 you need to revert them to default to include the waiver link.
To revert to default:
- Go to Automations in your site's dashboard.
- Click the App automations tab.
- Click the More Actions icon
 next to your edited automation and select Duplicate.
 - Click the More Actions icon
 next to the original automation and select Revert to default.
 - Copy your custom changes from the duplicate back into the original automation.
- Delete or disable the duplicate.
To add your intake form to your booking policy:
- Go to Booking Policies in your site's dashboard.
- Click an existing policy or + Add a New Policy to create a new one.
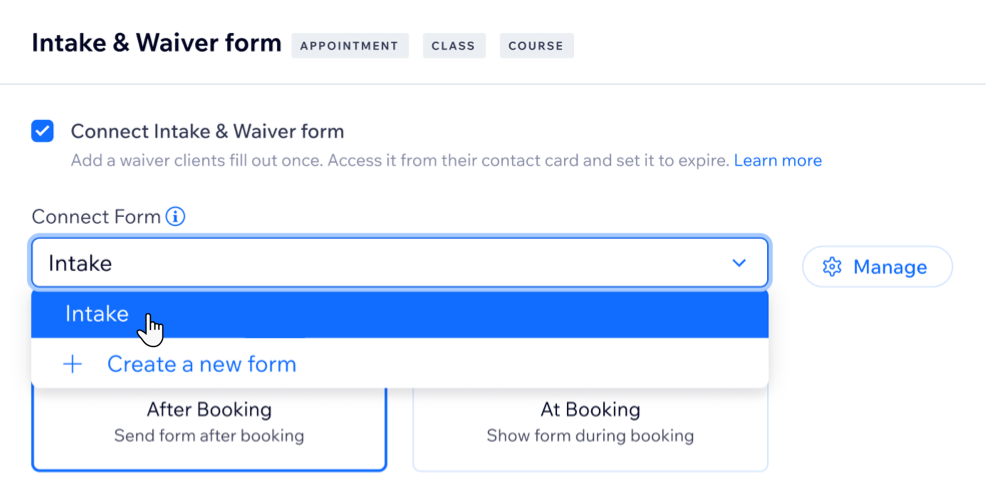
- Scroll down to Intake & waiver Form and click the checkbox to add an intake form for clients to fill out.
- Click the Connect form drop-down and select the intake form you want to add.
Tip: Click Manage Forms if you need to edit any existing intake forms.
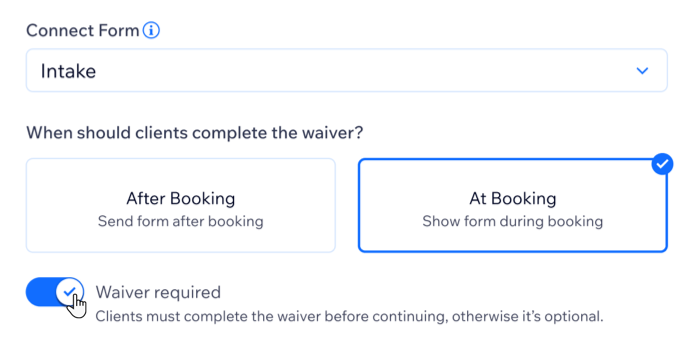
- Select when clients should fill out the form:
- After Booking: Share the link to the intake form manually with the client.
- At Booking: The waiver appears as part of your booking flow.
Note: Enable the Waiver required toggle if clients must fill out and submit the intake form in order to successfully make the booking.
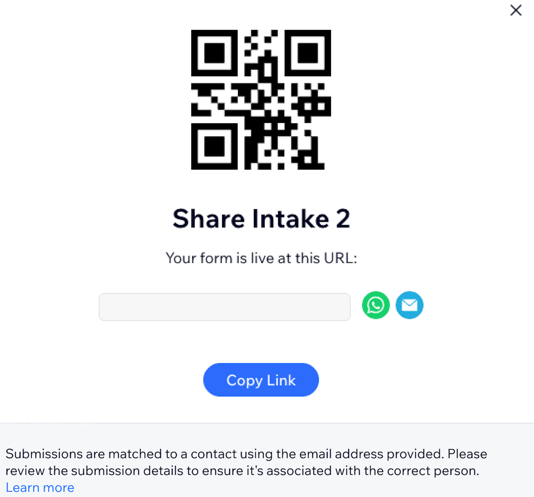
Sharing your form:
- Go to Manage Apps in your site's dashboard and click Open Dashboard next to Intake Forms.
- Hover over the relevant waiver and click Share.
- Use the relevant sharing option to send your form to clients: QR code, URL, WhatsApp, email, etc.
FAQs
Click a question to learn more about intake forms.
How do I see my form submissions?
 next to the relevant form.
Do clients need to fill out the form every time they book?
Why am I seeing “No valid submission” for my client’s form if they already filled one out?
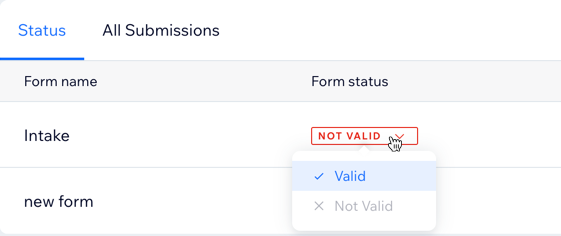
Can I change the status of a form submission?
Can clients fill out a form for a group booking?
Can I view and manage form submissions from my phone?
 at the bottom.
Does my intake form display when making a booking in my member apps or in the Wix App?
Will Wix continue to support the existing bookings waiver feature?
When do clients receive the waiver?
Can I archive or delete a form?
