

Wix Apps: Adding and Setting Up the Wix Intake Forms App
7 min
In this article
- Step 1 | Add the Wix Intake Forms app to your site
- Step 2 | Create an intake form
- Step 3 | Share your intake form
- FAQs
The Wix Intake Forms app helps you collect important information from your clients before their visit. Create digital forms, for example, waivers or questionnaires and decide whether clients fill them out once or on a regular basis. This makes onboarding faster, keeps your business protected, and helps you give every client a safer, more personal experience.
Anyone can download the Intake Forms app, however, the form link is only available with Business and Business Elite Premium plans for Wix Editor users, or Plus and Elite Studio plans for Studio Editor users. Learn more about upgrading your site.
Ways you can use the Intake Forms app:
Step 1 | Add the Wix Intake Forms app to your site
Disclaimer:
By using the Intake Forms app, you acknowledge that Wix is not responsible for any damages or losses arising from its use. You are solely responsible for verifying the app’s accuracy before use. Take the time to understand how the app works, including how waivers are assigned and tracked, and always manually check submissions before serving clients to prevent missing or incorrect forms.
Start by adding the Wix Intake Forms app to your site from the Wix App Market. Once installed, you can begin creating digital waivers, intake forms, or health questionnaires for your clients.
Dashboard
Wix Editor
Studio Editor
- Go to Wix Intake Forms in the Wix App Market.
- Click Add to Site.
- Click Get Started.

Step 2 | Create an intake form
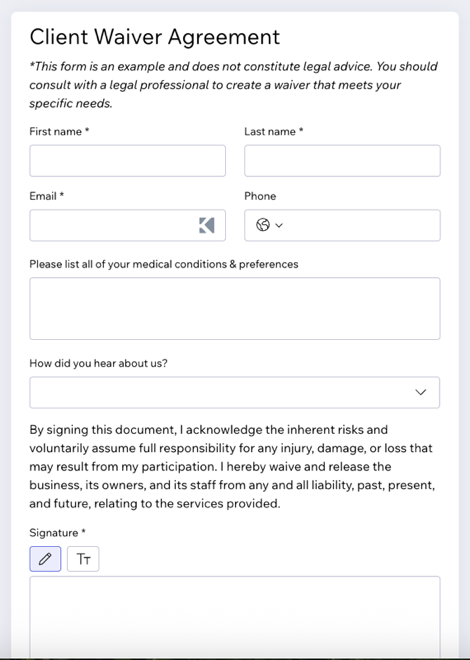
Build a custom intake form by adding the fields that matter most to your business and clients. There are 4 sections of the form to consider: Contacts, General, Choices, and Layout elements.
Each one helps you collect and display the right information, so your forms are clear and professional from the very first submission.
To create an intake form:
- Click + Create New Form.
- Choose how to edit the form:
- Edit the form title: Click the form title at the top of the form, enter a new name (e.g. 'Client Waiver Agreement') and click the checkmark to save.
- Add form fields: Click the Add icon
 on the left. Click the type of field you want to add:
- Contacts: Add fields for client details like phone number or birthday.
Note: The first name and email fields are always included and can’t be removed. - General: Collect open-ended information with short/long answers, numbers, digital signatures, file uploads, or star ratings.
- Choices: Offer clear selections with checkboxes, single- or multi-select options, tag pickers, drop-downs, and date/time pickers for precise, structured responses.
- Layout elements: Use layout elements like header and text to organize your waiver or intake form. For example, you can create a simple waiver with just your legal text and an approval checkbox or signature or add more headers and text fields if you need to collect extra details from clients.
Note: The form is flexible, so you can keep it straightforward or make it as detailed as you need.
- Contacts: Add fields for client details like phone number or birthday.
- Add conditional rules: Click the Rules icon
 on the left to add conditional rules:
- Click + Add Rule. Note: To enable Rules, your form must have a minimum of 2 fields.
- Set up your rules:
- If: Select the field and condition (e.g. is empty, is filled).
- (Optional) Click + Add Condition to add more conditions.
- Choose And (all conditions must be met) or Or (any condition must be met).
- Then: Select the field(s) and the action (e.g. shown, hidden, required, optional).
Tip: You can apply the same result to multiple fields by selecting more than one.
- If: Select the field and condition (e.g. is empty, is filled).
- (Optional) Click + Add Rule to add another rule.
- Click Save Rule.
- Click Save.
Required fields:
Click the relevant field and click Settings. Enable the Required field toggle to make sure you collect the information you need from your visitors.
Step 3 | Share your intake form
Share your intake form with clients or team members using a shareable link, social media, or a QR code.
To share your intake form:
- Hover over the relevant intake form.
- Click Share.
- Choose how you want to share your link:
- Share on social media: Click the relevant social media platform icon to share via WhatsApp or email.
- Copy the form link: Click Copy Link, then paste your link wherever you want to share it.
- QR code: Share the QR code.
FAQs
Click a question below to learn more about the intake forms app.
How can I view my form submissions?
 next to the relevant form.
How do I keep track if my clients have filled out intake forms?
Can I have more than one intake form for my business?
Can I set an expiration date for my form?
Will Wix continue to support the existing Health waiver form?
