Wix Bookings: Sending Payment Requests to Clients Using Automations
2 min
Send payment requests (invoices) to clients when they complete a specific action on your site, using automations.
You can also choose to send invoices automatically when a session starts or ends. If clients book multiple sessions at once, they receive one invoice for the entire order.
Show me different ways I can use automated payment requests
Tip:
You can also automatically generate an invoice for every fully paid order, by following these steps.
To send payment requests to clients using Automations:
- Go to Automations in your site's dashboard.
- Click + Create Automation.
- Click + Start from Scratch.
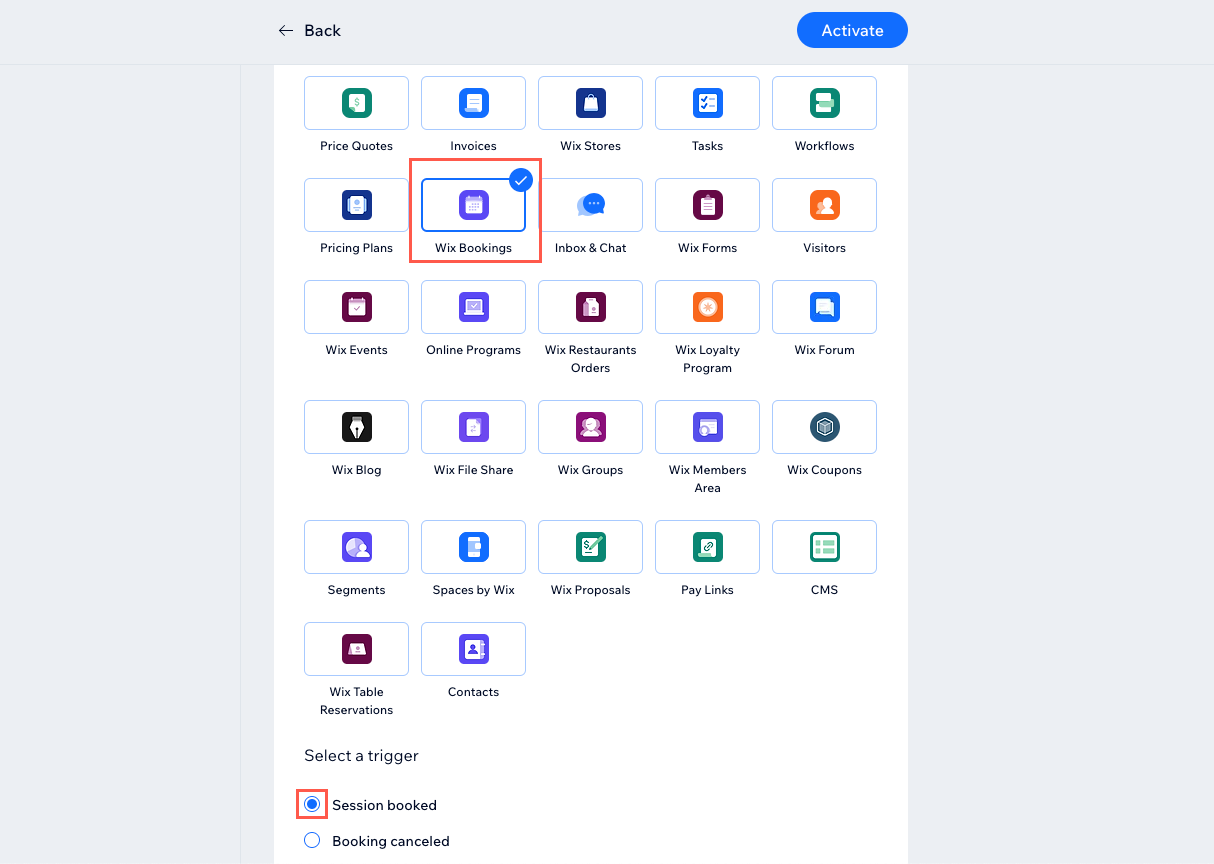
- Click Wix Bookings in the Trigger section.
- Click to select the relevant trigger. Below are some examples:
- Session booked: Choose this option if you want to send your invoice immediately after a client makes a booking. This is useful for services where clients don't have to pay the entire fee up front.
- Session starts/ends: This is useful for classes, as you can send an invoice to all participants separately using the automation.
- Click the Select which services trigger this automation drop-down and select the relevant option: Any or Specific.
Note: If you select Specific services, click the Select a service drop-down, select the relevant services and click Apply. - Choose the relevant option from the Limit frequency to drop-down. This can help prevent you from overloading your clients with emails if they book multiple sessions in a 24 hour period, for example.
- Select Request payment under Action 1.
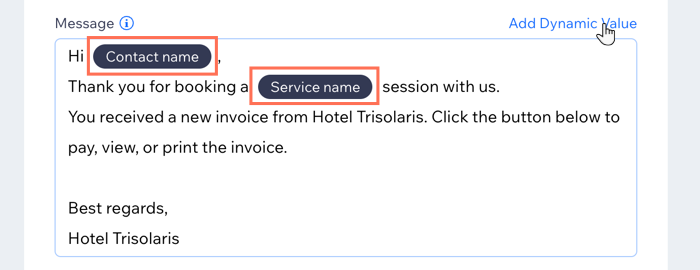
- Click to edit the text of the invoice Email subject and Message.
- (Optional) Add dynamic values to personalize the message with details such as the Contact name, Service name, or Service start/end date:
- Highlight the text you want to replace with dynamic values.
- Click Add Dynamic Value.
- Click the Variable name drop-down and choose the value you want to be inserted.
- (Optional) Click the Fallback value field and enter the text you want to insert if the dynamic value is not known.
- Click Add.
- Click Activate.